Crochet Daisy Rug

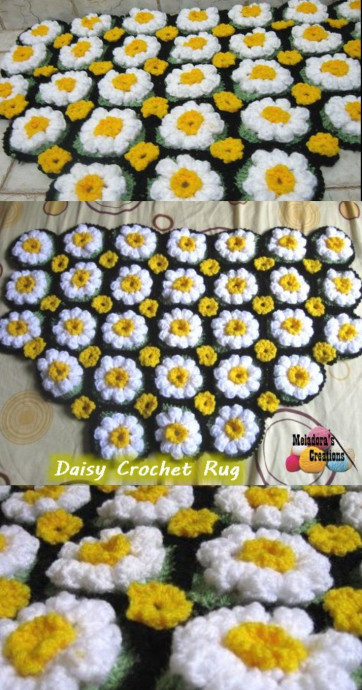
The Crochet Daisy Rug: A Whimsical Addition to Your Home
The Crochet Daisy Rug is an adorable and charming addition to any room in your home! This handmade rug adds a touch of whimsy and warmth to your space, making it feel cozy and inviting. The cute daisy design brings a cheerful and playful vibe that is sure to put a smile on your face every time you see it. Not only is this rug delightful to look at, but it is also wonderfully soft underfoot, creating a plush and comfortable surface to walk on. Whether you place it in a nursery, bedroom, or living room, the Crochet Daisy Rug will definitely brighten up your day and bring a lovely touch of handmade charm to your home decor.
Materials Needed
For this project you’ll need:
HOOK: 5 mm hook or size H hook for the US
YARN: I used worsted weight yarn, 4 ply US, 10 ply AU
Each skein was – 100 grams / 3.5 oz or 210 meters / 230 yards
SIZE: The finished rug will be 15.74 inches from top to bottom and 25 inches wide.
Another yarn brand with color options
You will need 2 skeins to make the main color of the flower, and 1 skein or less of each of the other 3 colors.
You will also need a tapestry needle to sew the pieces together.
Tapestry Needle
Abbreviations
ch = Chain
sl st = Slip Stitch
st = Stitch
sk = Skip
dec = Decrease
beg = Beginning
FPDC = Front Post Double Crochet
SC = Single Crochet
DC = Double Crochet
TRC = Triple Crochet
SCFS = Single Crochet foundation stitch
Front & Back post Single Crochet
Sc dec = Single Crochet decrease
DC dec = Double Crochet decrease
* = Repeat what’s in between * for the rest of round.
You will need to do 29 of the large motifs and 22 small motifs.
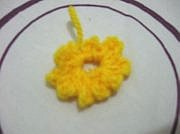
Making the Large Motif
Ch 4 and sl st in the beginning ch to form a ring, *(ch 3 and sl st into ring.)* repeat this 9 more times until you have 10 small petals. Ch 1 and cut yarn leaving a tail to be worked in with a tapestry needle.
Now change to the color you want for your petals and working in the back sts, attach your new color to one of the back sts.
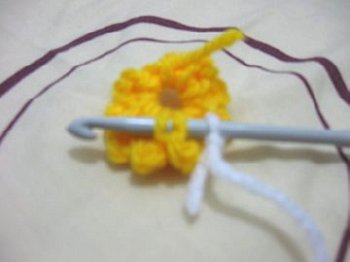
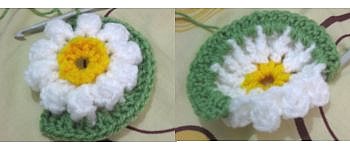
*(Ch 3 and sl st into next back st)* continue that around until you have 10 small white petals. At the end of the row, you want to sl st into the nearest petal to your left, turn your work to face the front and ch3, dc 4 more, then turn your work to the back and sl st into the top of the beginning ch 3 to create the popcorn stitch. Ch 2.
Dc 5 into the next small petal to the left, then turn your work and sl st into the top of the first popcorn. Ch 2.
Repeat making a popcorn and ch 2 until you have 10 popcorn stitches. Sl st into the top hole of the beginning popcorn stitch. Ch 1 and cut yarn, long enough to work in with a tapestry needle.
Attach your green yarn into one of the ch 2 spaces that are in between the popcorn stitches and dc 2, then dc 2 into the loop created at the top of the popcorn stitch when you made it. (top space of the popcorn) continue to dc 2 around for a total of 40 dc’s. Sl st into the top of the beginning dc and ch 1, cut yarn.
Attach the black yarn into any stitch and ch 1, then working to the right sc backward, which is called a crab stitch.
Continue that all the way around and leave yourself a tail to sew your flowers together; cut yarn.
Making the Small Motif
It’s worked like the first two rows of the Large Motif. With your yellow yarn, create the beginning flower again, working the first two rows. (only the second row instead of white, use black.)
Change to black and do ch 3 sl st into the back of the next stitch. Like you did before. Fasten off yarn.
Now to sew the rug together. To make sure the rug stays on the front side, you want to sew using the back stitches.
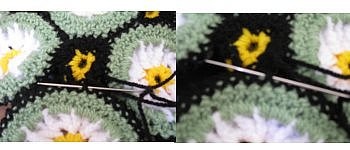
Sew through back loops only.
Each of the top three rows will be 7 large motifs and 6 small motifs.
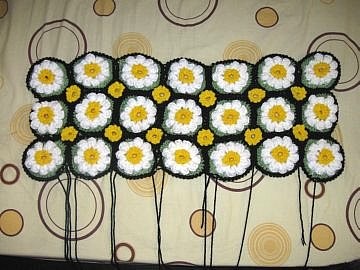
On the fourth row, you will also be using 6 small motifs, but only 5 large motifs. On the fifth row, you will be using 4 small motifs and 3 large motifs as shown in the picture at the top of this page.
Finish sewing in all your tails and you're done! Enjoy!
- Funny Pictures
-
 Hilarious Memes for Those Bored to Tears
-
 Weekly Treat of Funniest Parenting Memes for Good Laugh out Loud Right Now
-
 Really Funny Pics to End These Weekend Perfectly
- Recipes
-
 Crispy Baked Avocado Fries
-
 Scrambled Chickpea and Spinach Pitas
-
 Cinnamon Pancakes
- Lifehacks
-
 Crochet Basics: Aligned Cobble Stitch
-
 Brick Stitch Crochet Tutorial
-
 Crochet Basics: Wattle Stitch
- Crochet Ideas
-
 Crochet Snorlax Plushie Doll
-
 Crochet Beautiful Penguin Toy
-
 Crochet Tiny Snowman
- DIY
-
 DIY Santa Craft For Kids
-
 Paper Plate Angel Craft
-
 Upcycled Mason Jar Chicken Vase
- Knitting Ideas
-
 Knitted Bridger Cowl
-
 Knitted Keepsake Bag
-
 Knitted Cutie Cupcake Dolls