Crochet Vintage Rings Hot Pad
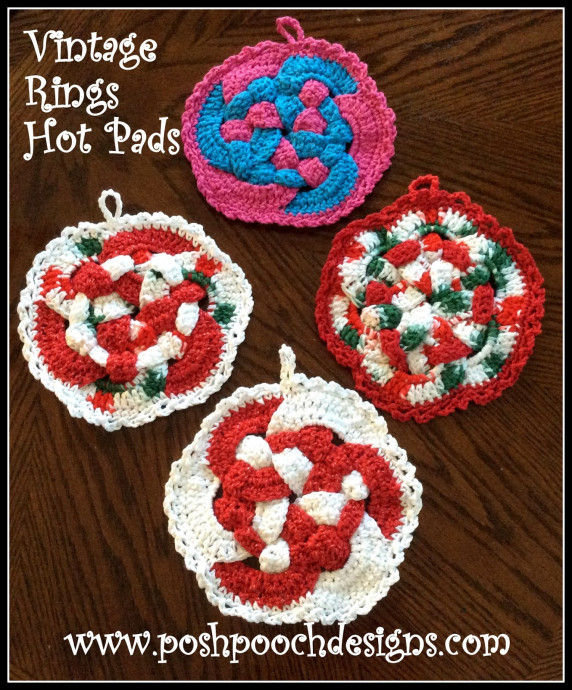
Looking for a fun and unique addition to your kitchen accessories? Look no further than the Crochet Vintage Rings Hot Pad! This charming piece combines functionality with vintage style for a delightful touch to your cooking routine. Crafted with care and attention to detail, these hot pads not only protect your surfaces but also add a pop of retro flair to your home. Whether you're an avid cook or simply love decorative accents with a nostalgic feel, the Crochet Vintage Rings Hot Pad is sure to make you smile every time you use it.
Skill Level
Easy
Materials
- Crochet Hook - H / 5.00MM
- Yarn - Cotton Yarn – 4 oz. Sugar and Cream
- Yarn needle
Stitches Used
- Chain (ch)
- Slip Stitch (slst)
- Single Crochet (sc)
- Double Crochet (dc)
- Skip (sk)
Size
8.5 inches across
Notes
- Ch1 does not count as a st
- Ch3 counts as a dc
- Rings: You will need to make 6 rings.
Instructions for Rings
RND 1: Ch 20, join in a circle, place 26 sc around the circle, join to 1st sc, ch 3.
(26 dc)
RND 2: 1 dc in the same st as the ch3, *1 dc in the next sc, 2 dc in the next dc*.
Repeat from * to * around, join to top of ch3, tie off and weave in your ends.
(39 dc)

Strap Instructions
Ch 50, 1 dc in the 4th ch from the hook and in each ch across.
Tie off leaving a 12 inch tail. (48 dc)
Assembly Instructions
Lay out the rings, overlapping each ring on the next ring.
Lace the strap through the rings. It is easier to lace them through when the rings are flat, then form the circle.
Sew the ends of the strap together.
You will need to smooth out the rings and adjust the strap so it lays nicely.
Trim Instructions
Attach yarn to the 1st ring as shown in the picture,
1 sc in the next 10 sts,
Stitch the next 2 stitches going through this, and the next ring,
*1 sc in the next 10 sts, 1 sc in the next 2 sts, stitching through this and the next ring*
Repeat from * to * 4 more times. Join to the 1st sc.
You will need to do a little adjusting of the rings as you go.
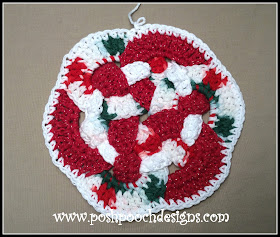
Finishing Touches
*Ch3, sk next 2 sts, slst in the next st*
Repeat from * to * around the edge of the potholder, join to 1st slst.
Hanger Instructions
Ch 12, slst in the last sl, tie off and weave in your ends.


