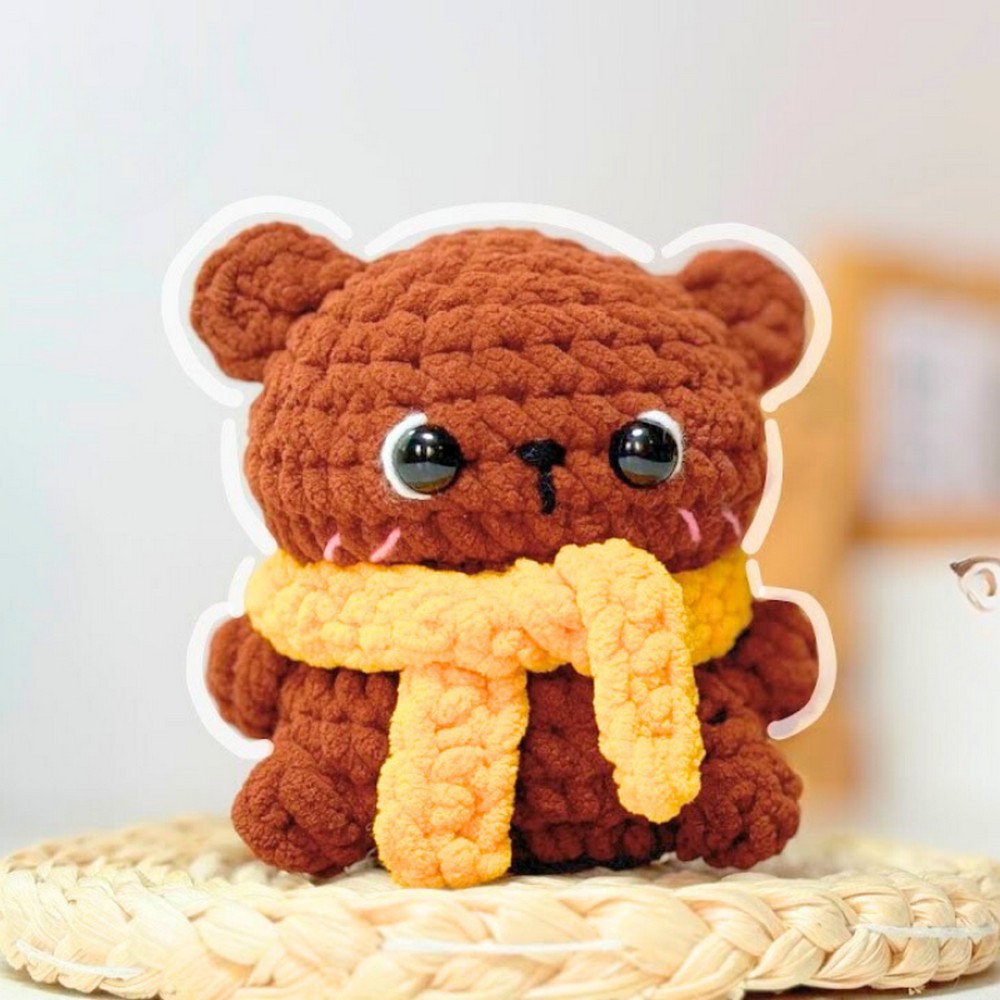
How to Crochet a Teddy Bear: A Comprehensive Guide


Crochet teddy bears are just the cutest little companions you can create with your own two hands! With their cozy yarn fur and adorable button eyes, these handmade bears are perfect for snuggles and as heartfelt gifts for your loved ones. Whether you're a seasoned crocheter or just diving into this cozy craft, crafting a crochet teddy bear can bring you joy and relaxation with every stitch. So, grab your yarn and hook, and let's crochet some cuddly cuties together!
Materials and Preparation
To create your adorable crochet teddy bear, gather the following materials:
Yarn: Brown Chanel yarn for the bear's body and pink yarn for blush accents.
Hook Size: 5 mm crochet hook.
Eyes: 10 mm plastic safety eyes.
Stuffing: Polyfill or similar stuffing material.
Needle: Yarn needle for sewing and embroidery details.
Optional Tools: Stitch marker for easy tracking, scissors.
Additional Yarn: White cotton yarn for eye highlights, black cotton yarn for the nose embroidery, and yellow yarn for the scarf.
Abbreviations and Notes
Below are the common crochet abbreviations used in this pattern:
SC: Single Crochet
INC: Increase (2 SC in the same stitch)
DEC: Decrease (Invisible decrease, using only the front loops)
Cluster: Four Triple Crochet Cluster
MR: Magic Ring
Important Notes:
Invisible Decrease: Insert hook into the front loops of two stitches and complete as one stitch.
Magic Ring: Used as the starting point for creating circular sections.
Use a stitch marker to track the beginning of each round.
If you’re new to crochet, familiarize yourself with basic techniques (e.g., magic ring, single crochet, and triple crochet).
Gauge, Approximate Size, and Pattern Notes
Gauge: Not critical for this project; use suggested hooks and yarn to match the finished dimensions.
Approximate Size: Finished teddy bear measures approximately 5 inches tall.
Special Techniques: Magic ring, invisible decrease, and front loop-only crochet are used.
Step-by-Step Pattern
Body (Rounds 1-9)
Round 1: Base
Create a magic ring.
Work 8 SC into the ring. Pull the yarn tail to close the ring into a circle.
Round 2: Increase
INC in each stitch around (8 INC total). You should have 16 stitches at the end.
Round 3: Body Expansion
Alternate 1 SC and 1 INC for 8 repetitions (8 INC total). You should now have 24 stitches.
Round 4: Further Expansion
Alternate 2 SC and 1 INC for 8 repetitions (8 INC total). Finish with 32 stitches.
Round 5: Arms and Legs (Clusters)
Create 10 SC.
Make a 4 Triple Crochet Cluster in the next stitch to form an arm.
Work 10 SC, another 4 Triple Crochet Cluster for the second arm, and finish with 10 SC.
Round 6: Regular Stitches
Work 28 SC around in this round.
Round 7: Legs and Hands (Clusters)
Work 8 SC, a 4 Triple Crochet Cluster to form the first leg, 15 SC, another 4 Triple Crochet Cluster for the second leg, and finish with 7 SC.
Round 8: Decrease Round
Alternate 2 SC and 1 DEC for 8 repetitions. You should now have 24 stitches.
Round 9: Final Body Round
Alternate 1 SC and 1 DEC for 8 repetitions. You should now have 16 stitches.
Head (Rounds 10-19)
Round 10: Front Loop Only
Work 1 SC plus 1 INC into the front loops only of each stitch for this round. You should now have 24 stitches.
Round 11: Shaping the Head
Alternate 2 SC and 1 INC for 8 repetitions. Finish with 32 stitches.
Stuff the body using stuffing material before continuing.
Round 12-13: Maintain Shape
Work 32 SC evenly across these rounds to maintain the head's shape.
Round 14: Decrease and Shaping
Alternate 1 SC and 1 DEC for 8 repetitions, working back down to 24 stitches.
Round 15: More Decreases
Work 1 SC, then 1 DEC for 7 repetitions.
Round 16: Final Decrease
Work a final round of 7 DEC to reduce stitches further, ending in a tight finish.
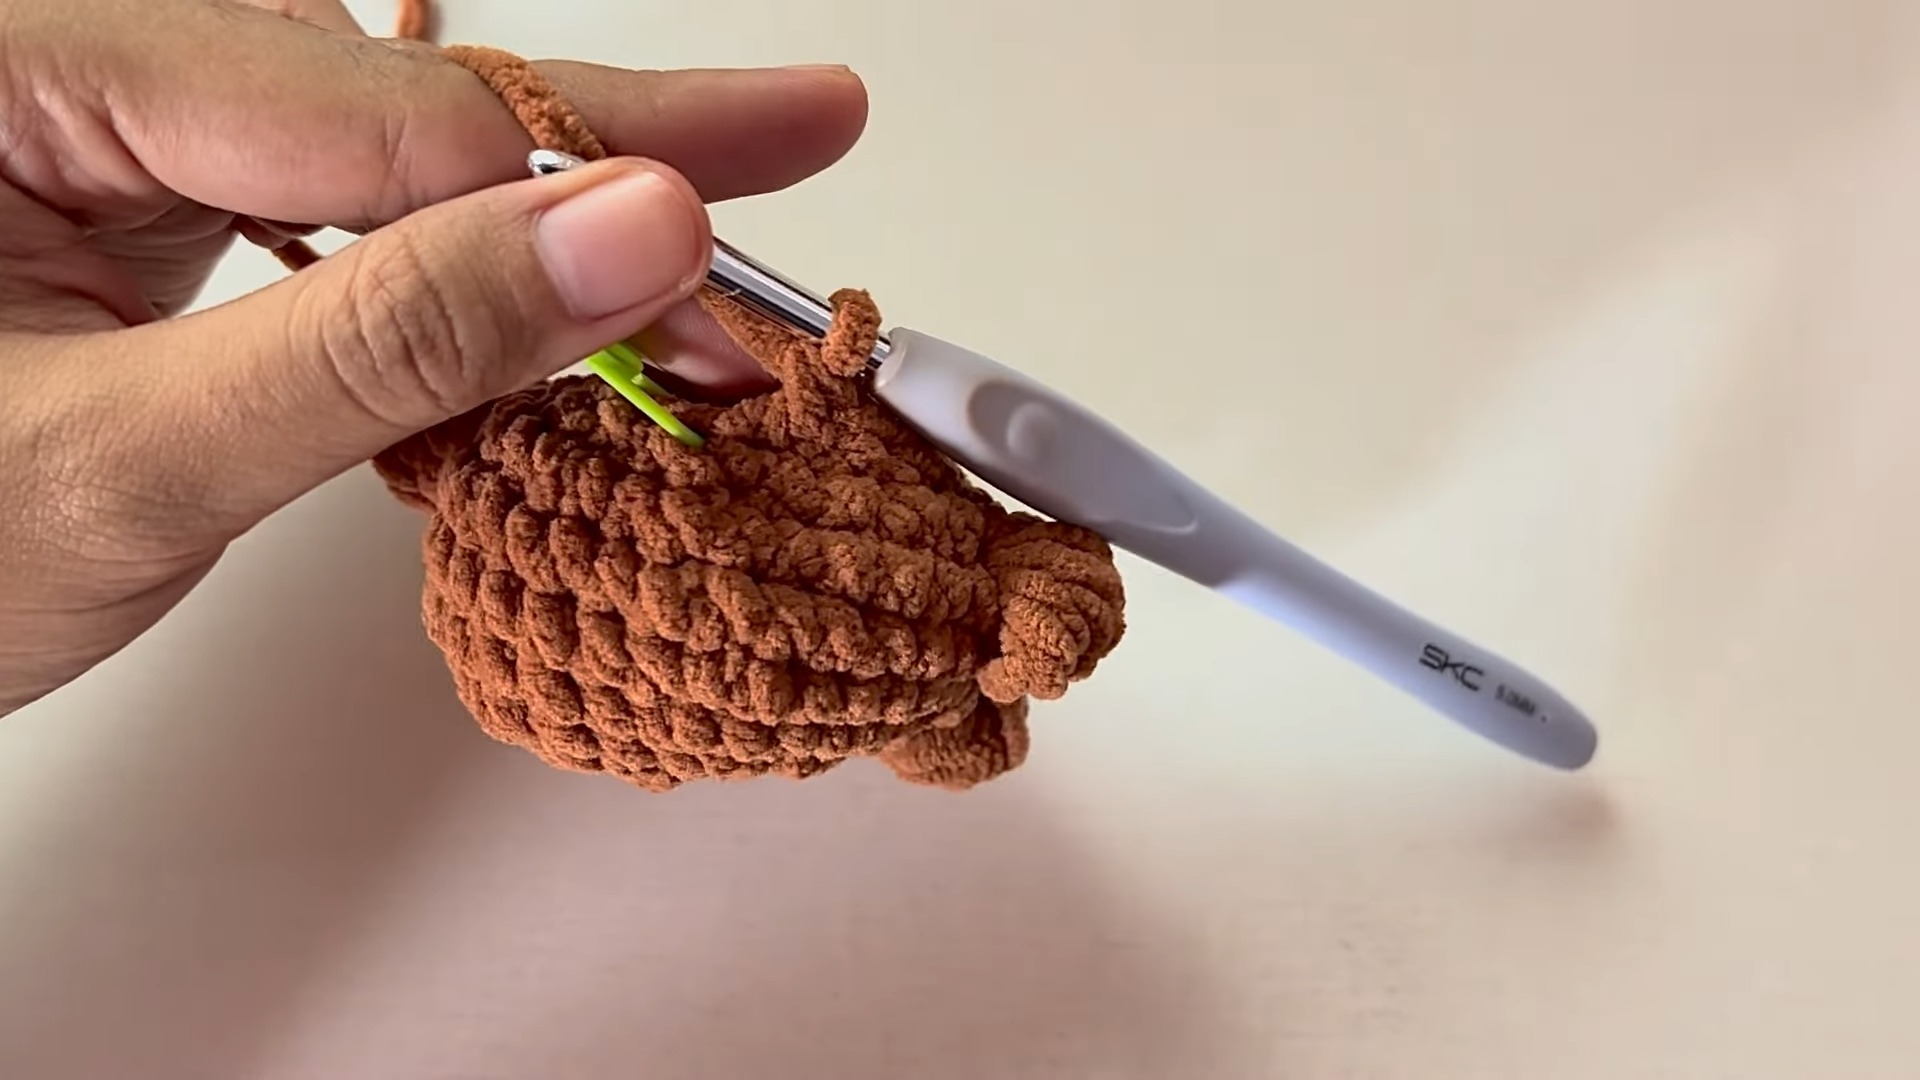
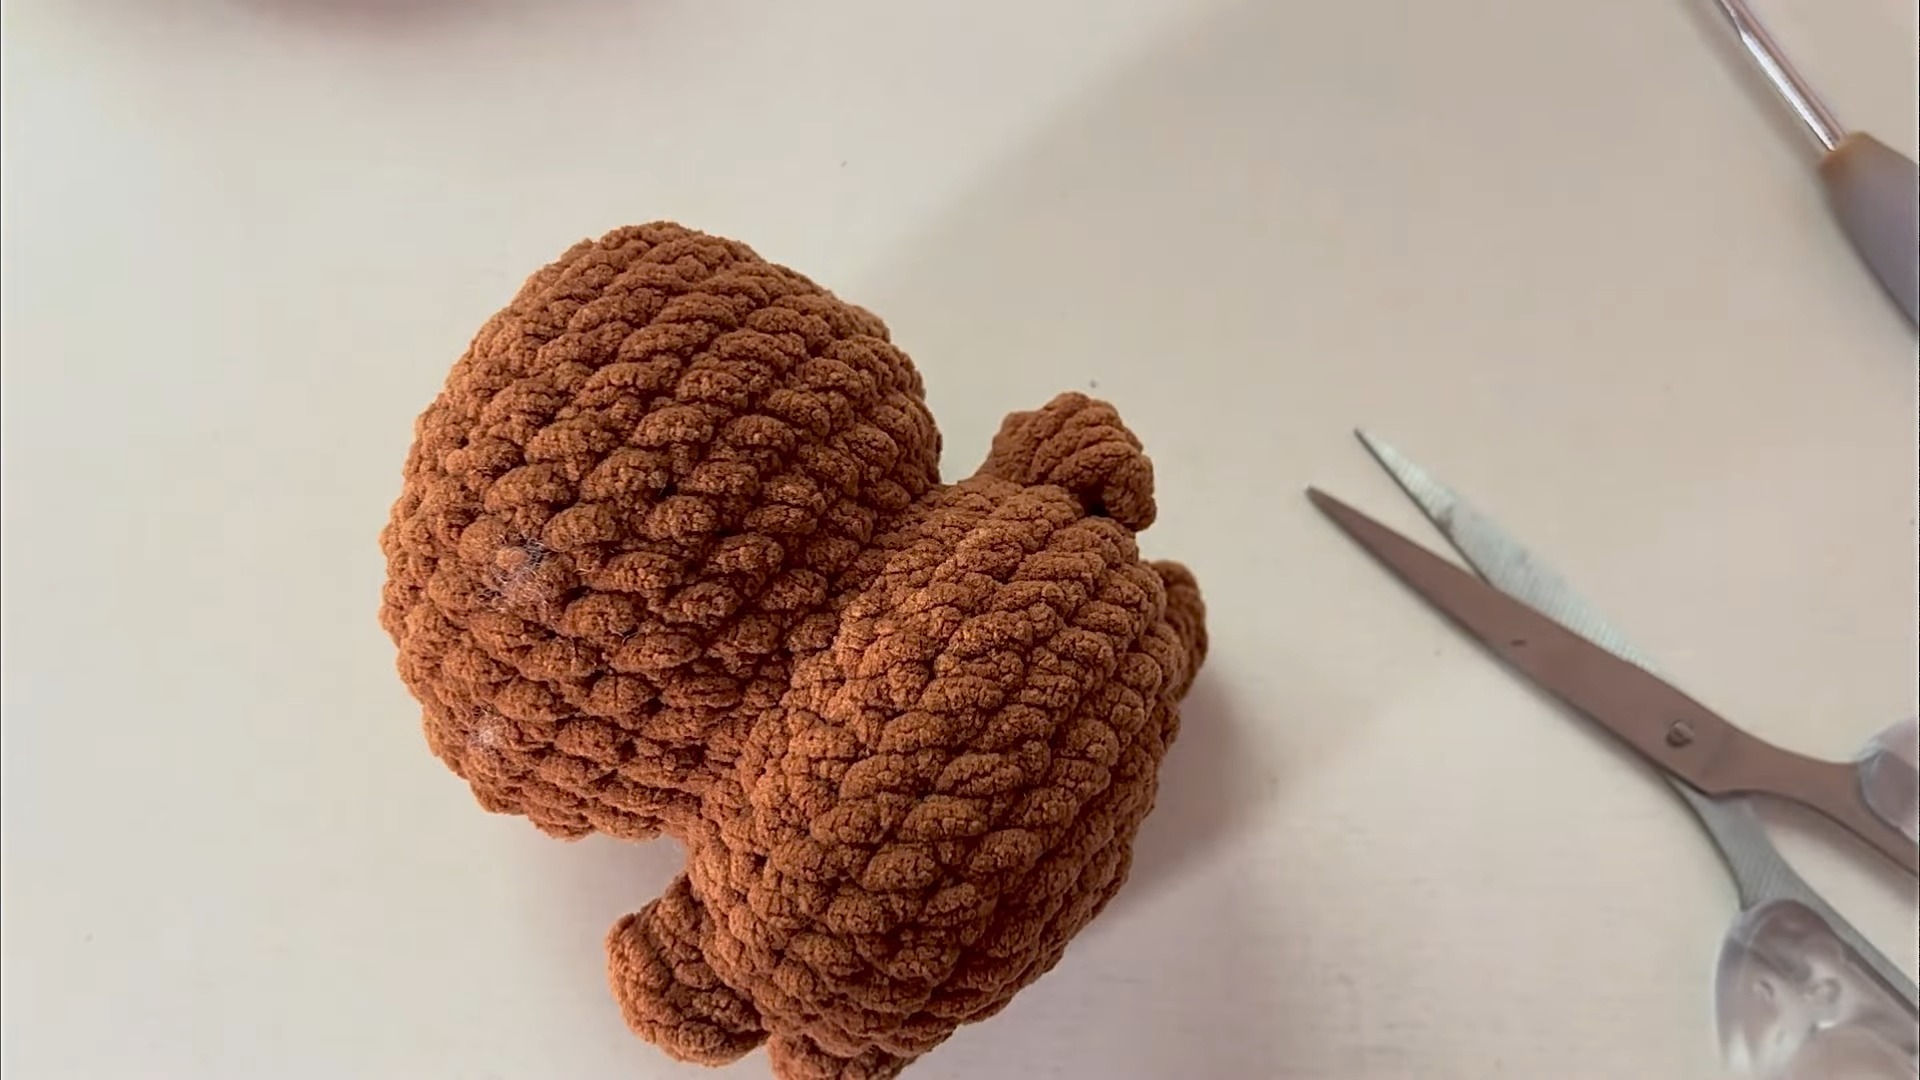
Finish the Head
Use a needle to thread the remaining yarn tail through the outer loops of the final stitches to close the opening neatly.
Facial Embroidery
Eyes
Attach 10 mm plastic safety eyes evenly between rows 13 and 14, spaced 4 stitches apart.
Nose
Using black yarn, embroider a nose between the eyes, centered over two stitches. Add blush accents using the pink yarn for cuteness!
Ears
Ear (Make 2): Begin with a magic ring and work 5 SC into it. Pull the yarn tail to close the ring. Leave a long tail for sewing.
Attach Ears:
Position ears between rows 15, 16, and 17, directly behind the arms. Sew securely using a needle and the tails.
Scarf
Make a slip knot and chain 41 stitches using yellow yarn.
Work 1 SC in each chain for the entire length (40 SC).
Hide yarn tails and wrap the completed scarf around the bear’s neck.
Finishing Touches
Ensure all yarn tails are tucked in neatly. Add any final embellishments, such as buttons on the scarf or additional embroidery, if desired.
- Funny Pictures
-
 Hilarious Memes for Those Bored to Tears
-
 Weekly Treat of Funniest Parenting Memes for Good Laugh out Loud Right Now
-
 Really Funny Pics to End These Weekend Perfectly
- Recipes
-
 Crispy Baked Avocado Fries
-
 Scrambled Chickpea and Spinach Pitas
-
 Cinnamon Pancakes
- Lifehacks
-
 Crochet Basics: Aligned Cobble Stitch
-
 Brick Stitch Crochet Tutorial
-
 Crochet Basics: Wattle Stitch
- Crochet Ideas
-
 Crochet Snorlax Plushie Doll
-
 Crochet Beautiful Penguin Toy
-
 Crochet Tiny Snowman
- DIY
-
 DIY Santa Craft For Kids
-
 Paper Plate Angel Craft
-
 Upcycled Mason Jar Chicken Vase
- Knitting Ideas
-
 Knitted Bridger Cowl
-
 Knitted Keepsake Bag
-
 Knitted Cutie Cupcake Dolls