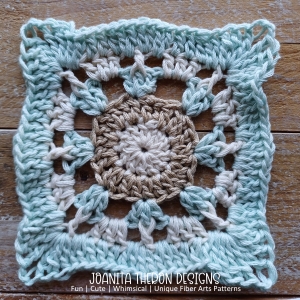
Crochet Afghan Square

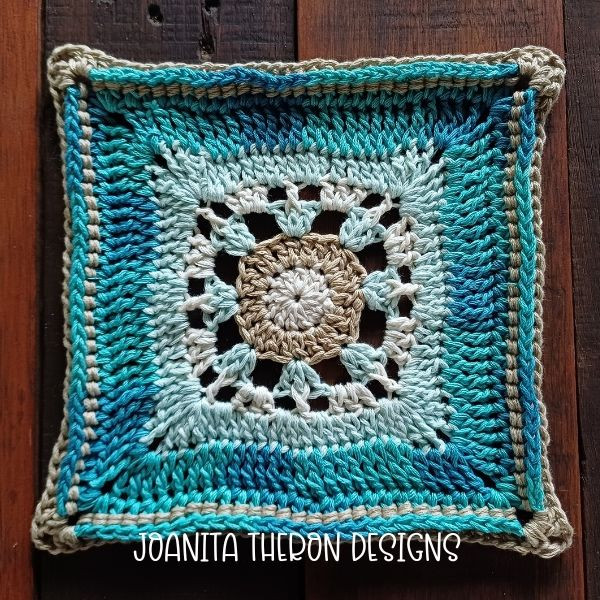
Crochet Afghan Squares: Tiny Works of Art
Crochet Afghan Squares are like tiny works of art that come together to create a cozy and beautiful blanket. Each square is a playground for your creativity, allowing you to experiment with different colors, stitches, and patterns. Whether you're a seasoned crocheter or just starting out, these squares are a fun and relaxing way to unwind and create something special. Plus, they make for fantastic gifts that are sure to be treasured by your loved ones. So grab your yarn and hook, and let's crochet some magic, one square at a time!
Supplies/Materials
- Yarn – Vinnis Colours – DK Nikkim 100% cotton (50 grams/119 meters)
- Weight – DK (11 wpi) 3: Light.
- Hook – 4.00 mm (G) – Clover
- Scissors
- Yarn needle
Abbreviations: US Terminology
- CH – chain
- SL ST – slip stitch
- SC – single crochet (UK – DC)
- HDC – half double crochet (UK – HTR)
- DC – double crochet (UK – TR)
- RS – right side
- WS – wrong side
Gauge
Not necessary for this project to be perfect. However, if you use a different yarn and/or hook, sizing will differ. Using the SAME hook and yarn will ensure your squares are consistent in size.
Pattern Notes
Stitch count is important! For completing the blanket, correct stitch count will ensure a successful joining of squares.
Size
Square – 9 x 9 inches (23 x 23 cm)
Colors
Approx – 104 – 120 yards (95 – 110 m) for complete square
- A – Natural
- B – Cappuccino
- C – Princess Aqua
- D – Princess Lilac
- E – Seychelles
- F – Purple Mix
Instructions
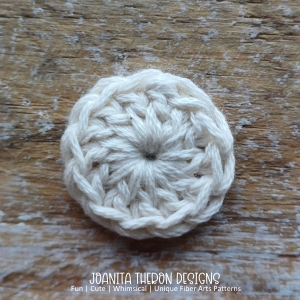
With A – make a magic ring/or CH 4; SL ST into 4th CH from hook to form a ring.
RND 1: CH 2 (this DOES NOT count as a ST); work 12 DC into ring; SL ST into first DC worked. (12 DC) Fasten off and weave in ends.
With B – join into any DC.
RND 2: CH 3 (counts as 1 DC); work 1 DC into SAME DC; work 2 DC into each DC around; SL ST into 3rd of 3 CH. (24 DC) Fasten off and weave in ends.
With C – join into any DC.
RND 3: CH 3 (counts as 1 DC); work 2 DC into SAME DC; CH 3; SKIP next 2 DC. *Work 3 DC into next DC; CH 3; SKIP next 2 DC. ** Repeat from * to ** 6 more times; SL ST into 3rd of 3 CH.
(8 x 3 DC groups; 8 x 3 CH groups) Fasten off and weave in ends.
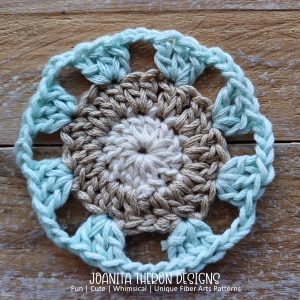
With A – join into any 3 CH space.
RND 4: CH 3 (counts as 1 DC); work 2 DC into SAME space; CH 1; SKIP next DC; work 1 FPDC around next DC; CH 1; SKIP next DC. *Work 3 DC into next 3 CH space; CH 1; SKIP next DC; work 1 FPDC around next DC; CH 1; SKIP next DC. ** Repeat from * to ** 6 more times; SL ST into 3rd of 3 CH.
(8 x 3 DC groups; 8 FPDC; 16 x 1 CH spaces) Fasten off and weave in ends.
With C – join into any FPDC.
RND 5: CH 4 (counts as 1 TR); work [2 TR; CH 2; 3 TR] into same FPDC; work 2 DC into next 1 CH space; work 1 DC into each of next 3 DC; work 2 DC into next 1 CH space; work 2 DC into next FPDC; work 2 DC into next 1 CH space; work 1 DC into each of next 3 DC; work 2 DC into next 1 CH space.
* Work [3 TR; CH 2; 3 TR] into next FPDC; work 2 DC into next 1 CH space; work 1 DC into each of next 3 DC; work 2 DC into next 1 CH space; work 2 DC into next FPDC; work 2 DC into next 1 CH space; work 1 DC into each of next 3 DC; work 2 DC into next 1 CH space. **
Repeat from * to ** 2 more times; SL ST into 4th of 4 CH.
(22 STS on each side; 4 x 2 CH corner spaces) Fasten off and weave in ends.
With E – join into any 2 CH corner space.
RND 6: CH 4 (counts as 1 TR); work [1 TR; 2 CH; 2 TR] into 2 CH corner space; work 1 TR into each of the next 22 STS. *Work [2 TR; 2 CH; 2 TR] into 2 CH corner space; work 1 TR into each of the next 22 STS. ** Repeat from * to ** two more times; SL ST into 4th of 4 CH.
(26 TR on each side = 104 TR)
RND 7: CH 3 (counts as 1 DC); work 1 DC into next TR; work [2 DC; 3 CH; 2 DC] into next 2 CH corner space; work 1 DC into each of next 26 TR.
*Work [2 DC; 3 CH; 2 DC] into next 2 CH corner space; work 1 DC into each of next 26 TR. **
Repeat from * to ** once more; work [2 DC; 3 CH; 2 DC] into next 2 CH corner space; work 1 DC into each TR; SL ST into 3rd of 3 CH.
(30 DC on each side = 120 DC) Fasten off and weave in ends.
With B – join into any 3 CH corner space.
RND 8: CH 3 (counts as 1 DC); work [1 DC; 2 CH; 2 DC] into corner space; work 1 BPDC around each of next 30 DC. *Work [2 DC; 2 CH; 2 DC] into next corner space; work 1 BPDC around each of next 30 DC. ** Repeat from * to ** two more times; SL ST into 3rd of 3 CH.
(30 BPDC; 4 DC on each side) Fasten off and weave in ends.
- Funny Pictures
-
 Hilarious Memes for Those Bored to Tears
-
 Weekly Treat of Funniest Parenting Memes for Good Laugh out Loud Right Now
-
 Really Funny Pics to End These Weekend Perfectly
- Recipes
-
 Crispy Baked Avocado Fries
-
 Scrambled Chickpea and Spinach Pitas
-
 Cinnamon Pancakes
- Lifehacks
-
 Crochet Basics: Aligned Cobble Stitch
-
 Brick Stitch Crochet Tutorial
-
 Crochet Basics: Wattle Stitch
- Crochet Ideas
-
 Crochet Snorlax Plushie Doll
-
 Crochet Beautiful Penguin Toy
-
 Crochet Tiny Snowman
- DIY
-
 DIY Santa Craft For Kids
-
 Paper Plate Angel Craft
-
 Upcycled Mason Jar Chicken Vase
- Knitting Ideas
-
 Knitted Bridger Cowl
-
 Knitted Keepsake Bag
-
 Knitted Cutie Cupcake Dolls