How to Make Crochet Honeycomb Coasters

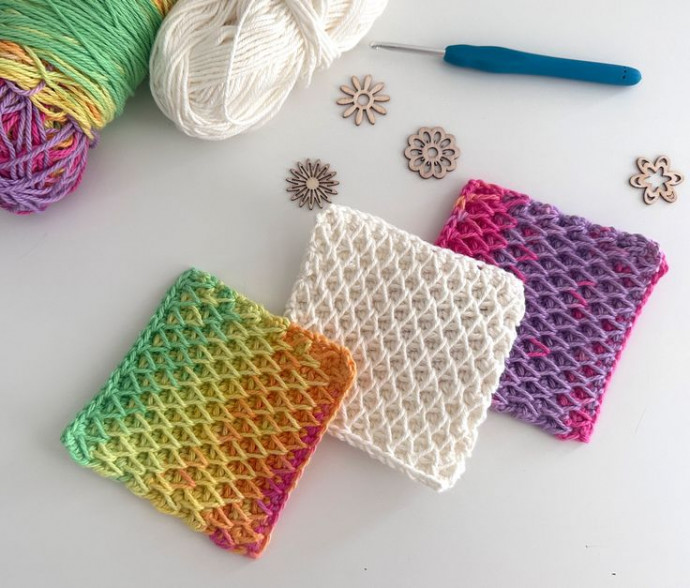
Crochet Honeycomb Coasters are the perfect addition to your cozy home decor! These delightful coasters not only protect your surfaces but also add a touch of handmade charm to your space. The intricate honeycomb stitch pattern gives them a unique texture that will impress your guests and make you smile every time you use them. Why settle for boring coasters when you can have these cute and functional crochet creations? They are a fun and creative way to add a personal touch to your home while keeping your coffee table looking stylish and protected.
Materials
You can use any 100% cotton, light worsted weight yarn #3/DK/8ply yarn. (I used Abbey Road Freedom, colour: Tutti Frutti)
Crochet hook 4mm
Scissors
Yarn needle
Dimensions
4″ x 4″ (10cm x 10cm)
Gauge
9 stitches x 13 rows = 4″ (10cm)
Abbreviations (US Terms)
- Ch = chain
- St = stitch
- SC = single crochet
- Sp St = spike stitch
- SC2tog = single crochet 2 together
Special Stitches
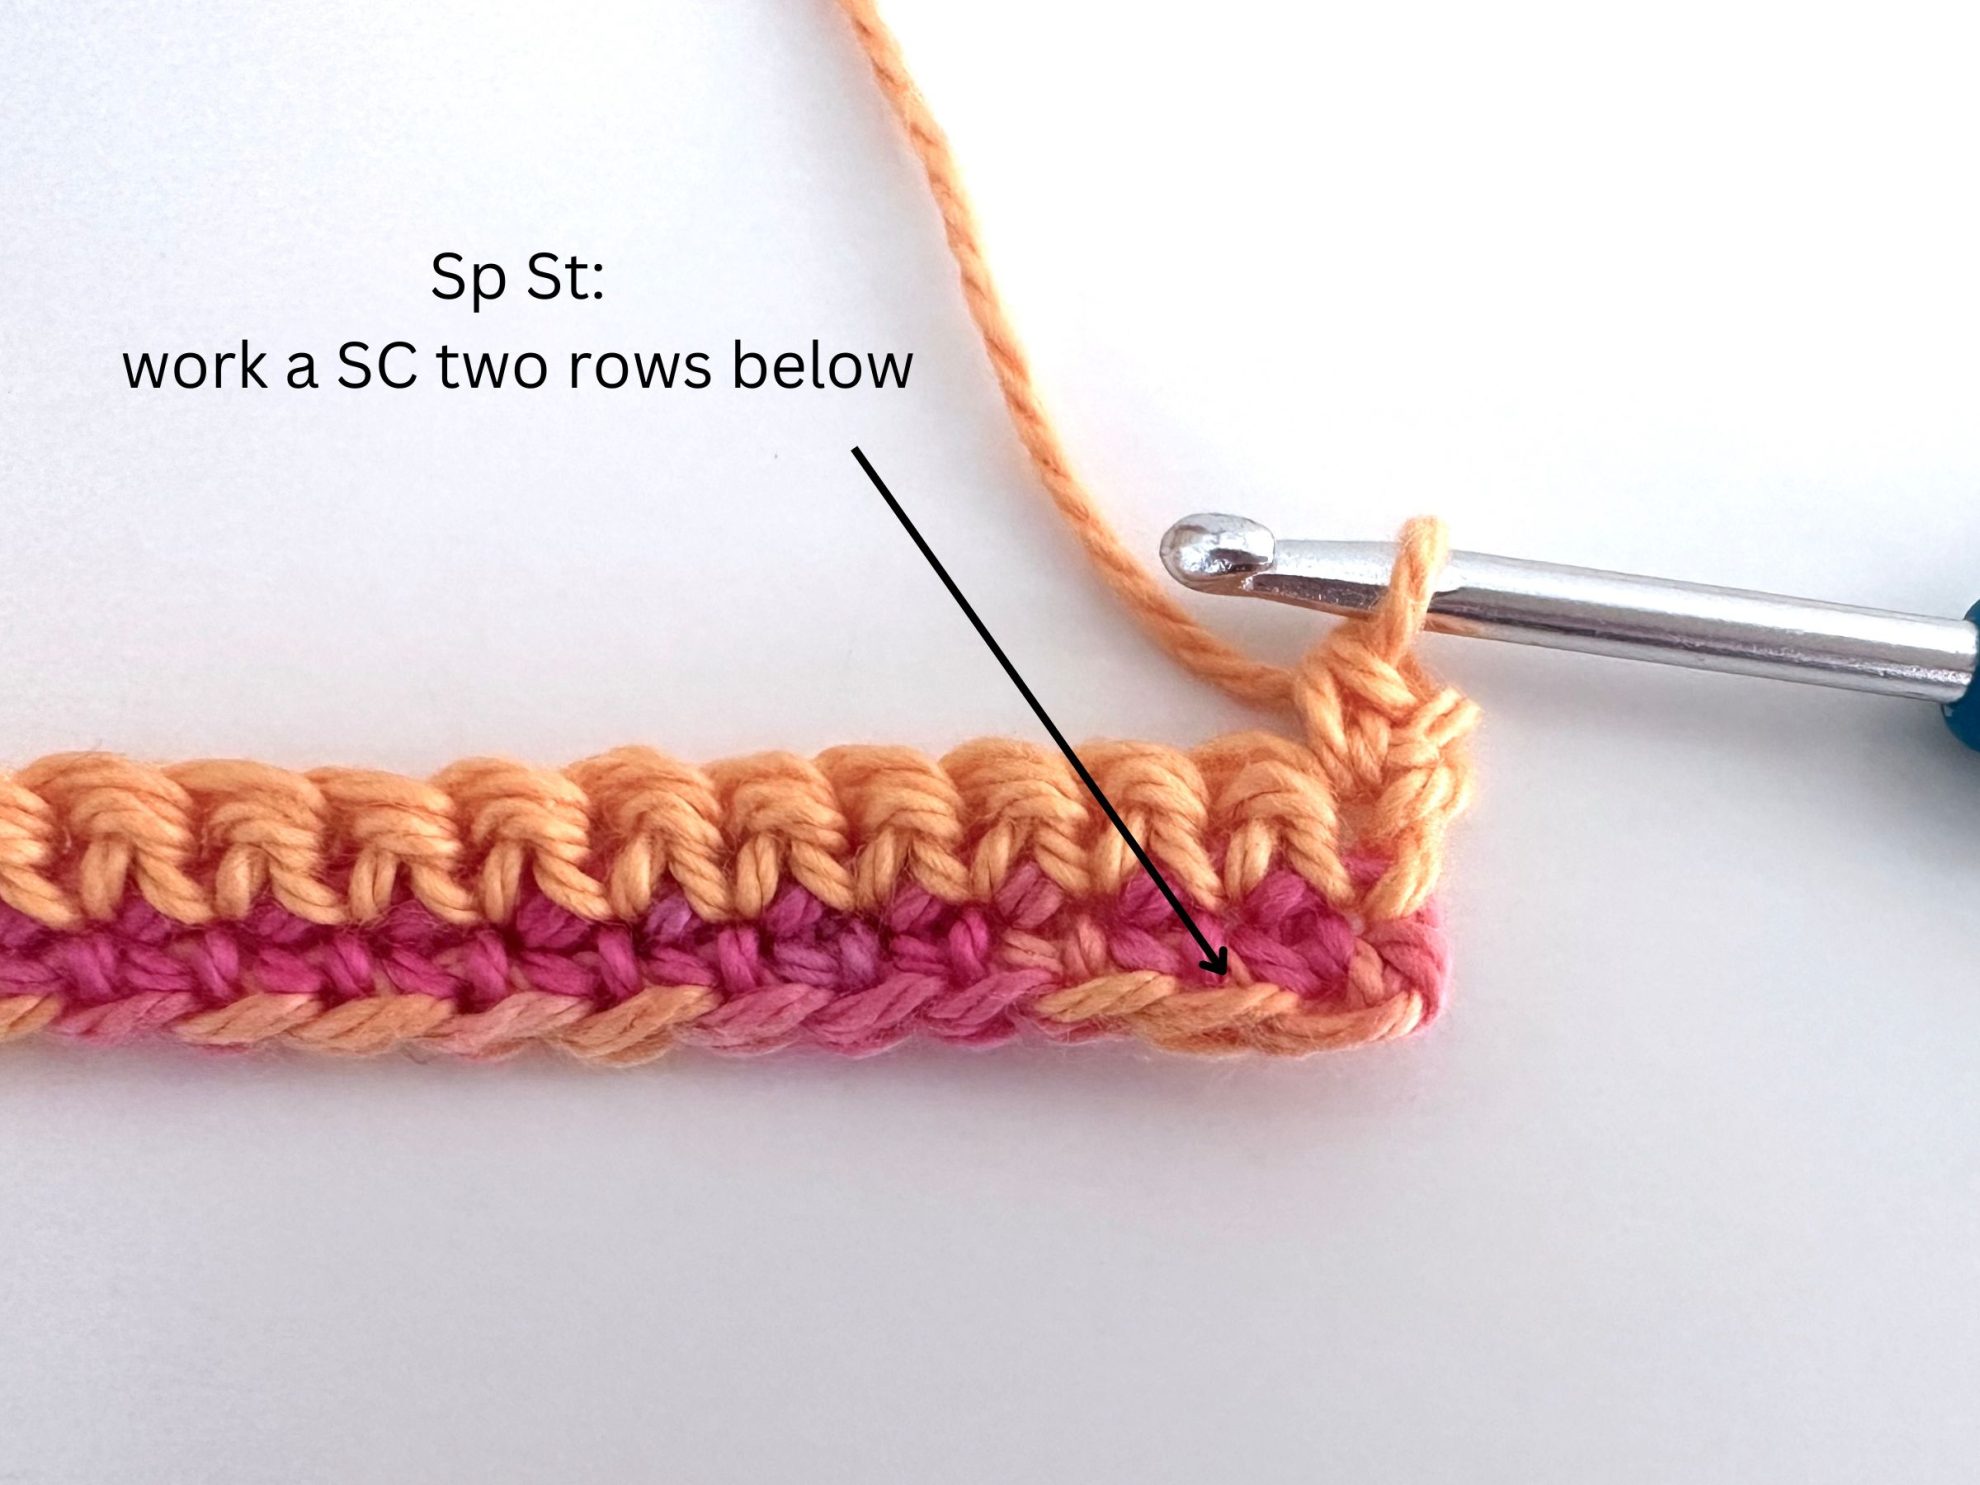
Spike stitch (Sp St): Insert hook into the stitch two rows below the current row and work a single crochet (refer to photos for row 3).
Single crochet two together (in this pattern): Insert hook behind one strand of yarn of the Sp St and around the other strand of the next Sp St, work a single crochet (refer to photos for row 4).
Honeycomb Coasters Pattern Notes
This crochet coaster measures 4 inches wide and 4 inches long. The size can be easily adjusted by chaining more or less for your foundation chain (any even number of chains) and working more or fewer rows.
Ch 1 at the beginning of a row is a turning chain and does not count as a stitch. Count after each row to ensure you haven’t skipped any stitches! You should have the same number of stitches in each row.
Honeycomb Crochet Coasters Written PatternCh 18 or any even number of chains until you reach four inches.
Row 1: SC in second Ch and across the row (17 in every row).
Row 2: Ch 1, turn. SC in first St and across. Ch 1, turn.
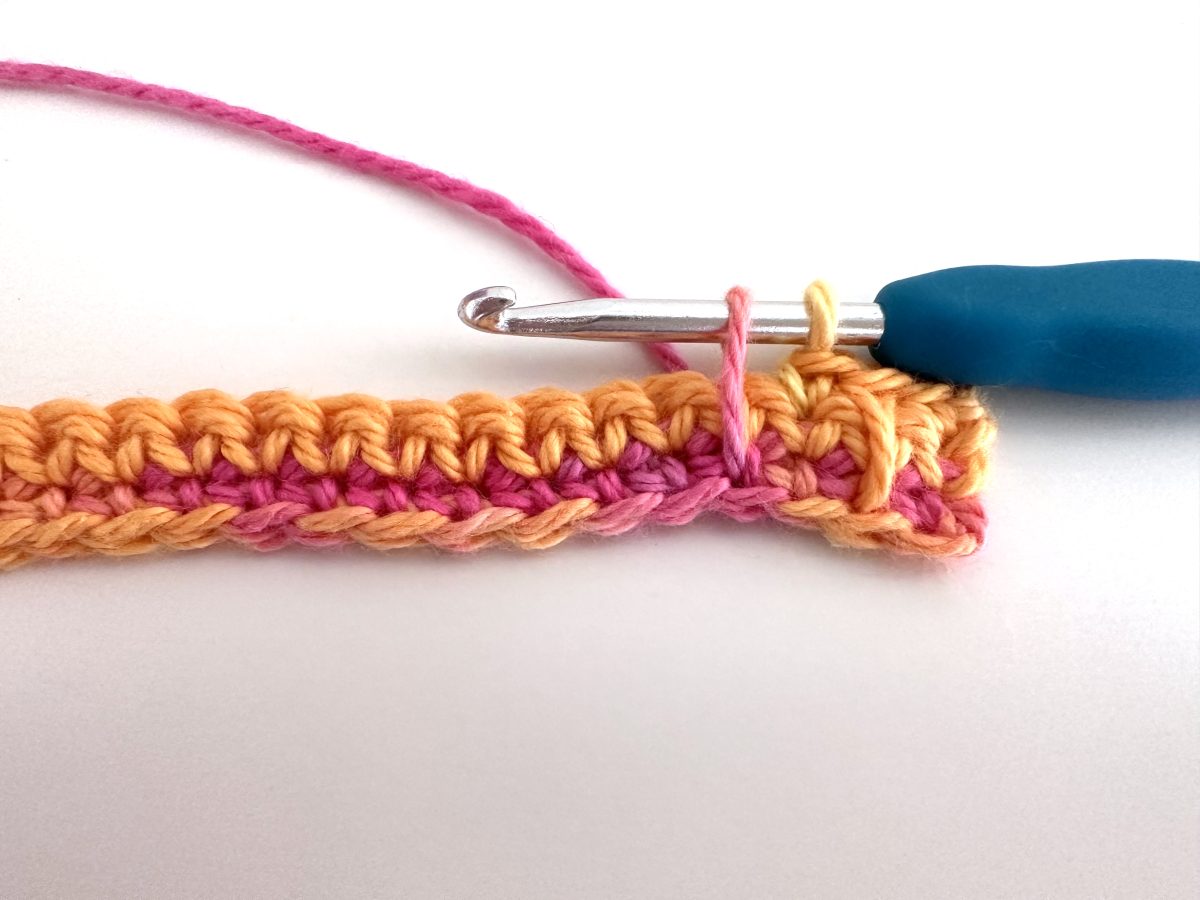
Row 3: SC in first St, Sp St in next (two rows below). Alternate SC and Sp St across the row. Sc in last stitch, Ch 1 and turn.
Row 4: SC in first St, SC in next, SC2tog (see photo below), SC in next St, repeat [SC2tog in next, SC in next] across the row, SC in last St. Ch1 and turn.
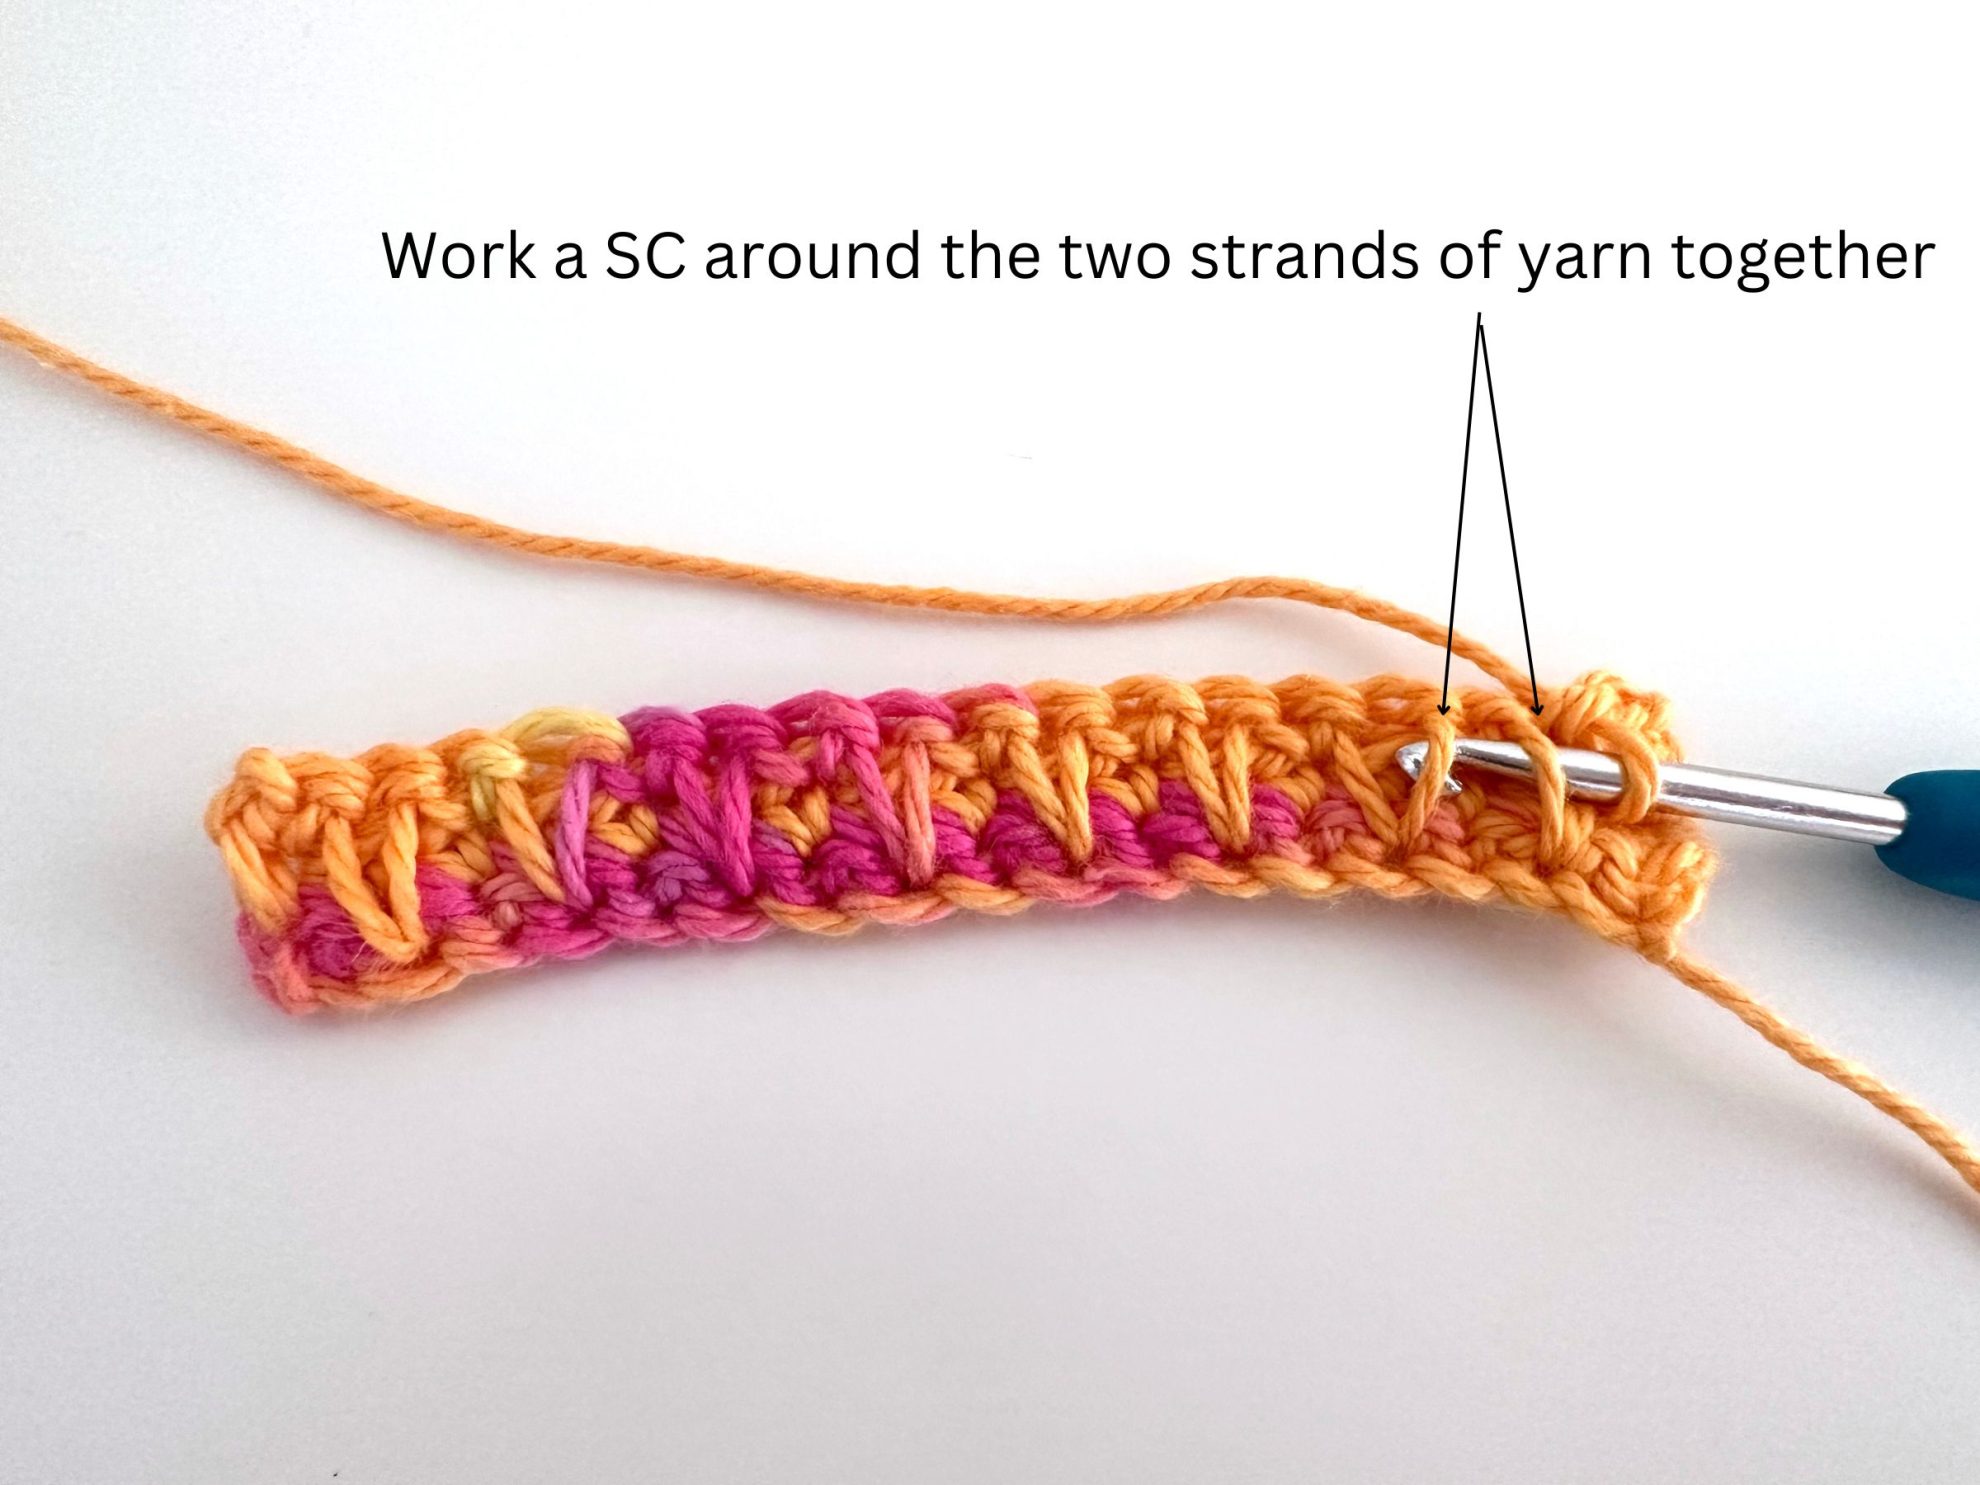

Note: When you look at the spike stitches, they resemble the letter V. You need to connect one leg of one V with another leg of the next V.
Row 5: Sp St in first, SC in next, repeat [Sp St in next, SC in next] across the row. Sp St in last St. Ch 1 and turn.
Row 6: SC in first, repeat [SC2tog in next, SC in next] across the row. SC in last St. Ch 1, turn.
Row 7-26 (or until you have a square coaster): repeat rows 3-6.
The Honeycomb stitch texture isn’t reversible, but the other side is just as pretty. It doesn’t have a raised texture, but it features Spike stitches and is a lovely pattern. Depending on your mood, you can use either side for different textures!
- Funny Pictures
-
 Hilarious Memes for Those Bored to Tears
-
 Weekly Treat of Funniest Parenting Memes for Good Laugh out Loud Right Now
-
 Really Funny Pics to End These Weekend Perfectly
- Recipes
-
 Crispy Baked Avocado Fries
-
 Scrambled Chickpea and Spinach Pitas
-
 Cinnamon Pancakes
- Lifehacks
-
 Crochet Basics: Aligned Cobble Stitch
-
 Brick Stitch Crochet Tutorial
-
 Crochet Basics: Wattle Stitch
- Crochet Ideas
-
 Crochet Snorlax Plushie Doll
-
 Crochet Beautiful Penguin Toy
-
 Crochet Tiny Snowman
- DIY
-
 DIY Santa Craft For Kids
-
 Paper Plate Angel Craft
-
 Upcycled Mason Jar Chicken Vase
- Knitting Ideas
-
 Knitted Bridger Cowl
-
 Knitted Keepsake Bag
-
 Knitted Cutie Cupcake Dolls