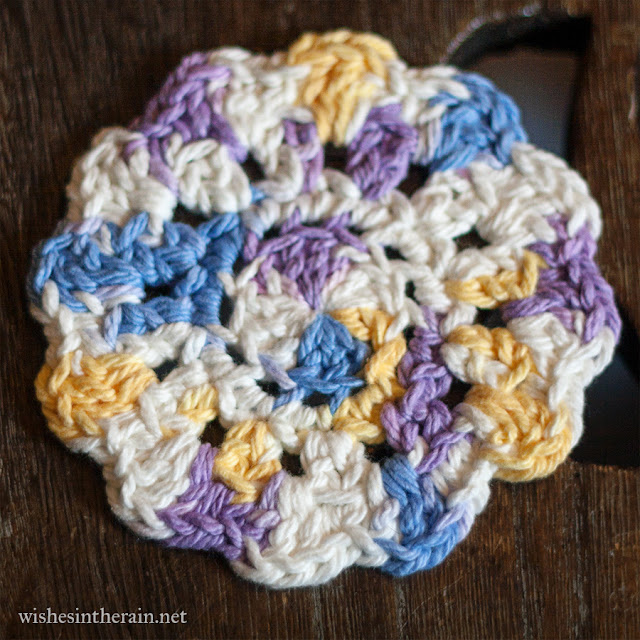
Crochet Celebration Coasters: A Fun DIY Project for Everyone

Get ready to add a touch of charm and creativity to your home decor with these delightful Crochet Celebration Coasters! These coasters are not only functional but also a fun and enjoyable project to work on. Whether you're a seasoned crocheter or just starting out, these coasters are perfect for all skill levels. The Crochet Celebration Coasters are designed to bring a pop of color and joy to any space. With their vibrant hues and intricate patterns, they are sure to catch the eye of anyone who sees them. Made with soft and durable yarn, these coasters are not only beautiful but also practical, providing a protective barrier for your furniture while adding a stylish touch to your living room, dining area, or even your outdoor patio. Whether you're looking to spruce up your own home or create a heartfelt gift for someone special, these coasters are sure to bring joy and beauty to any space. Let your imagination run wild and create a set of coasters that will be the talk of the town!
Materials Needed
You will need:
- Worsted/aran weight cotton yarn, for example Lily's Sugar'n Cream, or Rico Creative Cotton. For one coaster you will need about 11m/12 yards of yarn. For the holder you will need about 24m/26 yards. For a full set you'll need around 92m/100 yards of yarn in total.
- 4.5mm hook
- 1m ribbon (or 1m chain of contrasting color yarn with ends sewn in)
- Tapestry needle for sewing in ends
- Iron, tea cloth, water spray for blocking
Stitches used: ch, sl st, sc, hdc, dc, magic ring, chainless starting dc (this stitch is a bit tricky but well worth learning; if you don't want to use it you can ch3 instead). Some stitches need to be worked into back loops. US terms are used throughout.

Coaster Instructions
Round 1
Dc 12 times into magic ring. Pull tight and sl st through first dc to join. (12)
Round 2
Ch 1. In back loops, 2 sc in each st around, join with sl st into first sc. (24)
Round 3
Chainless starting dc (or ch3), dc in same st, skip 1 st, (2dc in next st, skip 1 st) 11 times, join in top of 1st dc/ch3 (24)
Round 4
Ch 1, (sc in back loops of next 2 dcs, 3dcs into gap) 12 times. Join with sl st to first sc, bind off and weave in ends.
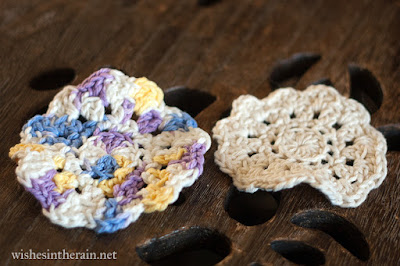
Blocking the Coaster
When you finish, the coaster will not lay completely flat. Steam blocking will fix this and only takes a minute per coaster. Lay one coaster upside down on an ironing board, and cover with a clean tea towel. Spray water over the towel, then iron briefly to flatten the coaster. If you have a steam iron you can use that instead of spraying water, and if you don't have a water spray, just dampen the tea towel first.
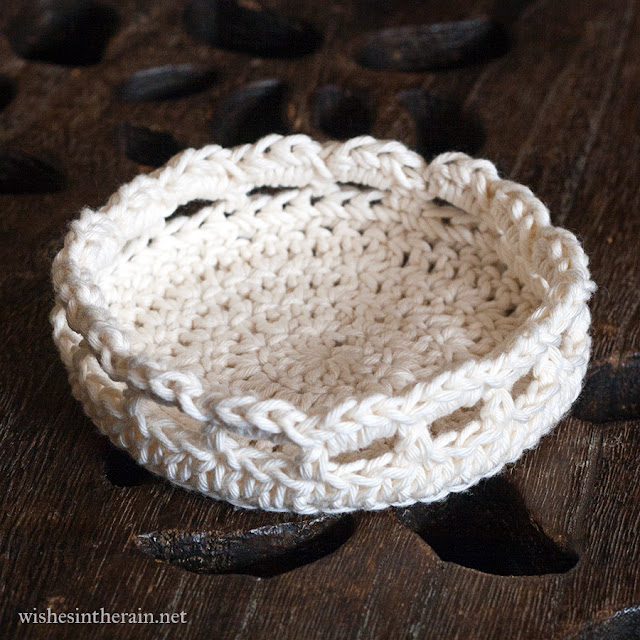
Holder Instructions
Round 1
Dc 12 times into magic ring. Pull tight and sl st through first dc to join.
Round 2
Ch2 (does not count as st - make 1st dc into same space as ch 2 throughout), 2dc in each dc around. Join to first dc. (24 sts)
Round 3
Ch2, (2dc in next st, dc in next st) 12 times. Join. (36 sts)
Round 4
Ch2, dc, (2dc in next st, dc in next 2 sts) 11 times, 2dc in next st, dc, Join (48 sts)
Round 5
Ch1, In back loops only, hdc in each st around. Join (48 sts)
Round 6
Ch1, (hdc, ch2, skip 2 sts) 16 times, join with sl st into 1st hdc. (16 hdc, 16 ch2 spaces)
Round 7
(3hdc into ch2 space, sl st into hdc) 16 times. Bind off & weave in ends.
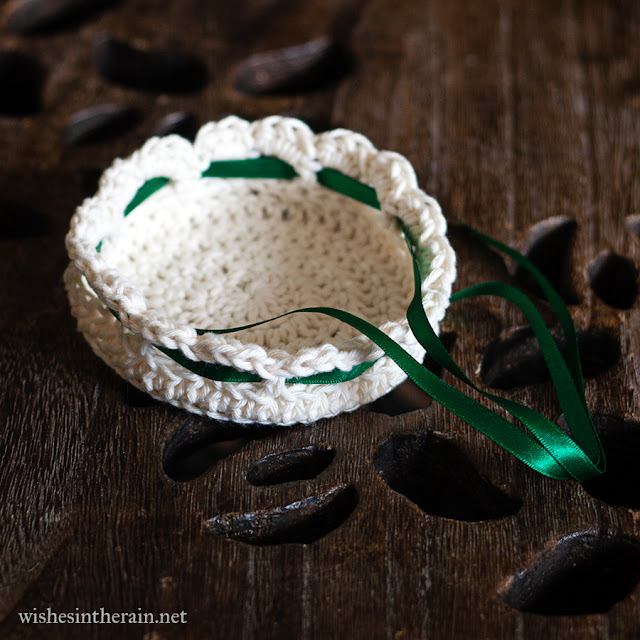
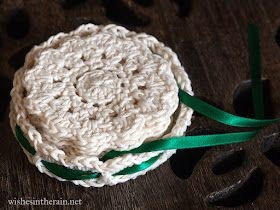
Finishing Touch
To add the ribbon, turn the holder inside out and weave ribbon in and out through the holes until it goes round one and a half times (so the ends are on opposite sides of the holder). Adjust the ribbon so that both ends are the same length, and turn the holder right way out again. Place the coasters in the holder and tie a neat bow.
- Funny Pictures
-
 These are the Pics That Simply Describe Your Life
-
 Hilariously Accurate Parenting Memes That Show the Other Side of Parenthood
-
 Great Pics That Just Depict Our Lives
- Recipes
-
 Crispy Baked Avocado Fries
-
 Baked Beans and Hot Dogs with Biscuit Topping
-
 Roasted Rosemary Lemon Chicken Breasts
- Lifehacks
-
 Crochet Basics: Twisted Fringe
-
 7 Crochet Tips And Tricks
-
 How To Work Crochet Into Denim
- Crochet Ideas
-
 Crochet Snorlax Plushie Doll
-
 Crochet Cat in 1 Row
-
 Crochet Beautiful Penguin Toy
- DIY
-
 Popsicle Stick and Jingle Bell Christmas Tree Ornament
-
 Upcycled Mason Jar Chicken Vase
-
 Crochet Namaste Stephanie Doll
- Knitting Ideas
-
 Knitted Keepsake Bag
-
 Knitted Textured Heart Dishcloth
-
 Knitted Snowfall Dishcloth