How to Make Crochet Baby Bonnets

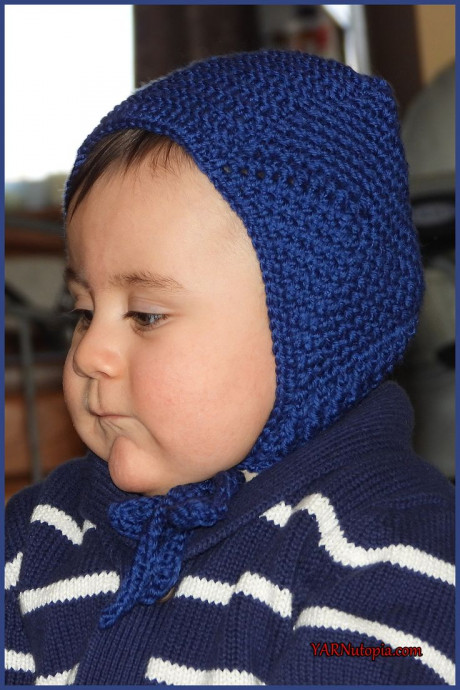
Crochet baby bonnets are the sweetest accessory for your little one! Not only do they keep baby's head cozy and warm, but they also add a touch of charm to any outfit. The delicate stitches and soft yarn make them a delightful handmade gift for a newborn or a fun project for crafty parents. Whether you choose a classic design or opt for a playful color combination, a crochet baby bonnet is sure to be a precious addition to your baby's wardrobe. So, why not grab your crochet hook and create something adorable for your bundle of joy?
Materials You Will Need:
- Red Heart Yarns Chic Sheep Yarn in VIP
- Size G-4.25mm Crochet Hook
- Yarn Needle
- Scissors
Special Stitches:
- Ch(s): chain(s)
- YO: Yarn Over
- BLO: Back Loop Only
- FLO: Front Loop Only
- St(s): Stitch(es)
- Sl st: slip stitch
- SK: Skip
- SC: Single Crochet
- SC2TOG: Single Crochet Decrease
- HDC: Half Double Crochet
- DC: Double Crochet
Pattern:
Granny Square:
Make 2
Ch 2
Rnd 1: SC in 2nd Ch from hook, [Ch 2, SC in same ch as first SC] 3 times, Ch 2, Sl st to first SC.
Rnd 2: Sl st into Ch 2 corner sp, Ch 1, [SC, Ch 2, SC] in corner,* Ch 1, [SC, Ch 2, SC] into next corner, repeat from * around, sl st to first SC.
Rnd 3: Sl st into Ch 2 corner sp, Ch 1, [SC, Ch 2, SC] in corner, *Ch 1, SC in next ch 1 sp, Ch 1, [SC, Ch 2, SC] in corner, repeat from * around, sl st to first SC.
Rnd 4: Sl st into Ch 2 corner sp, Ch 1, [SC Ch 2, SC] in corner, * [Ch 1, SC in next ch 1 sp] repeat until you get to the next corner, [SC, Ch 2, SC] into corners, repeat from * around, Sl st to first SC.
Rnds 5-10: Repeat Round 4
Fasten off with long tail for sewing.
Center Ribbing:
Work in BLO to make the ribbing look
Ch 17
Row 1: SC in 2nd Ch from hook and each ch across, ch 1, turn. (16)
Row 2: SC in each st across, Ch 1, turn.
Rows 3-40: repeat Row 2
Fasten off with long tail for sewing.
Assembly Step:
Sew the center ribbing piece to the granny squares.
Bottom Cuff:
Attach Yarn to bottom corner of bonnet
Row 1: Ch 2, DC across the bottom of the bonnet, Turn.
Row 2: Ch 2 (does not count as stitch), DC in first st, FPDC on next, BPDC on next, repeat from * across, ending with DC in last st, Turn.
Rows 3-4: Repeat Row 2
Fasten off, Weave in ends.
Ties/Straps:
Attach yarn to bottom corner of bonnet (do this for both straps)
Ch 51, SC in 2nd Ch and each ch across until you get back to the bonnet. Sl st to bonnet. Fasten off. Weave in all ends.
- Funny Pictures
-
 These are the Pics That Simply Describe Your Life
-
 Hilariously Accurate Parenting Memes That Show the Other Side of Parenthood
-
 Great Pics That Just Depict Our Lives
- Recipes
-
 Crispy Baked Avocado Fries
-
 Baked Beans and Hot Dogs with Biscuit Topping
-
 Roasted Rosemary Lemon Chicken Breasts
- Lifehacks
-
 Crochet Basics: Twisted Fringe
-
 7 Crochet Tips And Tricks
-
 How To Work Crochet Into Denim
- Crochet Ideas
-
 Crochet Snorlax Plushie Doll
-
 Crochet Cat in 1 Row
-
 Crochet Beautiful Penguin Toy
- DIY
-
 Popsicle Stick and Jingle Bell Christmas Tree Ornament
-
 Upcycled Mason Jar Chicken Vase
-
 Crochet Namaste Stephanie Doll
- Knitting Ideas
-
 Knitted Keepsake Bag
-
 Knitted Textured Heart Dishcloth
-
 Knitted Snowfall Dishcloth