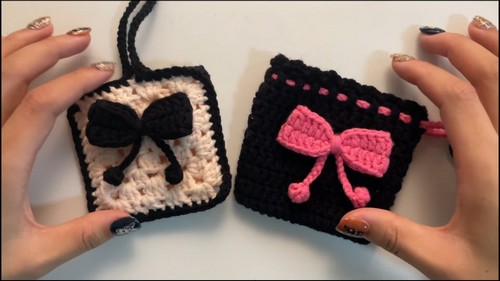
How To Crochet A Pouch With A Raised Bow

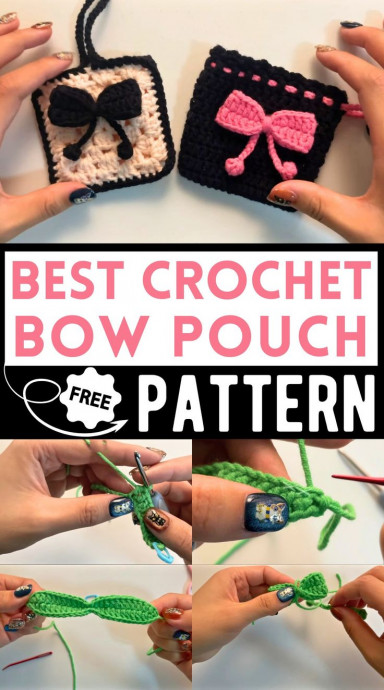
The Crochet Pouch With Raised Bow is a charming accessory that adds a touch of elegance to your everyday style. The raised bow detail gives it a unique and playful look, perfect for keeping your essentials organized in a stylish way. This pouch is not only practical but also a fun DIY project for those who enjoy crafting and creating their own accessories. With its classic design and modern twist, the Crochet Pouch With Raised Bow is sure to be a hit wherever you go.
Materials Needed
- 5 ply cotton yarn
- 3 mm crochet hook
- Scissors
- Darning needle
- Stitch marker
Steps to Crochet a Bow Pouch
Part 1: The Bow
Prepare Materials
Grab your yarn and leave a nice long tail.
Make a slip knot.
Chain Formation
Crochet 27 chains.
Yarn over, pull through.
You can count the “V” shapes formed to keep track of the chains.
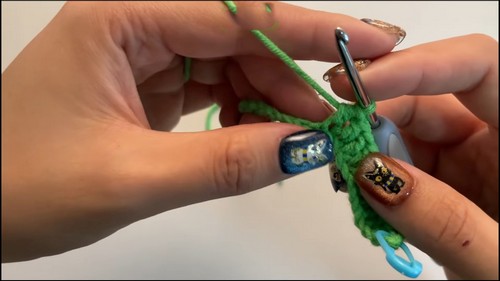
First Row of Single Crochets and Double Crochets
Locate the second chain from the hook.
Insert your hook into the chain, yarn over, pull up a loop, yarn over again, pull through both loops. This is your first single crochet (SC).
Mark the first stitch with a stitch marker.
Next, crochet a half double crochet (HDC):
Yarn over, insert hook into the next chain, yarn over, pull up a loop (you have three loops on your hook), yarn over again, pull through all loops.
Work 9 double crochets (DC) across the next nine stitches:
Yarn over, insert hook into the next chain, yarn over, pull up a loop (three loops on your hook), yarn over, pull through first two loops, yarn over, pull through remaining two loops.
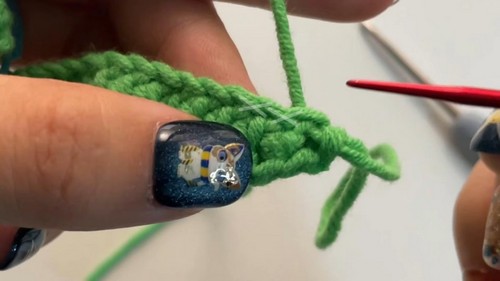
Continue:
Another half double crochet in the next stitch.
Slip stitch in the next two stitches (insert hook, yarn over, pull through the loop on the hook).
Another half double crochet, then work 9 more double crochets.
Half double crochet in the next stitch.
Slip stitch into the last chain.
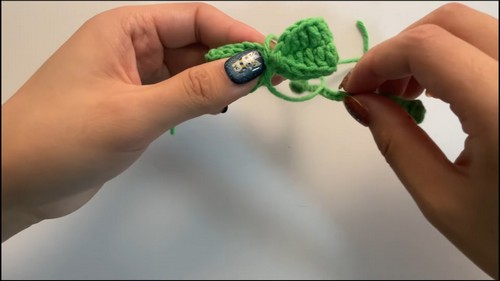
Finishing the First Side
Chain one.
Work a slip stitch into the little gap formed by the last chain worked into.
Yarn over, pull through the loop on the hook.
Work on the Opposite Side of the Starting Chain
Half double crochet into the first “X” shaped crossed loops.
Work 9 double crochets into the next 9 stitches.
One half double crochet.
Two slip stitches.
Another half double crochet, then 9 more double crochets.
Half double crochet in the next stitch.
Slip stitch into the final stitch to finish.

Secure and Weave in Tails
Slip stitch into the first stitch that was marked.
Leave a tail, fasten off, and weave in ends with a darning needle.
Part 2: The Bow Tie
Create the Tie
Leave a tail and make a slip knot.
Chain 3:
Into the second chain from the hook, make a bobble stitch.
If unsure, refer to bobble stitch instructions elsewhere.
Work 4 unfinished double crochets into the same stitch, yarn over and pull through all five loops.
Chain 20 more.
Work another bobble stitch into the second chain from the hook.
Leave a tail, fasten off, and weave in ends.
Shape Bobble into Ball
Thread the tail through the last chain, leave a loop.
Pass needle through the loop to form a knot, pull tight.
Weave needle around the bobble to shape it into a ball.
Knot the tail to secure it, weave the tail into the center, and trim excess.
Part 3: Assembling the Bow
Fold and Knot the Bow
Fold the bow piece so the front is facing out.
Knot the two tails together twice to secure.
Wrap and Secure the Tie
Arrange the tie piece and wrap the tails around the center in opposite directions.
Flip to the back and adjust for bunching.
Knot the tails on the back to lock in place.
Attachment to Pouch (Optional)
Find desired placement on the pouch.
Use a hook to pull tails through the pouch, tie them tightly inside.
Weave in ends and trim excess.

Additional Notes
This pattern can be customized with extra stitching or fabric glue for added security.
- Funny Pictures
-
 Hilarious Memes for Those Bored to Tears
-
 Weekly Treat of Funniest Parenting Memes for Good Laugh out Loud Right Now
-
 Really Funny Pics to End These Weekend Perfectly
- Recipes
-
 Crispy Baked Avocado Fries
-
 Baked Beans and Hot Dogs with Biscuit Topping
-
 Roasted Rosemary Lemon Chicken Breasts
- Lifehacks
-
 Crochet Basics: Twisted Fringe
-
 7 Crochet Tips And Tricks
-
 How To Work Crochet Into Denim
- Crochet Ideas
-
 Crochet Snorlax Plushie Doll
-
 Crochet Cat in 1 Row
-
 Crochet Beautiful Penguin Toy
- DIY
-
 Popsicle Stick and Jingle Bell Christmas Tree Ornament
-
 DIY Santa Craft For Kids
-
 Paper Plate Angel Craft
- Knitting Ideas
-
 Knitted Bridger Cowl
-
 Knitted Keepsake Bag
-
 Knitted Cutie Cupcake Dolls