Crochet Loopita Bow: Fun and Whimsical Accessory Tutorial

Penelope
Feb 24, 2025 08:38 AM
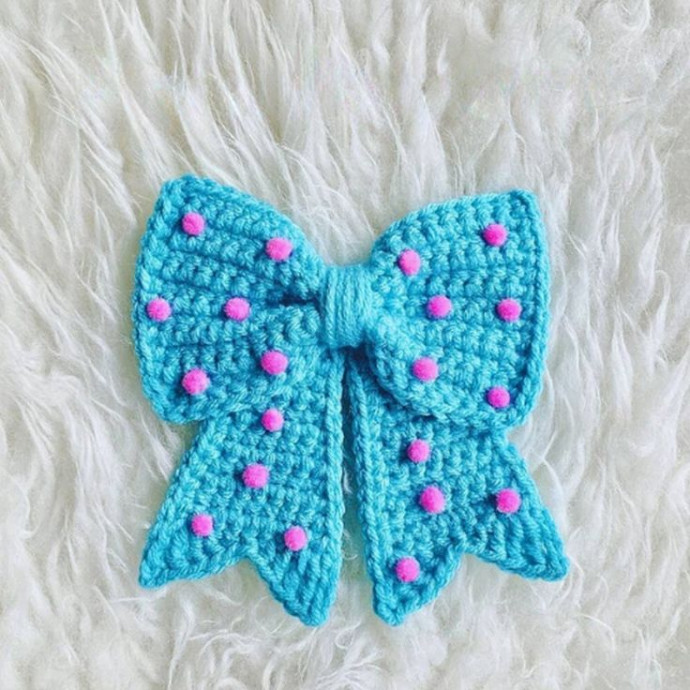
The Crochet Loopita Bow is an absolute delight! This charming accessory adds a touch of whimsy and flair to any outfit. With its intricate design and beautiful colors, this bow is sure to stand out and make a statement. Whether you're wearing it in your hair, on a bag, or as a cute accessory on your clothing, the Crochet Loopita Bow brings a playful and fun vibe to your style. It's the perfect way to show off your creative side and spread a little joy wherever you go!
Materials and Info:
- 4.0mm hook.
- I Love This Yarn Hobby Lobby.
Width: 5" x 5 ½" approx.
(Size depends on hook size, yarn, and tension).
Instructions
The number inside the parenthesis is the total sts for that row.
Everything inside brackets goes in the same st.
Top
- Row 1: Ch 21, 20 sc. Turn work.
- Row 2-12: Ch 1, 20 sc.
- Sc around the rectangle (no need to sc on row 12).
Bottom (Make 2)
- Row 1: Ch 5, 4 sc. Turn work. (4)
- Row 2-5: Ch 1, 4 sc. Turn work. (4)
- Row 6: Ch 1, 2 sc, 1 sc, 1 sc, 2 sc. Turn work. (6)
- Row 7-9: Ch 1, 6 sc. Turn work. (6)
- Row 10: Ch 1, 2 sc, 1 sc, 1 sc, 1 sc, 1 sc, 2 sc. Turn work. (8)
- Row 11-13: Ch 1, 8 sc. Turn work. (8)
- Row 14: [ch 1, 1 sc, ch 3, sl st in ch next to hook, 2 tr] dc, hdc, sc2tog, hdc, dc, [2 tr, ch 1, sl st in ch 1, ch 3] join with a sc.
- Sc all around. Sl st on the first st of row 14.
- Weave in ends in a way that you close the gap between sc, ch 3, and 2 tr from row 14.
Finishing Touches
- Fold the rectangle in the middle and use a long string to wrap it around.
- Sew or glue the bottom.
No comments
Write a comment
- Funny Pictures
-
 Cute Cat Memes That Will Make Your Day Brighter
-
 Spot-on and Funny Memes About Introverts Struggles
-
 Top Wonderful Cat Memes on Their Way to Better Your Day
- Recipes
-
 Creamy Old Fashioned Rice Pudding
-
 Russian Tea Cakes (Snowball Cookies)
-
 Rigatoni with Sausage, Tomatoes, and Zucchini
- Lifehacks
-
 How to Crochet a Harlequin Stitch
-
 Removing The Toughest Stains
-
 Crochet Basics: Crumpled Griddle Stitch
- Crochet Ideas
-
 Crochet Christmas Tree
-
 Crochet Goblet of Fire
-
 Crochet Adorable Ammonite
- DIY
-
 DIY Snowman Wreath
-
 Mini Santa Sleigh Ornament
-
 Crochet Gingerbread House Blanket
- Knitting Ideas
-
 Knitted Easter Bunny
-
 Knitted Mobile Phone/Glasses Case
-
 Knitted Cabled Wallet