Create Your Own Crochet Open Tops

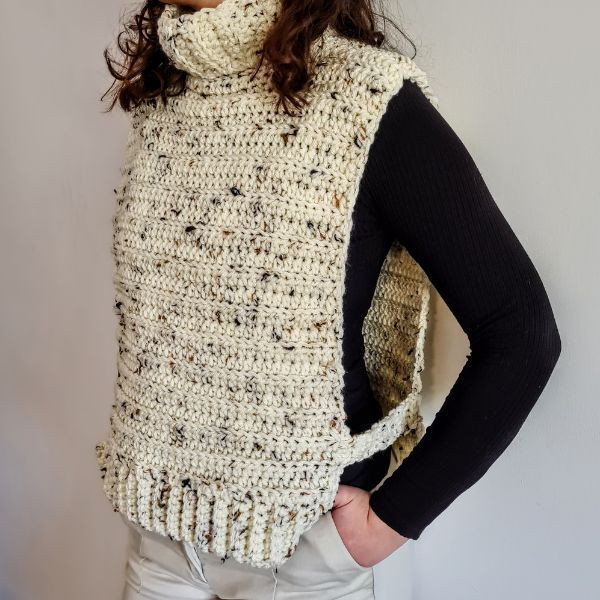
Crochet open tops are an absolute must-have for anyone who loves to add a touch of charm and flair to their outfits. These delightful creations are perfect for layering over a cute tank top or swimsuit, making you stand out with style while staying comfy. The open design allows for a breezy feel, keeping you cool and fashionable in warm weather. Whether you prefer a lacy pattern or a solid stitch, a crochet open top is a versatile piece that effortlessly elevates any ensemble. So go ahead, embrace your unique style and rock that crochet open top like the fashionista you are!
Materials
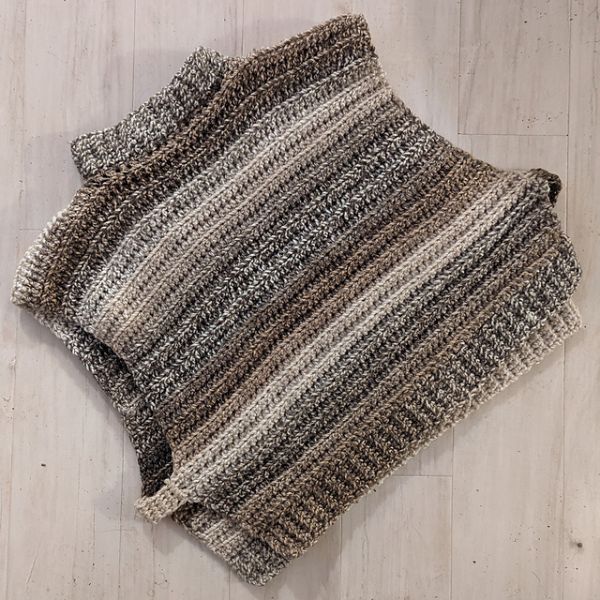
Hayfield Bonus Chunky Extra Value yarn Weight #5, 100 gr 100% Acrylic 150 yards/ 137 m – I used 3.5 skeins
You can work this pattern with any yarn weight and hook size; it will change the measurements.
Or any weight #5 yarn.
Hook: US Size (6 mm).
Yarn Needle, Scissors, Measuring Tape.
Sizes
You will find the different measurements in the pattern as follows: M (L, XL).
Stitch Key
Ch = Chain
Sc = Single Crochet
St = Stitch
Yo = Yarn over
Slst = Slip stitch
Specialty Stitches
BloSc = Back Loop Only Single Crochet stitch (insert hook into the next st (but only in the back loop). YO, pull back through that st (2 loops on hook), YO, pull through all 2 loops on hook).
BloHdc = Back Loop Only Half Double Crochet – Yarn over, insert crochet hook into the back loop only, pull up a loop, yarn over, pull through the 3 loops on the crochet hook.
Notes
This pattern is written in US terminology.
This pattern is worked in rows.
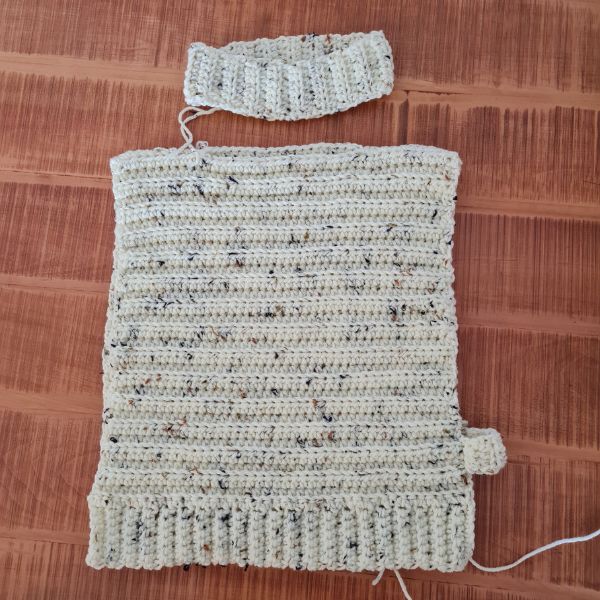
This pattern is worked in two identical rectangles, a collar, and side straps.
Ch3 does count as st at the beginning of each row.
Ch1 at the beginning of the row does not count as a stitch.
Instructions
Hem
Ch 8.
R1: Sc in 2nd ch from hook and across to the end of row, turn work (7 st).
R2: Ch 1, sc 1 in 1st st from hook, BloSc 1 in next 5 stitches, sc in last st, turn work (7 st).
R3-42(45, 57): Repeat R2 - do not cut your yarn; you will continue making one panel of the body.
The Body: Work 2 Identical Panels
Turn your hem on the side with the length facing you.
R1: Ch 1 and sc 1 in 1st st from row at the hem, sc 1 in every st from row to a total of 42(45,57), turn work.
R2: Ch 1, hdc in 1st st from hook, BloHdc in next st and across to one st before last, hdc in last st, 42(45,57), turn work.
R3- R30 (32, 34): Repeat R2. Secure your yarn and cut. Make sure you have about 21” length (hem + body) or add rows for your desired length.
Collar
Chain 8.
R1: Sc 1 in 2nd ch from hook, sc 1 in next ch and across to end, turn (7 st).
R2: Ch 1, sc in 1st st from hook, BloSc in next 5 stitches, sc 1 in last st, turn (7 st).
R3-38: Repeat R2 (22”).
Join two short ends using the tapestry needle or Slst to form a circle.
Construction
Lay two panels one on top of the other, facing the wrong side out.
Sew the shoulders with your tapestry needle 12 (20) stitches from each side.
Note: If you are making this pattern wider, measure to find out how many stitches will the shoulders be, leaving approximately a 9-inch/23cm hole for the neckline.
Sew the collar around the neckline using your tapestry needle.
Measure approx 5 inches/12.5 cm from the hem up to the underarm: insert your hook and sc 4 st, ch 1 turn and sc 4 for 6 rows, and sl st this strip to the second panel at the same height.
Repeat on the opposite side.
Note: If you want to make more than one strip along the armhole, just measure about 11 inches from shoulder to armhole.
Finishing
Weave in all ends, cut yarn, and enjoy!
- Funny Pictures
-
 Cute Cat Memes That Will Make Your Day Brighter
-
 Spot-on and Funny Memes About Introverts Struggles
-
 Top Wonderful Cat Memes on Their Way to Better Your Day
- Recipes
-
 Creamy Old Fashioned Rice Pudding
-
 Russian Tea Cakes (Snowball Cookies)
-
 Rigatoni with Sausage, Tomatoes, and Zucchini
- Lifehacks
-
 How to Crochet a Harlequin Stitch
-
 Removing The Toughest Stains
-
 Crochet Basics: Crumpled Griddle Stitch
- Crochet Ideas
-
 Crochet Christmas Tree
-
 Crochet Goblet of Fire
-
 Crochet Adorable Ammonite
- DIY
-
 DIY Snowman Wreath
-
 Mini Santa Sleigh Ornament
-
 Crochet Gingerbread House Blanket
- Knitting Ideas
-
 Knitted Easter Bunny
-
 Knitted Mobile Phone/Glasses Case
-
 Knitted Cabled Wallet