Crochet Crossed Rib Hat Pattern

Introduction
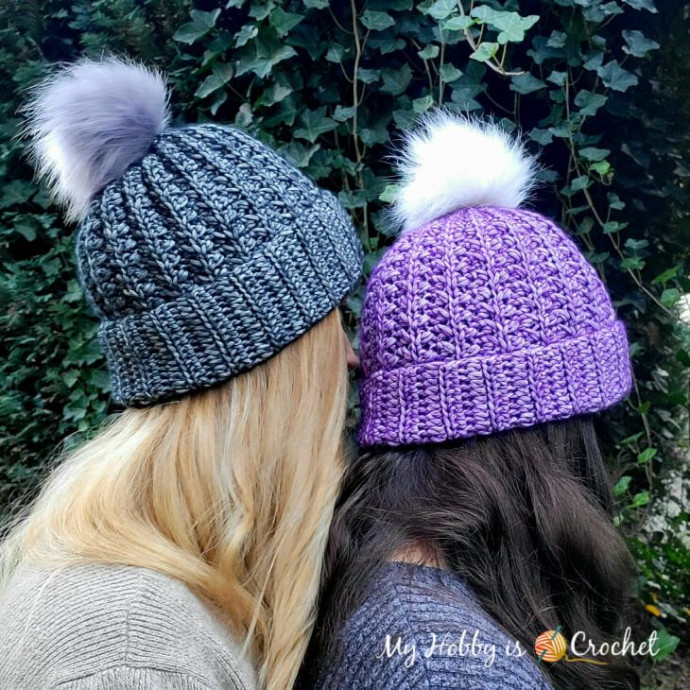
The Crochet Crossed Rib Hat is a stylish and cozy accessory perfect for adding a touch of warmth and flair to your winter wardrobe. This hat features a unique crossed rib design that adds texture and visual interest, making it a chic and trendy option for staying comfortable in chilly weather. Whether you're heading out for a leisurely walk or just want to elevate your casual look, this hat is sure to become a favorite go-to accessory. Plus, the joy of creating something handmade adds an extra special touch to each wear, making it a fun and rewarding project for crafters of all skill levels!
Size
The hat pattern comes in 2 sizes: child and teen/adult women.
Hat Total Height With Unfolded Brim:
- Child: 10.2 inches (26 cm)
- Teen/ Adult Women: 11 inches (28 cm)
Hat Circumference Without Stretching:
- Child: 19 inches (48.3 cm)
- Women: 20 inches (50.8 cm); the hat is stretchy!
You can customize the size of your hat, if you like! For a longer or shorter hat, start with more or less foundation chains in a multiple of 2 stitches + 1 for the turning chain. For a wider or narrower hat, add more or fewer rows in the pattern repeat of 2 rows.
Gauge
16 hdc back loops only and 9 rows = 10 cm x 10 cm (4” x 4")
Supplies
- Yarn: medium weight/aran yarn
- 4.5 mm crochet hook
- Scissors
- Optional stitch marker
Stitches and Abbreviations (US Terms)
- ch: chain
- st: stitch
- sc: single crochet
- sc blo: single crochet worked in back loops only
- hdc: half double crochet
- hdc blo: half double crochet worked in back loops only
- blo: back loop only
- RS: right side of work
- WS: wrong side of work
Special Stitches:
Crossed Half Double Crochet (CrHDC): sk 1 st, work 1 hdc into the next st, 1 hdc back into skipped st going in front of the last hdc just made, inserting the hook from front to back of the work.
Crossed Half Double Crochet worked into back loops only (CrHDC blo): as written above, but inserting the hook into the back loops of the stitches.
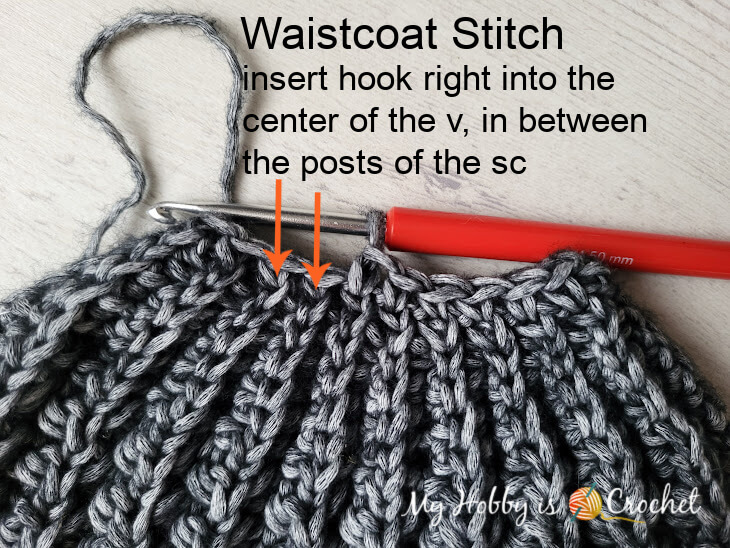
Waistcoat stitch (Wsc): a modified single crochet worked inserting the hook not under both top loops as usual, but right into the center of the V-shape, in between the posts of the sc.
Decrease waistcoat sts two together (dec Wsc2tog): insert hook into center of next waistcoat st and pull up a loop, insert hook into center of next waistcoat st and pull up a loop; you have 3 loops on the hook, yarn over and pull through all 3 loops on the hook to complete a decrease of 2 waistcoat stitches into 1 waistcoat stitch!
Notes
- The ch1 at the beginning of the rows will not count as a st.
- Do not work the slip stitches at the beginning/end of the rows tight; otherwise, it will be difficult on the next row to insert the hook into them; or you might even unsee them! Work the slsts taller!
- Working the last hdc at the end of rows into both top loops will give the edge more stability.
- If you like, you can use a stitch marker to mark the start of the brim stitches.
Hat Instructions
Use hook size 4.5mm and leave a long yarn tail (about 30-40 inches) that will be later used to sew the short ends together.
Child Size:
Ch 41.
Row 1 (WS): work 1 slst into 2nd ch from hook and 1 slst in next ch, 1 sc in each of the next 3 ch, 1 hdc in next st, 8 FcrHDC over the next 16 chains, 1 hdc in each of next 18 ch; ch1, turn (40 sts total)
Row 2 (RS): 18 hdc blo, 8 CrHDC blo (1 CrHDC blo for each of the 8 CrHDC groups from previous row), 1 hdc blo, 3 sc blo, 2 slst blo; ch1, turn (40 sts total)
Row 3 (WS): 2 slst blo, 3 sc blo, 1 hdc blo, 8 CrHDC blo, 17 hdc blo; 1 hdc inserting the hook under both top loops of last hdc from prev row; ch1, turn. (40 sts total)
Row 4 (RS): 18 hdc blo, 8 CrHDC blo, 1 hdc blo, 3 sc blo, 2 slst blo; ch1, turn (40 sts total)
Now you can measure your piece and make a gauge test. My piece is 10.5 inches long right now! After more rows it will shrink about 1 inch due to the shorter stitches at the top!
Rows 5-38: repeat the last two rows, alternating Row 3 and Row 4; ending with a row 4 repeat (worked from bottom to top!).
Do not cut yarn!! Place a stitch marker into the last stitch at the end of the last row! You will continue with the crown shaping after joining into a tube!
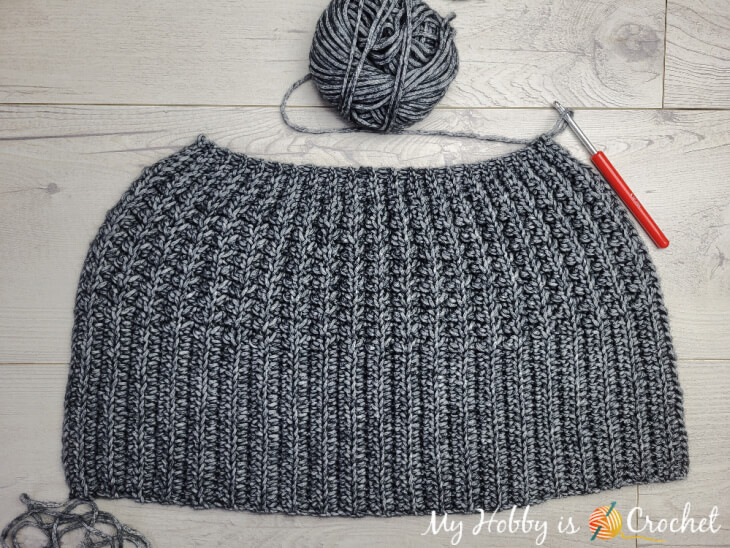
After finishing the last row, the piece should look like this:
Continue with the instructions for joining into a tube, right below the women size!
Teen/ Adult Women Size:
Ch 46.
Row 1 (WS): work 1 slst into 2nd ch from hook and 1 slst in next ch, 1 sc in each of next 3 ch, 1 hdc in next st, 9 CrHDC over the next 18 chains, 1 hdc in each of next 21 ch; ch1, turn (45 sts total)
Row 2 (RS): 21 hdc blo, 9 CrHDC blo (1 CrHDC blo for each of the 9 CrHDC groups from previous row), 1 hdc blo, 3 sc blo, 2 slst blo; ch1, turn (45 sts total)
Row 3 (WS): 2 slst blo, 3 sc blo, 1 hdc blo, 9 CrHDC blo, 20 hdc blo; 1 hdc inserting the hook under both top loops of last st; ch1, turn. (45 sts total)
Row 4 (RS): 21 hdc blo, 9 CrHDC blo, 1 hdc blo, 3 sc blo, 2 slst blo; ch1, turn (45 sts total)
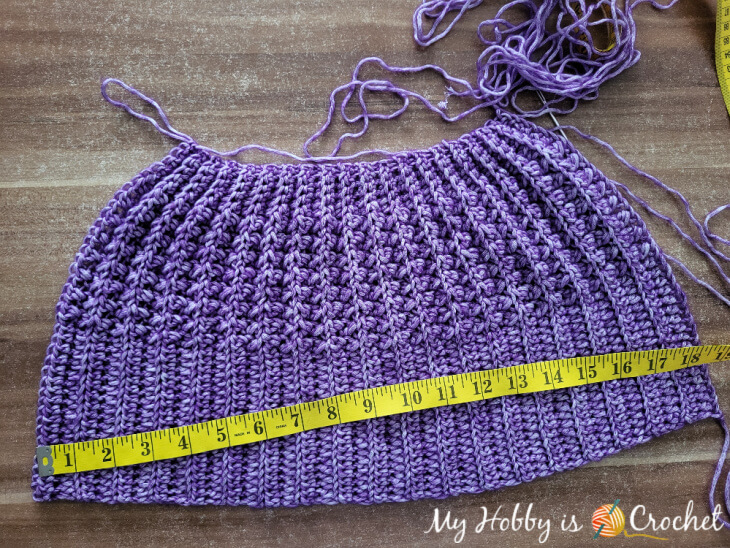
Now you can measure your piece and make a gauge test. My piece is 11.5 inches long right now! After more rows it will shrink about 1 inch due to the shorter stitches at the top!
Rows 5-42: repeat the last two rows, alternating Row 3 and Row 4; ending with a row 4 repeat (worked from bottom to top!).
Do not cut yarn!! Place a stitch marker into the last stitch at the end of the last row! You will continue with the crown shaping after joining into a tube!
After finishing the last row, the piece should look like this:
Joining the sides into a tube (both sizes):
Fold over the short ends of the piece so that the wrong sides are facing each other.
Although the pattern looks good on both sides, I take the wrong side as the side where the v-looking stitches are pointing up; and the right side where the v-looking stitches are pointing down! And that's because when you shape the crown in the next step on RS, working with the waistcoat stitch, it will keep the same look of the v-looking stitches pointing down.
Sew the back seam on the right side. Thread a yarn needle with the long yarn tail you left at the beginning of work; sew the short edges together inserting the needle through the front loop of the stitches on last row edge and the unused loops of the foundation chain sts on the other edge, back and forth, until you reach the top edge.
Cut yarn and fasten it off.

Crown/Top Shaping (both sizes)
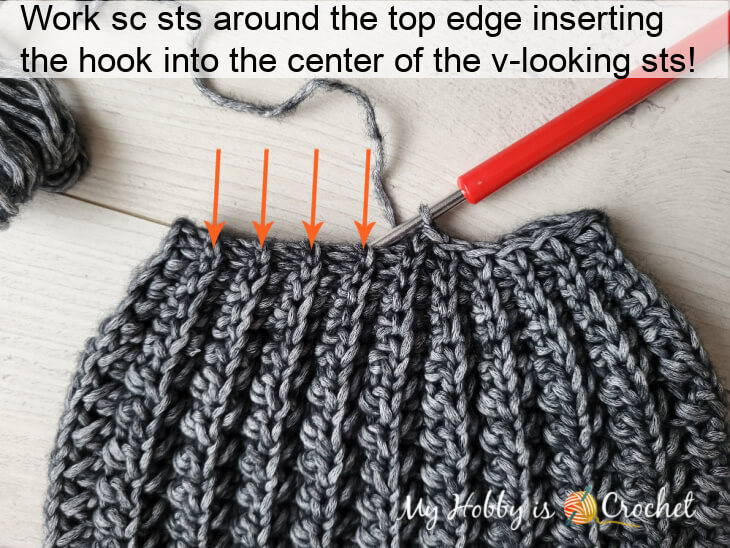
Remove the stitch marker and continue to crochet on RS around the top edge of the hat!
Round 1: ch1, work into the ridge sts/v-looking stitches around the top edge, inserting the hook right into the center of the v's, 1 sc in each of the 19 (21) ridges around the edge; join with slst to 1st sc.
Note: work the sc a bit taller, to make it easier to work the next round with the waistcoat sts!
Round 2: ch1, work 1 wsc (a bit taller) in each sc around; join with slst to top of 1st wsc st. Total: 19 (21 sts)
Round 3: ch1, decrease every next 2 Wsc sts around; at the end of the row you will have an extra st, work 1 wsc in last wsc; join with slst to top of 1st st. Total: 9 sts (11 sts)
Cut yarn. Fasten off.
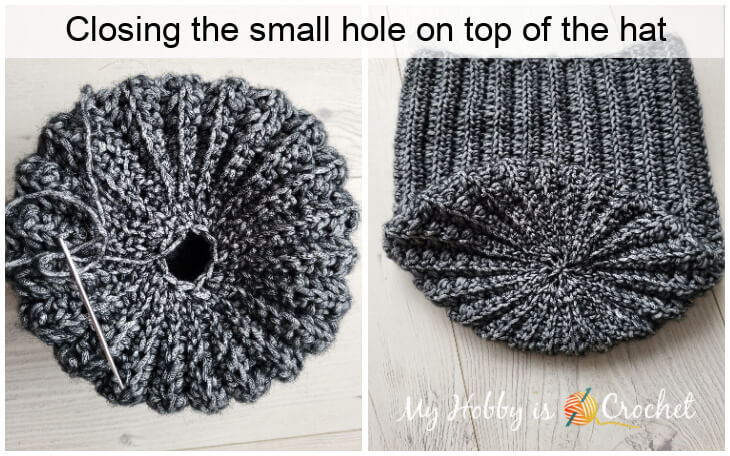
Closing the Small Hole on Top of the Hat (Both Sizes)
Turn the hat inside out. Thread a yarn needle with the second yarn tail, weave yarn in the back loops of the sts of the last round.
Cinch together to close the space and fasten off securely, making several knots. Weave in all ends.
If desired, add a pom pom on top of the hat.
- Funny Pictures
-
 Pics to Get the Excitement Today
-
 Funny Christmas Meme Dump
-
 Funniest Relatable Felines in the Form of Memes
- Recipes
-
 Cappuccino Brownies
-
 Chicken Mushroom Tortellini Bake
-
 Spinach Pie
- Lifehacks
-
 8 Necessary Tips for Baking Bread
-
 Tips & Hacks for Clean Carpets
-
 10 Uses For Old TV Armoires
- Crochet Ideas
-
 Crochet Watermelon Amigurumi
-
 Crochet Shark Applique
-
 Crochet Pineapple Amigurumi
- DIY
-
 Yarn Wrapped Christmas Wreath Ornaments
-
 Egg Carton Snowman Ornament
-
 Stick Peppermint Candy Ornament
- Knitting Ideas
-
 Knitted Star Square Dishcloth
-
 Knitted Free 2025 Year Dishcloth
-
 Knitted Ribbed Adult Hat