How to Create an Adorable Crochet Bunny Granny Square

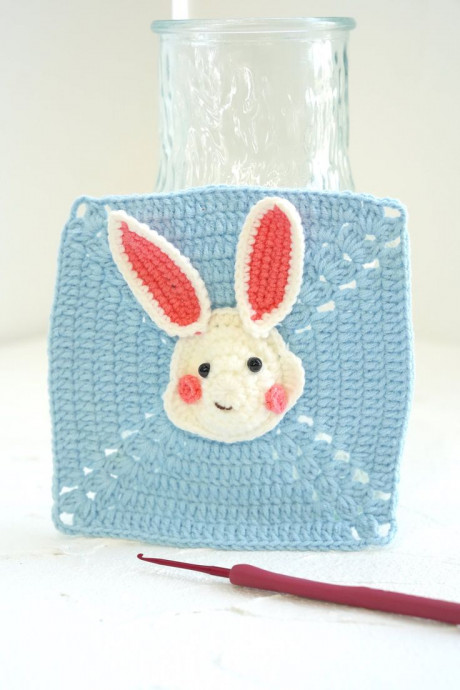
The Crochet Bunny Granny Square
The Crochet Bunny Granny Square is an adorable and charming pattern that adds a touch of whimsy to any crochet project. With its cute bunny design incorporated into the classic granny square motif, it's sure to bring a smile to your face every time you look at it. Whether you're a beginner or a seasoned crocheter, this pattern is great for adding a playful element to blankets, pillows, or even clothing. So grab your yarn and hook, and let's get crafting some sweet little bunnies together!
Materials Needed
- Yarn – Loopara 4ply combed cotton (White 01, Blue 30, and Red 61)
- Hook – 2.0mm
- Stitch Marker
- Scissors
- Yarn needle
- Hot melt adhesive
Step By Step Tutorial
How to Crochet a Rabbit Head
- R1: Magic ring, ch 2, 11 hdc, sl.
- R2: FLO: (ch 2, hdc), (hdc, 2 hdc inc) 3 times, hdc, hdc inc, sl.
- R3: FLO: (ch 2, hdc), (hdc, hdc inc) 9 times, hdc, sl.
- R4: (ch 2, hdc), (3 hdc, hdc inc) 5 times, 9 sc, sl.
- R5: (ch 1, sc), hdc, (hdc, dc), dc inc, (dc, hdc), sl, 7 hdc, hdc inc, 7 hdc, sl, (hdc, dc), dc inc, (dc, hdc), 10 sc, sl.
How to Crochet a Main Body
- R1: Starting from the 4th round of the head, (ch 4, sk 3, sl) 7 times, ch 2, hdc.
- R2: (Ch 3, bo with 2 dc, ch 2), (5 dc), [(ch 2, bo, ch 3, bo, ch 2), (5 dc)] 3 times, (ch 2, bo, ch 1, hdc), sl in top of beginning ch-3.
- R3: (Ch 3, bo with 2 dc, ch 2), dc inc, (5 dc), dc inc, [(ch 2, bo, ch 3, bo, ch 2), dc inc, (5 dc), dc inc] 3 times, (ch 2, bo, ch 1, hdc), sl in top of beginning ch-3.
- R4: (Ch 3, bo with 2 dc, ch 2), dc inc, (9 dc), dc inc, [(ch 2, bo, ch 3, bo, ch 2), dc inc, (9 dc), dc inc] 3 times, (ch 2, bo, ch 1, hdc), sl in top of beginning ch-3.
- R5: (Ch 3, bo with 2 dc, ch 2), dc inc, (13 dc), dc inc, [(ch 2, bo, ch 3, bo, ch 2), dc inc, (13 dc), dc inc] 3 times, (ch 2, bo, ch 1, hdc), sl in top of beginning ch-3.
- R6: (Ch 3, bo with 2 dc, ch 2), dc inc, (17 dc), dc inc, [(ch 2, bo, ch 3, bo, ch 2), dc inc, (17 dc), dc inc] 3 times, (ch 2, bo, ch 1, hdc), sl in top of beginning ch-3.
- R7: (Ch 3, bo with 2 dc, ch 2), dc inc, (21 dc), dc inc, [(ch 2, bo, ch 5, bo, ch 2), dc inc, (21 dc), dc inc] 3 times, (ch 2, bo, ch 1, hdc), sl in top of beginning ch-3. Fasten off, weave in ends.
How to Crochet Ears (Make 2)
- R1: Ch 12, 10 sc in 2nd ch from hook, (5 sc) in last ch, 10 sc along other side, sl.
- R2: Ch 1, 12 sc, (sc, sc, picot, sc), 11 sc, sc inc, sc, sl.
- R3: Ch 1, 13 sc, sc, (4 sc), sc, 12 sc, sc inc, sl.
How to Crochet Cheeks (Make 2)
- Magic ring, 6 sc, sl, fasten off, weave in ends.
Bunny Granny Square Style II Assembly
- Embroider mouth, attach ears, eyes, and cheeks with a small amount of glue. Weave in all remaining ends.
Notes
Crochet Tips: Keep your tension consistent throughout, especially when working the front loops only in the head section. This helps create a well-defined bunny face shape.
Assembly Tips: When assembling your Bunny Granny Square, attach ears symmetrically and secure with small stitches before gluing. Position cheeks slightly below eye level for the cutest expression.
- Funny Pictures
-
 Feline Memes to Feel Better
-
 Best Funny Pics of the Day Especially for You
-
 Pictures That Have No Right to be This Funny
- Recipes
-
 Strawberry Banana Bread
-
 Baked Beans and Hot Dogs with Biscuit Topping
-
 Roasted Rosemary Lemon Chicken Breasts
- Lifehacks
-
 Crochet Tutorial: Flower Puff Stitch
-
 8 Basic Crochet Tips
-
 7 Crochet Tips And Tricks
- Crochet Ideas
-
 Crochet Snorlax Plushie Doll
-
 Crochet Cat in 1 Row
-
 Crochet Beautiful Penguin Toy
- DIY
-
 Popsicle Stick and Jingle Bell Christmas Tree Ornament
-
 Upcycled Mason Jar Chicken Vase
-
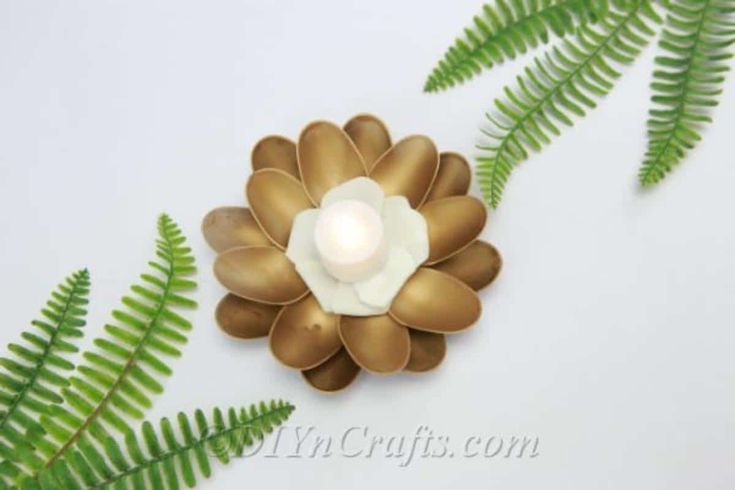 Make A Candle Holder From Plastic Spoons
- Knitting Ideas
-
 Knitted Newborn Striped Beanie
-
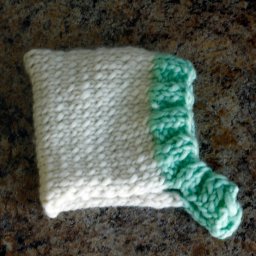 Knitted Chunky Newborn Pixie Hat
-
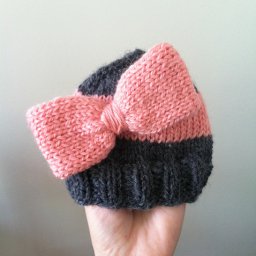 Knitted Big Bow Hat