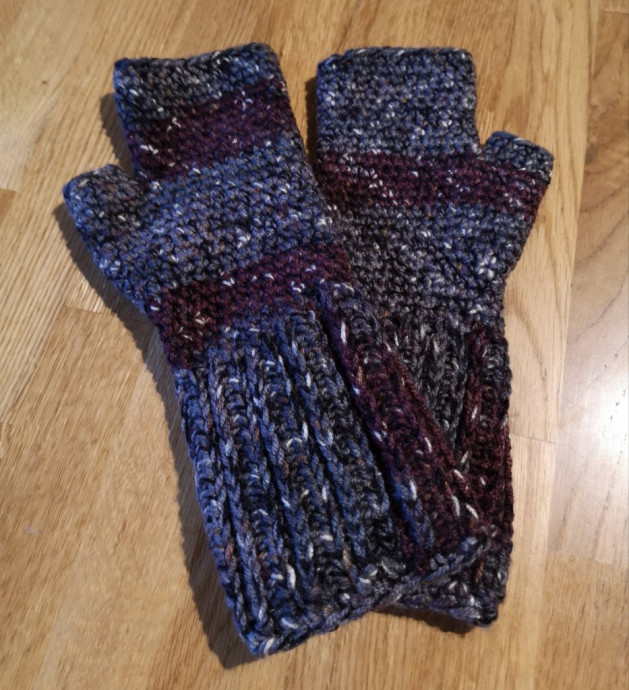
Crochet Ribbed Cuff Fingerless Gloves

Crochet ribbed cuff fingerless gloves are a cozy and stylish accessory perfect for keeping your hands warm while still being able to use your fingers freely. The ribbed cuff adds a touch of elegance to these gloves, making them a lovely addition to any outfit. Whether you're out for a brisk walk or simply typing away on your computer, these fingerless gloves are not only practical but also fashionable. With their versatile design, they are sure to become your go-to accessory for chilly days ahead!
Materials Needed
- Chunky yarn
- 4mm hook
- All crochet terms are in the US style
Crochet Terms
- Sc = single crochet
- Hdc = half double crochet
- 2sc = 2 single crochets into the next stitch
Ribbed Cuff
- Chain 19, hdc each chain starting from the 2nd chain from the hook. (18)
- Chain 1 (turning chain) working only in the front loop, hdc into each stitch. (18)
- Chain 1 (turning chain) working only in the back loop, hdc into each stitch. (18)
- Repeat rows 2 and 3 eight times. (18)
- Chain 1 (turning chain) working only in the front loop, hdc into each stitch. (18)
- Fold the piece in half so the wrong side is facing out, use slip stitches to join the top and bottom of the piece together. Turn it around so the right side is facing out. You will now be working in continuous circles to complete the rest of the glove.
Main Body of Glove
- Work 26 sc stitches evenly along the top of the glove. (26)
- Sc into each stitch. (26)
- Sc into the next 12 stitches, 2sc, 2sc, sc into the last 12 stitches. (28)
- Sc into each stitch. (28)
- Sc into the next 12 stitches, 2sc, sc, sc, 2sc, sc into the last 12 stitches. (30)
- Sc into each stitch. (30)
- Sc into the next 12 stitches, 2sc, sc into the next 4 stitches, 2sc, sc into the last 12 stitches. (32)
- Sc into each stitch. (32)
- Sc into the next 12 stitches, 2sc, sc into the next 6 stitches, 2sc, sc into the last 12 stitches. (34)
- Sc into each stitch. (34)
- Sc into the next 12 stitches, 2sc, sc into the next 8 stitches, 2sc, sc into the last 12 stitches. (36)
- Sc into each stitch for rows 32-36. (36)
- Sc into the next 13 stitches, skip 10 stitches, sc into the last 13 stitches (this creates the thumb hole). (26)
- Sc into each stitch for rows 38-47. (26)
Thumb
- Join back onto any stitch around the thumb hole, sc into each stitch. (10)
- Sc into each stitch for rows 2-3. (10)
To tidy up the bottom edge of the glove, join in any place and make 26 sc stitches evenly along the bottom.
The finished gloves look great and are very practical.
No comments
Write a comment


