Crocheting a Beautiful Strawberry

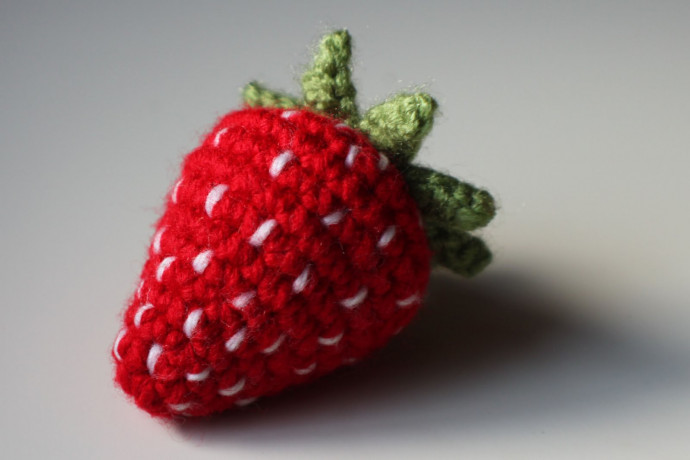
Crocheting a beautiful strawberry can be such a delightful and rewarding project! The vibrant red yarn coupled with the intricate stitching can make for a charming addition to any crafting collection. With a hint of green for the stem and tiny black "seeds" worked in, the finished strawberry can look incredibly realistic. Whether you're a seasoned crocheter or just starting out, this project is sure to bring a smile to your face as you create something so whimsical and sweet. Don't forget to showcase your crochet masterpiece with pride! Happy crocheting!
Materials
- G Hook
- F Hook
- Worsted weight yarn in red, green, and white
- Tapestry needle
Fruit
With G Hook
RND 1: 5 Sc in magic loop.
RND 2: 2 SC in each st around (10 sts)
RND 3: SC around (10 sts)
RND 4: *SC 1, 2 SC in next st* rep 5 times (15 sts)
RND 5: SC around (15 sts)
RND 6: *SC 2, 2 SC in next st* rep 5 times (20 sts)
RND 7: SC around (20 sts)
RND 8: *SC 3, 2 SC in next st* rep 5 times (25 sts)
RND 9-RND 11: SC around (25 sts)
RND 12: *SC 3, dec 1* rep 5 times (20 sts)
At this point, hold live stitch with a safety pin. Start to embroider seeds, spacing them evenly around the fruit, until you reach the live stitch. Stuff with fiber fill, leaving a bit of room at the top. Pick stitch back up.
RND 13: *SC 2, dec 1* rep 5 times (15 sts)
RND 14: *SC 1, dec 1* rep 5 times (10 sts)
Finish embroidering seeds, then stuff completely with fiber fill.
RND 15: SC in every other st, bind off. (5 sts) Since the top of my fruit will be hidden by leaves, I tie a strong knot and then weave in the ends.
Leaves
With F Hook
RND 1: 5 sc in magic loop
RND 2: 2 sc in each st, sl st to close round (10 sts)
RND 3: Ch 5, sl st in second ch from hook, sc in next ch, hdc in next two chs, sl st in next st. Repeat around until you have 10 leaves. Bind off, leaving a long tail for sewing. Attach leaves to the top of the strawberry, and weave in ends.
All done!
- Funny Pictures
-
 Hilarious Memes for Those Bored to Tears
-
 Weekly Treat of Funniest Parenting Memes for Good Laugh out Loud Right Now
-
 Really Funny Pics to End These Weekend Perfectly
- Recipes
-
 Crispy Baked Avocado Fries
-
 Scrambled Chickpea and Spinach Pitas
-
 Cinnamon Pancakes
- Lifehacks
-
 Crochet Basics: Aligned Cobble Stitch
-
 Brick Stitch Crochet Tutorial
-
 Crochet Basics: Wattle Stitch
- Crochet Ideas
-
 Crochet Snorlax Plushie Doll
-
 Crochet Beautiful Penguin Toy
-
 Crochet Tiny Snowman
- DIY
-
 DIY Santa Craft For Kids
-
 Paper Plate Angel Craft
-
 Upcycled Mason Jar Chicken Vase
- Knitting Ideas
-
 Knitted Bridger Cowl
-
 Knitted Keepsake Bag
-
 Knitted Cutie Cupcake Dolls