The Ultimate Guide to Crocheting a Cozy Head Wrap


Crochet Head Wrap Overview
Crochet head wraps are the perfect blend of cozy and chic, making them a must-have accessory for any season. Whether you're looking to keep your ears warm in the winter or add a bohemian touch to your summer outfit, these versatile head wraps have got you covered.
With a wide range of colors and patterns to choose from, you can easily find one that suits your style and personality. Not only are they stylish, but they are also practical, keeping your hair out of your face on windy days or when you're on the go. So, treat yourself to a crochet head wrap and elevate your look with a touch of handmade charm!
Crochet Instructions
With an H hook and worsted weight yarn, ch 4.
Row Instructions
RND 1: Row 1: dc in 3rd ch from hook. dc in next ch and ch 2, turn.
RND 2: Row 2: two dc in each st. ch 2, turn.
RND 3: Row 3: dc in first st. two dc in each of next 2 st. dc last st. ch 2, turn.
RND 4: Row 4: dc in each st. ch 2, turn.
RND 5: Row 5: dc in each of first 2 st. two dc in each of next two st. dc in each of last 2 st. ch 2, turn.
RND 6: Row 6: dc in each of first 3 st. two dc in each of next two st. dc in each of last 3 st. ch 2, turn.
RND 7: Row 7: dc in each of first 4 st. two dc in each of next two st. dc in each of last 4 st. ch 2, turn.
RND 8: Row 8: dc in each of first 5 st. two dc in each of next two st. dc in each of last 5 st. ch 2, turn.
RND 9: Row 9: dc in each of first 6 st. two dc in each of next two st. dc in each of last 6 st. ch 2, turn.
RND 10: Row 10: dc in each of first 7 st. two dc in each of next two st. dc in each of last 7 st. ch 2, turn.
RND 11: Row 11: dc in each of first 8 st. two dc in each of next two st. dc in each of last 8 st. ch 2, turn.
RND 12: Row 12: *dc in each st. across, ch 2, turn*
RND 13-17: Rows 13-17: (rep * - *)
RND 18: Row 18: dc in each of first 8 st. dc next 2 sts tog. dc next 2 sts tog. dc in each of last 8 st. ch 2, turn.
RND 19: Row 19: dc in each of first 7 st. dc next 2 sts tog. dc next 2 sts tog. dc in each of last 7 st. ch 2, turn.
RND 20: Row 20: dc in each of first 6 st. dc next 2 sts tog. dc next 2 sts tog. dc in each of last 6 st. ch 2, turn.
RND 21: Row 21: dc in each of first 5 st. dc next 2 sts tog. dc next 2 sts tog. dc in each of last 5 st. ch 2, turn.
RND 22: Row 22: dc in each of first 4 st. dc next 2 sts tog. dc next 2 sts tog. dc in each of last 4 st. ch 2, turn.
RND 23: Row 23: dc in each of first 3 st. dc next 2 sts tog. dc next 2 sts tog. dc in each of last 3 st. ch 2, turn.
RND 24: Row 24: dc in each of first 2 st. dc next 2 sts tog. dc next 2 sts tog. dc in each of last 2 st. ch 2, turn.
RND 25: Row 25: dc in each st. across. ch 2, turn.
RND 26: Row 26: dc in first st. dc next 2 sts tog. dc next 2 sts tog. dc in last st. ch 2, turn.
RND 27: Row 27: dc next 2 sts tog. dc next 2 sts tog.
Finish off with a 1" button of your choice on one end. It will fit through the dc on the other end nicely. I used a needle and thread to "re-enforce" the button hole.
- Funny Pictures
-
 Feline Memes to Feel Better
-
 Best Funny Pics of the Day Especially for You
-
 Pictures That Have No Right to be This Funny
- Recipes
-
 Strawberry Banana Bread
-
 Kraut-Tots
-
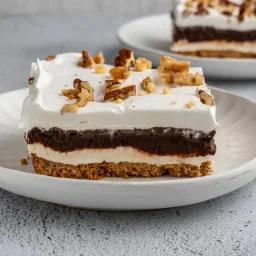 Chocolate Delight Dessert
- Lifehacks
-
 7 Crochet Tips & Tricks
-
 Raspberry Crochet Stitch
-
 Crochet Tutorial: Popcorn Stitch + Printed PDF
- Crochet Ideas
-
 Crochet Snorlax Plushie Doll
-
 Crochet Cat in 1 Row
-
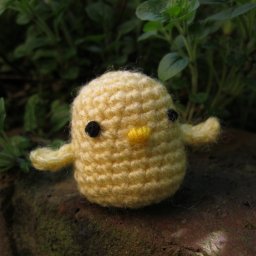 Crochet Tiny Chick Amigurumi
- DIY
-
 Popsicle Stick and Jingle Bell Christmas Tree Ornament
-
 Upcycled Mason Jar Chicken Vase
-
 Make A Candle Holder From Plastic Spoons
- Knitting Ideas
-
 Knitted Newborn Striped Beanie
-
 Knitted Chunky Newborn Pixie Hat
-
 Knitted Big Bow Hat