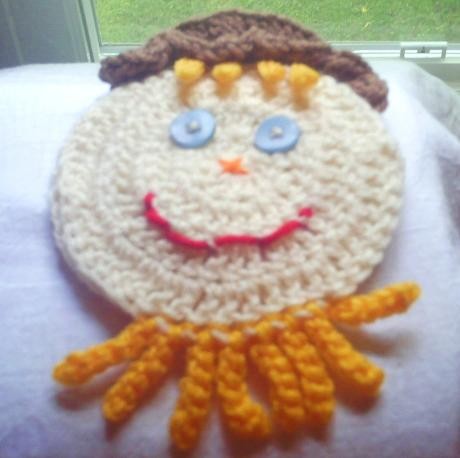
Crochet Scarecrow Towel Topper Tutorial

The Crochet Scarecrow Towel Topper is a delightful and whimsical addition to any kitchen or bathroom. This charming creation combines both functionality and creative design, making it a perfect choice for adding a touch of seasonal charm to your home. The scarecrow design brings a cheerful and welcoming vibe, making your space feel warm and inviting. Not only is this towel topper a fun and practical accessory, but it also serves as a unique conversation starter. Whether you're looking to spruce up your own living space or searching for a thoughtful gift for a friend, the Crochet Scarecrow Towel Topper is sure to bring smiles and a touch of autumn magic to any room.
Materials Needed
- Scarecrow Towel Topper- Aran, Brown, Gold/Yellow
- Small amounts: Red, Orange
- I hook
- 3 Buttons
- 1 small plastic kid's bracelet (used to be called Jelly Bracelets) or a wire ring 3"
- Yarn needle
Front of the Scarecrow
Aran Yarn and I hook:
- Chain 4
- 12 DC into 4 chain from hook. Join with slip stitch. (12 DC)
- Chain 3
- 2 DC each stitch around. Join with Slip Stitch (24 DC)
- Chain 3
- 2 DC in first stitch * 1 DC in next stitch, 2 DC in next stitch. Continue around * Join with slip stitch. (36 DC)
- Chain 3
- 2 DC in first stitch * 1 DC in next 2 stitches, 2 DC in the next stitch. Continue around * Join with slip stitch (48 DC)
- Fasten off yarn and weave in ends.
Sew on 2 buttons for eyes, a small orange nose, and a red mouth.
Straw/Hair
Attach gold/yellow yarn to the top of scarecrow.
- Chain 6. Slip stitch in each chain. Slip stitch to top.
- *Slip stitch in next stitch.
- Slip stitch in next stitch, Chain 6, slip stitch in each chain, slip stitch in the same stitch.*
- Repeat *-* twice.
- Fasten off. Weave in ends.
Attach gold/yellow yarn to the bottom of scarecrow.
- Chain 6. Slip stitch in each chain. Slip stitch to top.
- *Slip stitch in next stitch.
- Slip stitch in next stitch, Chain 6, slip stitch in each chain, slip stitch in the same stitch.*
- Repeat *-* 6 times.
- Fasten off. Weave in ends.
Back of the Scarecrow
Aran Yarn:
- Chain 4
- 12 DC into 4 chain from hook. Join with slip stitch. (12 DC)
- Chain 3
- 2 DC each stitch around. Join with Slip Stitch (24 DC)
- Chain 3
- 2 DC in first stitch * 1 DC in next stitch, 2 DC in next stitch. Continue around * Join with slip stitch. (36 DC)
- Chain 3
- 2 DC in first stitch * 1 DC in next 2 stitches, 2 DC in the next stitch. Continue around * Join with slip stitch (48 DC)
- Fasten off yarn and leave a long tail to sew back to front.
Towel Ring
With aran yarn:
- Attach yarn to ring/bracelet.
- Single crochet around the ring/bracelet.
- Chain 1
- Slip stitch around each stitch.
- Fasten off and leave a long tail to attach to the scarecrow.
- Sew top half of Ring/Bracelet to the 3rd round of the back of the scarecrow.
Place the front and back of the Scarecrow together and sew halfway around, leaving the bottom open.
Hat
Attach brown yarn to top of scarecrow. Evenly crochet 11 single crochet across the top.
- Turn chain 2, 3 hdc in each of the back loops of each stitch.
- Turn Chain 2. 1 HDC in each of the unworked loops. Slip stitch to beginning.
- Fasten off. Weave in ends.
Hanger
Attach brown yarn to top of scarecrow behind hat.
- Evenly crochet 7 single crochet across.
- *Turn Chain 2 HDC across row (7 hdc).
- Repeat * for 4 rows.
- Turn Chain 2 HDC, decrease the first 2 stitches, HDC the next 3 stitches, HDC decrease the last 2 stitches (5 hdc).
- Turn Chain 2 HDC in each stitch across row (5 hdc).
- Turn Chain 2 HDC in the first stitch, Chain 2, skip the next 2 stitches, HDC in the last 2 stitches (3 hdc, 2 chains).
- Turn Chain 1, SC in each stitch across including chain 2. (5 sc).
- Fasten off and weave in ends.
- Sew button to bottom of hanger.
Fold hanger in half and button.


