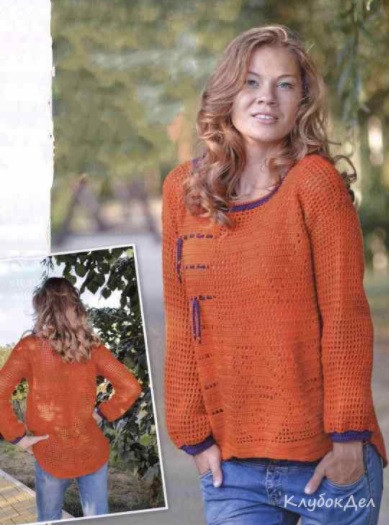
Crochet Pattern for a Chic Pullover with Fringe and Beads

Materials Needed
You’ll need:
- 500g of orange Casmira yarn (100% wool; 300m/100g);
- 20g of the same yarn, but in dark-violet color;
- Crochet hook size 2;
- 6 wooden beads.
Size: S.
Note: Make pattern design in natural size.
Instructions
Front
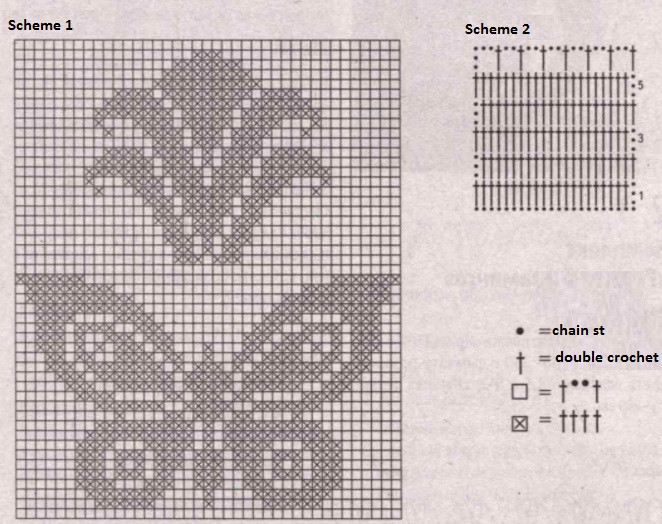
Make a chain of 53 cm long and 1 row of double crochets. Then, divide your work into 2 parts: one part – 32 cm wide, another part – 21 cm wide. Work the first part according to scheme 1, and the second part according to scheme 2. At 48 cm height, leave the central 16 cm for the neck-hole and continue making each shoulder with filet net, decreasing 1 square in every row. Fasten the neck-hole according to the pattern design. The depth of the arm-hole is 10 cm.
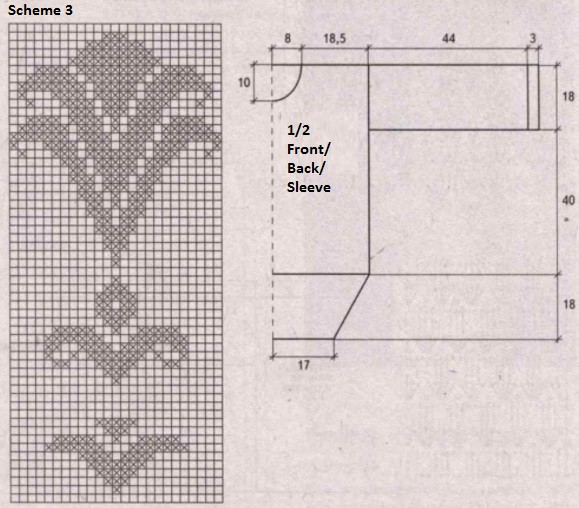
Back
Make a chain of 17 cm long and work with filet net, following scheme 3 in the center. Increase 3 stitches in every row from both sides. Crochet 12 rows = 18 cm with increases. Then, continue working according to the scheme for 58 cm more. Make side and shoulder chamfers, leaving 18 cm from each side for the arm-hole.
Sleeves
Make chain stitches along the arm-holes line and work 44 cm with circular rows of filet net.
Fringe
Fasten the cuffs of the sleeves with 3 cm of single crochets using violet yarn. Fasten the neck-hole with puff double crochets in violet yarn, then with single crochets in orange yarn. Divide the bottom edge of the front into 3 parts: 17.5 cm from one side, the central 18 cm, and 17.5 cm from the other side. Fasten the whole bottom edge of the pullover (including the bottom of the back) with 3 rows of double crochets, and the central 18 cm with half crochets. Make 3 chains of 40 cm long with violet yarn and insert them in the upper holes of the filet net, as shown in the photo. Place wooden beads at the ends of the chains.