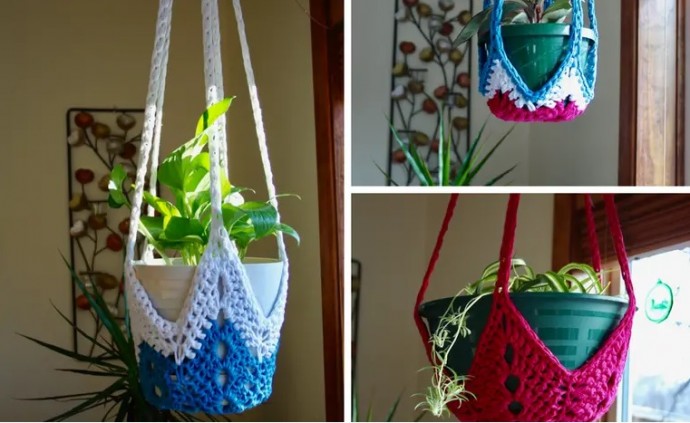
Crochet Plant Hangers: Small and Large Versions Made Easy

You’ll Need
Lion Brand Fast Track (Super Bulky):
- Pink Convertible (less than 1 skein);
- Airstream White (less than 1 skein);
- Cruise Ship Aqua (less than 1 skein);
- Crochet hook 9 mm;
- 2 in wood craft ring or 4 in wood craft ring;
- Needle for weaving in ends.
Size
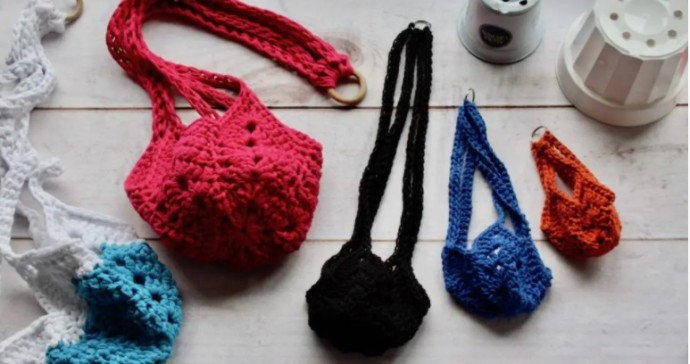
- Small: 25 in total length fits 4 in to 6 in pots
- Large: 36 in total length fits 6 in to 12 in pots
Instructions
Small and Large Plant Hangers
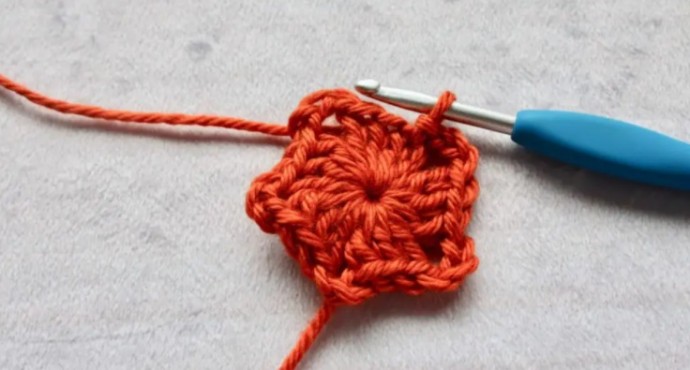
With desired color, make a MR, CH2.
Round 1: *3DC, CH3,* 5 times into the MR, SS to the first stitch of the round. (15DC or [5 clusters], 5-CH3 spaces)
You should have 3 CH3 spaces and 15DC.
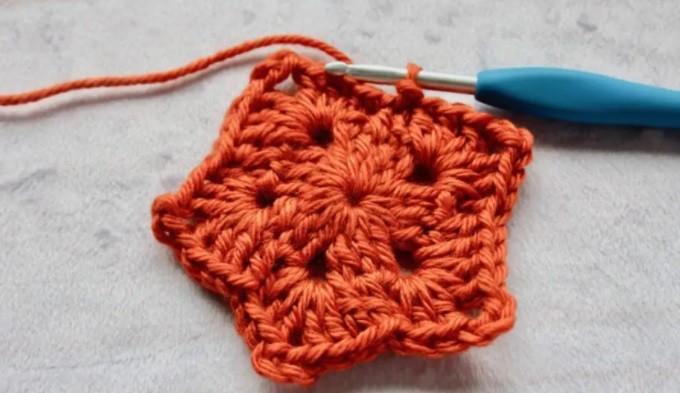
Round 2: CH1, skip the stitch you SS into to join round 1, HDC in the next stitch, skip next stitch, *in the CH3 space, (3DC, CH3, 3DC), skip the next stitch, HDC in the next stitch, skip the next stitch,* 4 times, in the CH3 space, (3DC, CH3, 3DC), skip the next stitch, SS to the first stitch of the round. (30DC or [10 clusters], 5-CH3 spaces, 5HDC)
Be sure to place 1HDC in the center DC stitch.
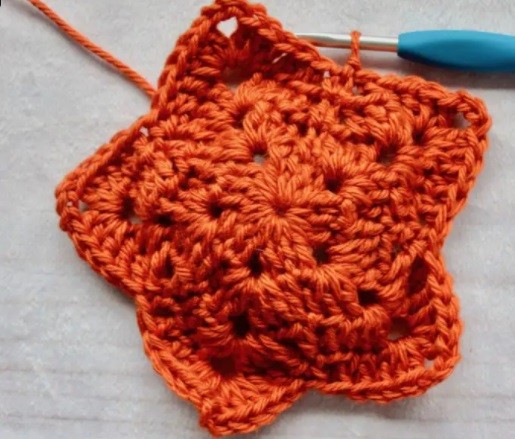
Round 3: CH1, HDC in the same stitch as the SS, skip next 2 stitches, *DC in the next stitch, in the CH3 space, (3DC, CH3, 3DC), DC the next stitch, skip 2 stitches, HDC in the next stitch, skip the next 2 stitches,* 4 times, in the CH3 space, (3DC, CH3, 3DC), DC in the next stitch, skip the next 2 stitches, SS to the first stitch of the round. (40DC or [10 clusters, and 10DC], 5-CH3 spaces, 5HDC) Stop here for the small hanger, continue for large hanger.
From here, make sure you skip 2 stitches before and after your HDC stitches, then DC in each stitch until you reach the next CH3 space.
Large Plant Hanger
Round 4: CH1, HDC in the same stitch as the SS, skip next 2 stitches, *DC in the next 2 stitches, in the CH3 space, (3DC, CH3, 3DC), DC the next 2 stitches, skip 2 stitches, HDC in the next stitch, skip the next 2 stitches,* 4 times, in the CH3 space, (3DC, CH3, 3DC), DC in the next 2 stitches, skip the next 2 stitches, SS to the first stitch of the round. (50DC or [10 clusters, and 20DC], 5-CH3 spaces, 5HDC)
Round 5: CH1, HDC in the same stitch as the SS, skip next 2 stitches, *DC in the next 3 stitches, in the CH3 space, (3DC, CH3, 3DC), DC the next 3 stitches, skip 2 stitches, HDC in the next stitch, skip the next 2 stitches,* 4 times, in the CH3 space, (3DC, CH3, 3DC), DC in the next 3 stitches, skip the next 2 stitches, SS to the first stitch of the round. (60DC or [10 clusters, and 30DC], 5-CH3 spaces, 5HDC)
Begin Shaping Upwards: Small Hanger
To shape the hangers to fit around a pot, we simply continue to grow our star, replacing the HDC stitch with a SC stitch.
Round 4: CH1, SC in the same stitch as the SS, skip next 2 stitches, *DC in the next 2 stitches, in the CH3 space, (3DC, CH3, 3DC), DC the next 2 stitches, skip 2 stitches, SC in the next stitch, skip the next 2 stitches,* 4 times, in the CH3 space, (3DC, CH3, 3DC), skip the next 2 stitches, SS to the first stitch of the round. (50DC or [10 clusters, and 20DC], 5-CH3 spaces, 5SC)
Simply replace the HDC with a SC to shape upwards.
Begin Shaping Upwards: Large Hanger
Round 6: CH1, SC in the same stitch as the SS, skip next 2 stitches, *DC in the next 4 stitches, in the CH3 space, (3DC, CH3, 3DC), DC the next 4 stitches, skip 2 stitches, SC in the next stitch, skip the next 2 stitches,* 4 times, in the CH3 space, (3DC, CH3, 3DC), DC in the next 4 stitches, skip the next 2 stitches, SS to the first stitch of the round. (70DC or [10 clusters, and 40DC], 5-CH3 spaces, 5SC)
Round 7: CH1, SC in the same stitch as the SS, skip next 2 stitches, *DC in the next 5 stitches, in the CH3 space, (3DC, CH3, 3DC), DC the next 5 stitches, skip 2 stitches, SC in the next stitch, skip the next 2 stitches,* 4 times, in the CH3 space, (3DC, CH3, 3DC), DC in the next 5 stitches, skip the next 2 stitches, SS to the first stitch of the round. (80DC or [10 clusters, and 50DC], 5-CH3 spaces, 5SC)
Supports and Ring Attachment
For Small Hanger
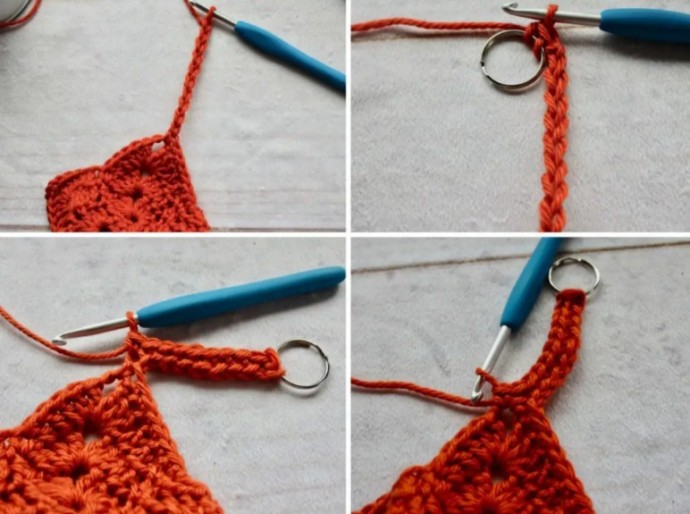
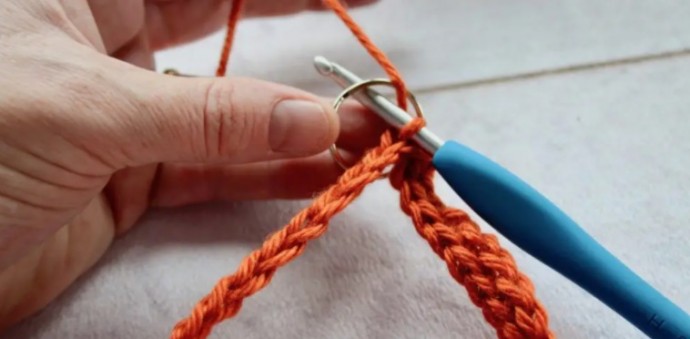
Round 5: CH1, SC in the same stitch as the SS, SC in the next 5 stitches, *in the CH3 space, SC once, CH37, working back down the CH, skip the first CH space, SC over the craft ring and into the 2nd CH space, SC in the remaining 35CH spaces, SC in the CH3 space, SC in the next 11 stitches,* 4 times, in the CH3 space, SC once, CH37, working back down the CH, skip the first CH space, SC over the craft ring and into the 2nd CH space, SC in the remaining 35CH spaces, SC in the CH3 space, SC in the next 6 stitches, SS to the first stitch of the round, fasten off and weave in ends. (65SC, 5-36SC CHs)
For Large Hanger
Round 8: CH1, SC in the same stitch as the SS, SC in the next 8 stitches, *in the CH3 space, SC once, CH37, working back down the CH, skip the first CH space, SC over the craft ring and into the 2nd CH space, SC in the remaining 35CH spaces, SC in the CH3 space, SC in the next 17 stitches,* 4 times, in the CH3 space, SC once, CH37, working back down the CH, skip the first CH space, SC over the craft ring and into the 2nd CH space, SC in the remaining 35CH spaces, SC in the CH3 space, SC in the next 9 stitches, SS to the first stitch of the round, fasten off and weave in ends. (100SC, 5-36SC CH’s)
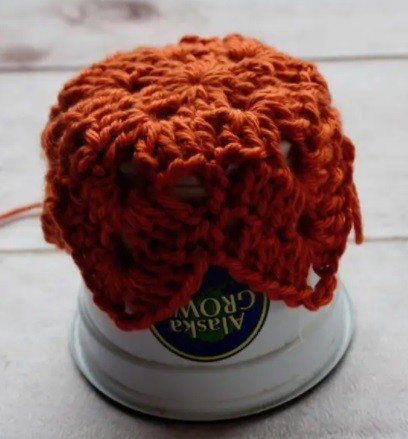
Building the Base
First, we start making a star pattern. You want to make the star so it fits around the bottom of your base. Crochet the never-ending star for as many rounds until the inverted peaks cover the base of your pot.
Depending on your yarn and hook, you may need to grow more or less to cover the base.
Once you have the base sized for your pot, you can begin building the star upwards to create the sides.
To do this, you simply follow the same star pattern as you would to grow the star; the only change is you will replace the HDC stitch with a SC stitch.
Continue adding rounds to your star, replacing each HDC stitch with a SC stitch until your star comes up 2/3 from the top.
Use the star pattern with the SC stitch until the star is 2/3 of the way up the pot.
Adding the Hangers
The final round should have all SC stitches, and there is no need to skip stitches or keep count; simply SC in each stitch. When you reach the CH3 spaces, you will add in your CH, connect it to the ring, and SC back down the CH. Be sure to place a SC in the CH3 space before and after your long CH.