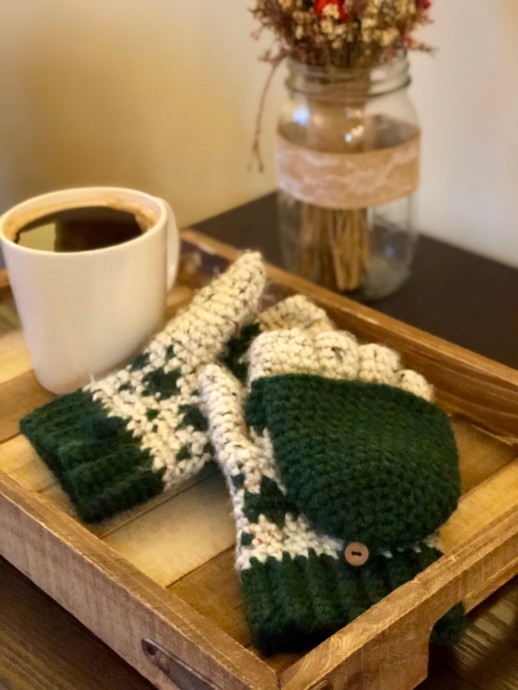
How to Crochet Your Own Glittens

You’ll Need:
2 skeins of Lion Brand’s Woolspun in Evergreen (approximately 144 yards or 113 grams);
1 skein of Loop and Threads Charisma Tweed in Cream (approximately 106 yards or 83 grams);
Crochet hook 5.5 mm;
2 buttons.
Measurements
Height to the Top of Cap: 10″
Height to Fingers: 7.5″
Width: 4″ across
Stitches Control
15 sts x 15 rows = 4” x 4”.
Special Stitches
- Increase: Single crochet 2 into 1 stitch
- Decrease: Single crochet 2 stitches together
Instructions
Ribbing
Foundation: Ch 8, turn
Row 1: Starting in the 1st ch from your hook, sc 7 in blo, turn
Row 2-30: Ch 1, sc 7 in blo, fasten off. Use the tail to join the first and last row together to make a cylinder.
Palm/ Finger
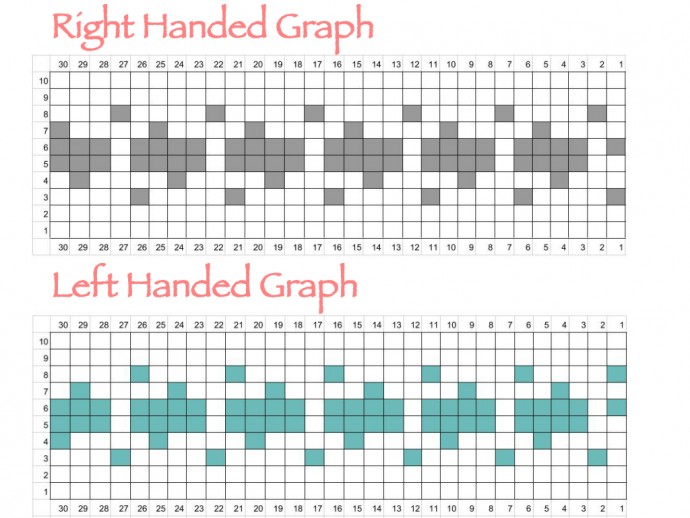
For this section, you will be following the tapestry design below. All the dark squares are worked in your primary color, while all white squares will be your secondary color. To compensate for this, each row has been shifted (to the left if you are right-handed and to the right if you are left-handed). When switching between the colors, you will actually begin switching in the stitch preceding the stitch you want to be a different color.
Round 1: Attach 2nd color, ch 1, pick up sc 30 around the top of the cuff cylinder.
Round 2-8: sl st, ch 1, sc into the same st, follow tapestry design.
Round 9 (left hand glitten): in secondary color: sl st, ch 1, sc 3, ch 7, sk 7, sc 20.
Round 9 (right hand glitten): in secondary color: sl st, ch 1, sc 20, ch 7, sk 7, sc 3.
Round 10: in secondary color: sl st, ch 1, sc around.
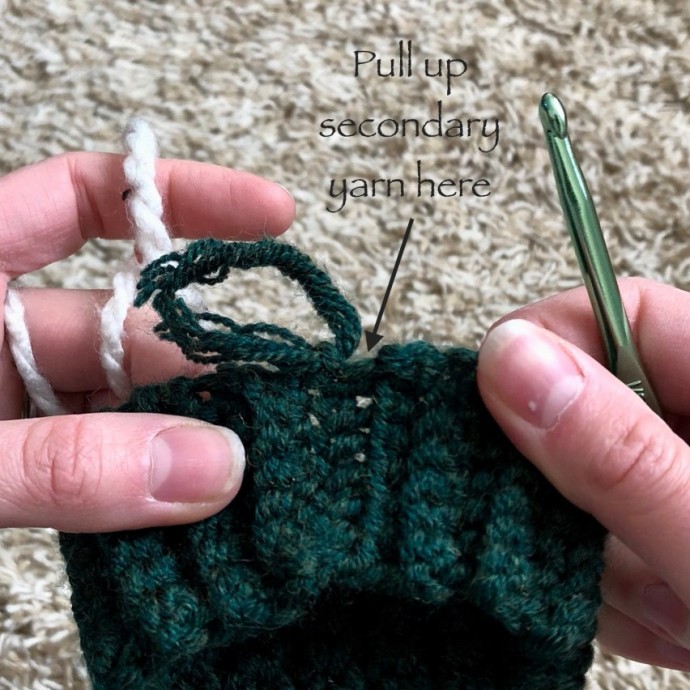
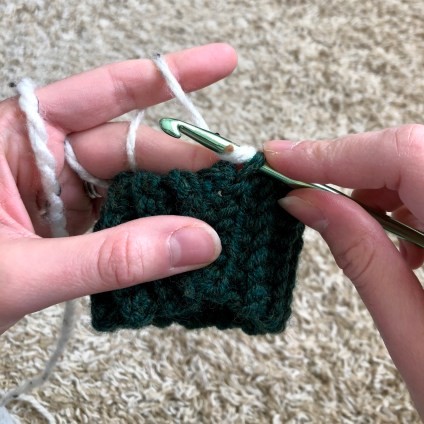
Round 11-14: sl st, p/u primary color yarn and drop secondary. ch 1, sc around.
Round 15: p/u secondary yarn and drop primary. sl st, ch 1, sc around, fasten off.
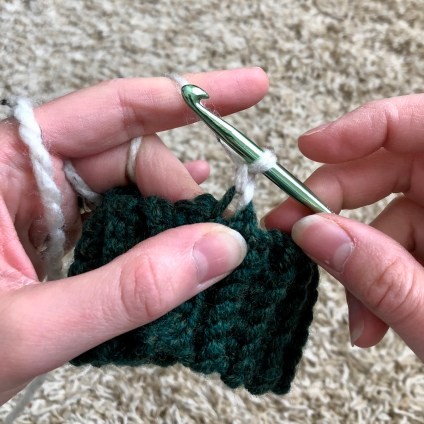
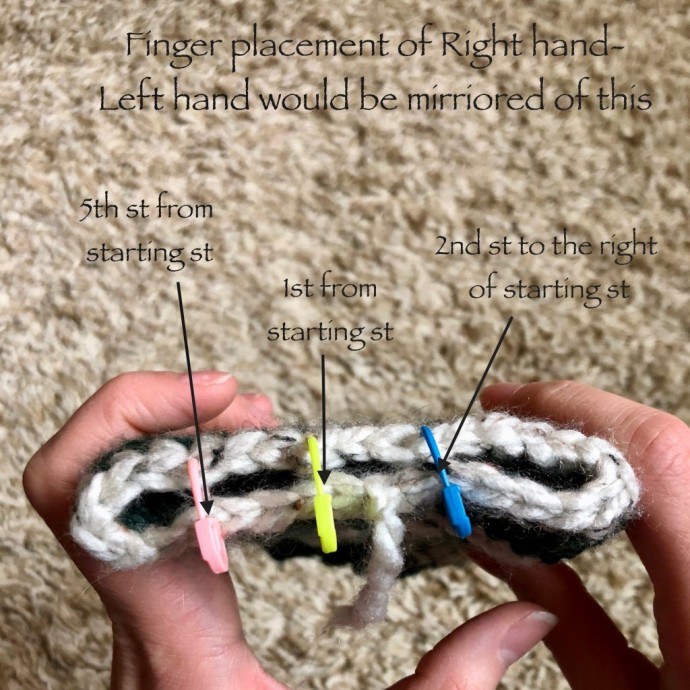
From here, you will begin working the pattern for your fingers. I recommend adding stitch markers in the starting stitch for each finger before you begin, as to better track your starting point.
Fingers and Thumb - Right Hand
*Please note: each finger is worked in continuous rounds (vs. the joined rounds used in the pattern for the palm).
Pinky Finger
Foundation: sk 4 sts from first sc of palm, pu secondary yarn and sc 8 working around, ch 3 and connect back to first sc created of this finger. (11)
Round 1: sc 2, decrease, sc 2, decrease, sc 3 in blo of the ch 3 from foundation (9)
Round 2-4: sc around, fasten off and weave in ends. (9)
Ring Finger
Foundation: sk 1 st from first sc of palm, pu secondary yarn and sc 3, work 3 in flo of ch sts from pinky finger, sc 3 (working along backside of palm section), ch 3 and connect to first sc created for this finger (12)
Round 1: sc 9, sc 3 in blo of ch sts (12)
Round 2-4: sc around, fasten off and weave in ends. (12)
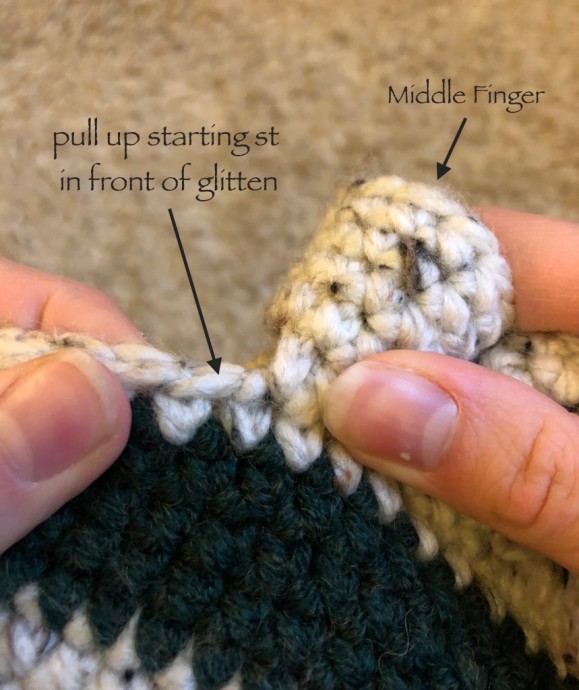
Middle Finger
Foundation: pu secondary yarn in 2nd sc to the right of the starting st of the palm sc 3, sc 3 in flo of ch sts from ring finger, sc 3 (working along backside of palm section), ch 3 and connect to first sc created for this finger (12)
Round 1: sc 9, sc 3 in blo of ch sts (12)
Round 2-4: sc around, fasten off and weave in ends. (12)
Index Finger
Foundation: flip glitten over and begin working along the back side of the palm section into the 1st st to the left of where the middle finger ends. sc 10, sc 3 in flo of ch sts from middle finger. (13)
Round 1-4: sc around, fasten off and weave in ends. (13)
Thumb
Foundation: pu secondary yarn towards middle most st of thumb hole. Work 15 sc around.
Round 1: sc around (15)
Round 2: *sc 3, decrease*, repeat from * around (12)
Round 3-6: sc around (12)
Round 7: *sc 2, decrease*, repeat from * around (9)
Round 8-9: sc around (9)
Round 10: *sc 1, decrease*, repeat from * around (6)
Round 11: decrease 3 times, fasten off and weave in ends. (3)
Fingers and Thumb - Left Hand
*Please note: each finger is worked in continuous rounds (vs. the joined rounds used in the pattern for the palm).
Index Finger
Foundation: sk 1 st, pu secondary yarn and sc 10 around, ch 3 and connect to first sc of this finger (13)
Round 1: sc 10, sc 3 in blo of ch sts (13)
Round 2-4: sc around, fasten off and weave in ends (13)
Middle Finger
Foundation: pu secondary yarn in 2nd sc to the right of the starting st of palm, sc 3, sc 3 in flo of ch from index finger, sc 3 (working along back side of palm), ch 3 and connect to starting sc of this finger. (12)
Round 1: sc 9, sc 3 in blo of ch sts (12)
Round 2-4: sc around, fasten off and weave in ends (12)
Ring Finger
Foundation: pu secondary yarn in 5th sc to the right of starting st of palm (or 3 sc to the right of where your middle finger ended), sc 3, sc 3 in flo of ch from middle finger, sc (working along back side of palm), ch 3 and connect to starting sc of this finger (12).
Round 1: sc 9, sc 3 in blo of ch sts (12)
Round 2-4: sc around, fasten off and weave in ends. (12)
Pinky Finger
Foundation: flip glitten over and begin working on back side of glitten by pulling up secondary yarn in first sc to the left of where your ring finger ended (worked similar to index finger of right hand), sc 8 around, sc 3 into flo of ch from ring finger. (12)
Round 1: sc 2, decrease, sc 2, decrease, sc 3 (9)
Round 2-4: sc around, fasten off and weave in ends. (9)
Thumb
Foundation: pu secondary yarn towards middle most st of thumb hole. Work 15 sc around.
Round 1: sc around (15)
Round 2: *sc 3, decrease*, repeat from * around (12)
Round 3-6: sc around (12)
Round 7: *sc 2, decrease*, repeat from * around (9)
Round 8-9: sc around (9)
Round 10: *sc 1, decrease*, repeat from * around (6)
Round 11: decrease 3 times, fasten off and weave in ends. (3)
Finger Cap
Make 2.
*Please note: this portion is worked in continuous rounds (vs. the joined rounds used in the pattern for the palm).
Foundation: work 5 in magic ring (5)
Round 1: increase around (10)
Round 2: *sc, increase*, repeat from * around (15)
Round 3: *sc 2, increase*, repeat from * around (20)
Round 4: *sc 3, increase*, repeat from * around (25)
Round 5: *sc 4, increase*, repeat from * around (30)
Round 6-17: sc around (30)
Once you reach the end of round 17, ch 1 and turn your work, sc 15 and fasten off leaving a long tail (1 row created).
Buttonhole
Chain 7 and fasten off. Insert ends of the chain to either side of the very top of your finger cap and tie together on the inside (buttonhole created).
Assembly
Using the long tail, whip stitch the row of the finger cap right above round 15 of the palm section of the glitten (directly below the start of the fingers).
Sew button right above wrist ribbing towards the center of the glitten on the back side of the glitten (where the top of your hands will be).