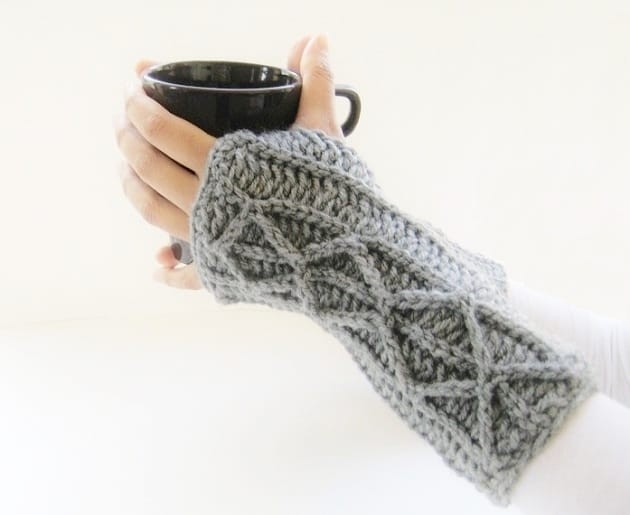
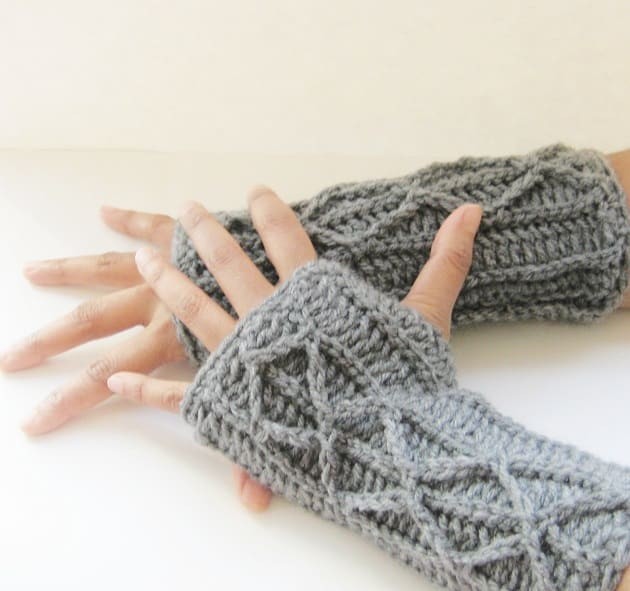
Crochet Gloves with Faux Cables


You’ll Need
140 yards of worsted weight size 4 medium yarn;
Crochet hook 5 mm;
Sewing needle.
Stiches Control
14 sts x 4 rows = 3 ½” x 3 ½”
Size
A finished glove is 8 ½ inches long and 3.5 inches wide.
Instructions
Chain 32 + 3 for turning chain.
Row Instructions
Row 1: 1 dc in to 4th chain from hook (counts as 1st dc), 1 dc in each chain across. 33 dc
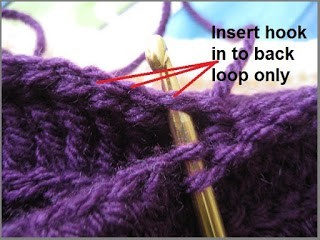
Row 2: Ch 1 (counts as 1st sl st), 1 sl st in back loop of next st, 1 sl st in back loop of each st till end of the row. 33 sl st
Row 3: Ch 3 (counts as 1st dc), 1 dc in the back loop of the next st, 1 dc in the back loop of each st across till the end of the row. 33 dc
Repeat Rows 2 & 3 till you have a total of 16 rows, ending with a sl st Row (Row 2). Now your gloves should measure 7 inches in width. Do not fasten off.
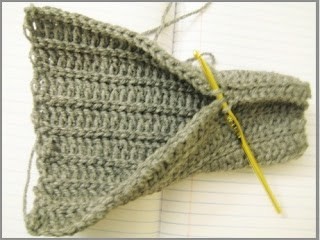
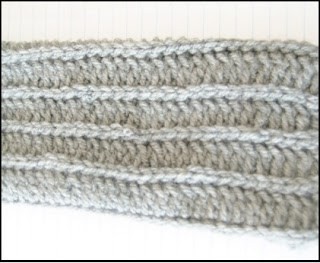
Fold it with the right side inside (the striped) and start to slip stitch the long sides together to make a tube as shown in pic 2 above. While making the joining sl stitches you will insert your hook through the free loop left on the foundation chain side and the back loop of the sl st on the other side.
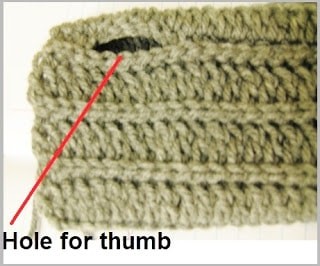
Now stop joining the sides together and work sl stitches up along the foundation chain side only for 1 ½ inches; this will form the hole for your thumb as shown in pic 4 above. Now sl st the rest of the 1 inch together till you reach the end. Do not fasten off.
Continue to work a round of sc around the opening of the gloves to even out the irregular edges. Work the sc stitches along the inside of the tube as that would be the right side of the glove. Try to distribute the sc as evenly as possible.
Make one more glove following the exact same pattern.
Faux Cables
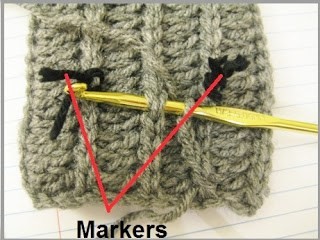
Try the glove on the left hand, inserting your thumb through the hole, and place markers to show 2 tracks running through the middle of your hand. Repeat with your right glove.
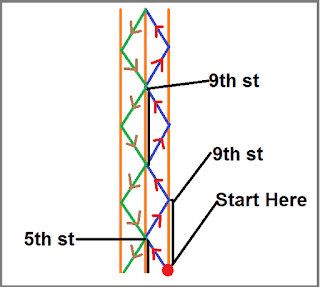
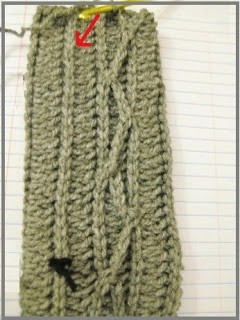
Keep the gloves down with the markers showing on top. Sl st to the base of the ridge on the right as shown by the red dot and follow the blue line as shown in pic 7 above.
Ch 3, sl st to the 5th st on the middle ridge to the left, *(ch 4, sl st to the 9th st (counted from the previous sl st made on the same ridge) on the right ridge, Ch 4, sl st to the 9th st on the middle ridge). Repeat from * 2 more times. Now you will have reached the top of your glove.
Now, you will work your way down and make the mirror image of the cable you already made, following the green line.
*(Ch 4, sl st to the point opposite to the one made on the right ridge, ch 4, sl st to the middle ridge at the same point as the first cable you made). Repeat from * 2 more times, ch 3, and sl st to the end of the ridge. Do not fasten off. Work a round of sc around the glove opening to even out the edges. Weave in the remaining yarn ends.