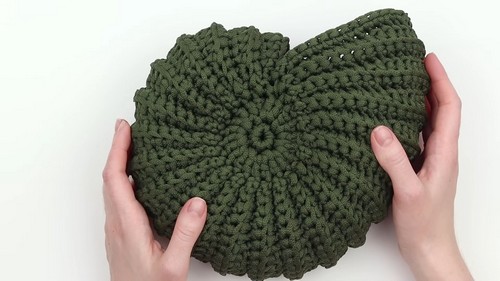
Crochet an Ammonite Shell Basket

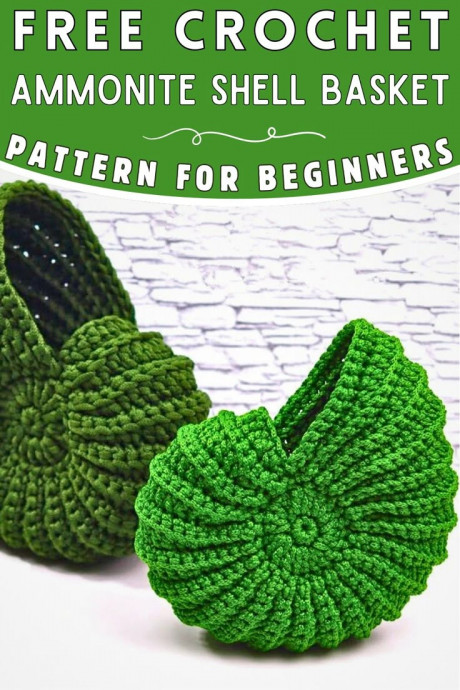
If you're looking to add a touch of whimsy and creativity to your home decor, crocheting an ammonite shell basket could be just the project for you! This delightful basket, inspired by the intricate patterns of ancient sea creatures, is not only a fun and relaxing crochet project but also a unique piece that will surely catch the eye of your guests. Imagine storing small trinkets or displaying your favorite plants in this charming basket that doubles as a conversation starter. Let your creativity flow as you work on this delightful crochet project and enjoy the satisfaction of creating something truly special for your home!
Materials
Yarn: You can use any yarn you like, but a worsted weight yarn is a good choice. I used a yarn called “Lion Brand Yarn Mandala” in the color “Oasis.”
Crochet hook: The size of the hook you need will depend on the yarn you are using. I used a size H (5.0 mm) hook.
Scissors
Yarn needle
Markers (optional)
Tapestry needle (optional)
Creating the First Circle
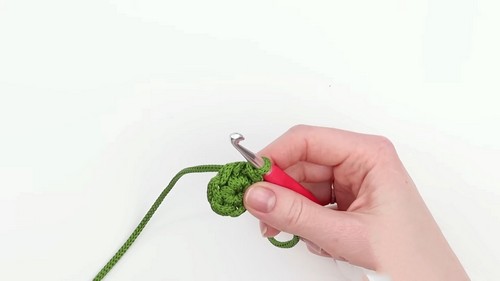
Start with a Slipknot: Begin by making a slipknot and proceed to crochet six single crochets. This will result in six braids.
Forming the Circle: After completing the six braids, pull the tail to tighten, forming a small circle.
Joining the Circle: Join the circle by slipping the hook under both loops of the first stitch for a slip stitch. This connects the circle.
Expanding the Circle
Second Row (Double Crochets): Start with three chain stitches to elevate to the double crochet level. Continue by making double crochets in the same and each subsequent stitch, ending with 18 double crochets.
Completing the Row: Add two more double crochets to the stitch connecting the start and end of the first row. This should yield 20 crochets in total.
Finishing the Circle: Perform the twenty-first crochet to join the row, cut the thread, and securely join the beginning and end of the row.
Creating the Second Center Circle
Repeat the process described for the first circle, including the joining and expansion steps. Bind off using the tail instead of the working thread for a polished finish.
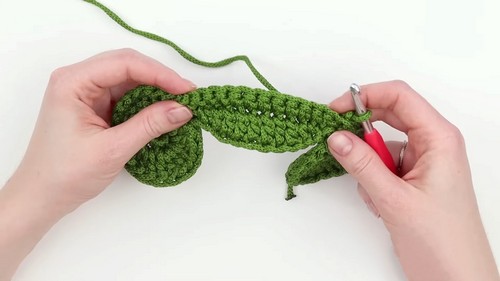
Constructing the Shell Body
Starting the First Row of the Wall
Initiating the Wall: Use the working thread to pull up and make thirteen chain stitches, positioning the circles with their fronts oriented accordingly.
Joining the Chain: Join the chain to the second circle, ensuring proper alignment and orientation.
Crocheting the Wall
First Section: Begin with a variety of stitches increasing in size from slip stitch, single crochet, to half double crochet, and then proceed to make seven double crochets.
Reverse the order of the stitches as you approach the end of the row and join this row to the circle.
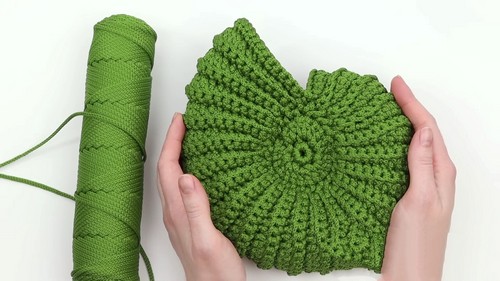
Expanding the Pattern
Each subsequent row will primarily feature single crochets, with slip stitches at both the beginning and the end for seamless joining to the circle.
The pattern divides into pairs of rows, with the second row in each pair being simpler, consisting solely of single crochets.
Increasing the Shell Size
Start increasing in the second pair of rows to add volume to the shell.
Introduce increases strategically to shape the shell, utilizing a mix of single, half double, and double crochets.
Finishing Touches
Continue following the pattern of increasing and joining as you work through the rows, keeping an eye on the formation of the shell’s shape.
Pay attention to maintaining an invisible center line, allowing the shell to curl naturally.