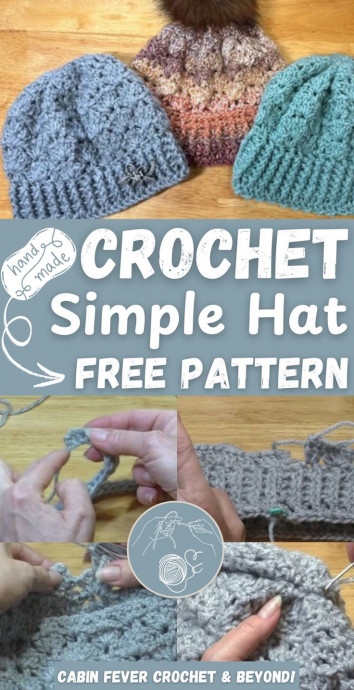
The Crochet Vista Point Hat is an absolute must-have for anyone looking to add a touch of style and warmth to their winter wardrobe! This trendy hat features a unique design that stands out in a crowd, making you the talk of the town. Whether you're heading out for a morning stroll or meeting friends for coffee, this hat will keep you cozy and fashionable all day long. With its soft yarn and comfy fit, you'll never want to take it off! So go ahead, crochet yourself a Vista Point Hat and step out with confidence and flair!
Materials
One 100g ball of yarn (weight 3–4)
Two crochet hooks: main size and one size larger
Two stitch markers
Measuring tape
Yarn needle
Optional: Pom-pom or decorative button
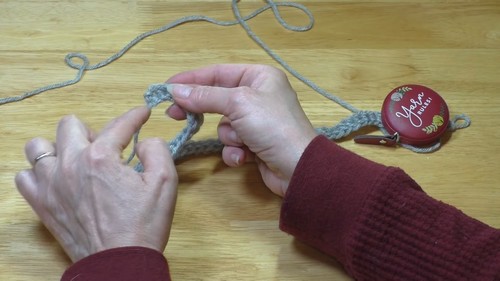
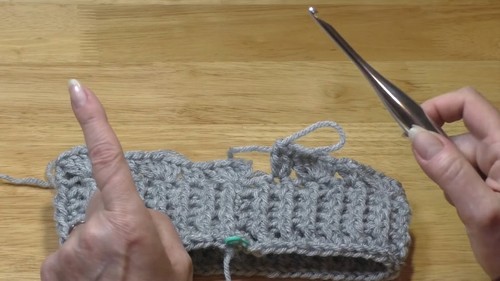
Band / Ribbing Section
Round 1:
Work a foundation single crochet or a chain in multiples of 6 + 1 to fit your head.
Join ends into a circle, ensuring there are no twists.
Round 2:
Chain 2 (does not count as a stitch).
Double crochet in the same stitch and in each stitch around.
Round 3:
Chain 2.
Front post double crochet around the first stitch.
Back post double crochet around the next.
Repeat FPDC and BPDC around.
Round 4:
Chain 2.
Repeat Round 3, maintaining the post stitch pattern.
Repeat Round 4 until the band reaches your desired height.
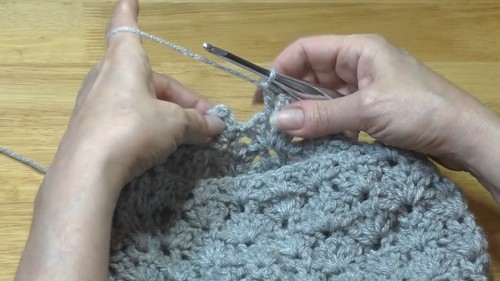
Main Pattern
Round 1:
Chain 3 (counts as 1st double crochet), add 4 more double crochets into the same stitch (5 total = 1 shell).
Skip next 2 stitches.
Place 2 double crochets in the next stitch.
In this round, repeat: shell in one stitch, skip 2, 2 DC in next stitch.
Round 2:
Chain 1 and turn.
Slip stitch between the 2 DC from previous round.
Chain 3 (counts as first DC), place 4 more DC in the same space to form a shell.
Continue working shells between stitches.
Repeat Round 2 for 2–3 more rounds, alternating between right side and wrong side for texture.
Decrease Section
Round 1:
Chain 1 and turn.
Slip stitch between the 2 DC.
Work 4 DC instead of 5 in each shell space (decreasing shell size).
Round 2:
Chain 1 and turn.
Slip stitch between the first 2 DC.
Place 3 DC in each shell space.
In the middle of each shell, place 2 DC directly in the center.
For Round 3:
Chain 1 and turn.
Slip stitch between the 2 DC.
Place 2 DC between each set of stitches: one between stitch 1–2 and one between stitch 2–3 of the previous shell.
Round 4:
Chain 1 and turn.
Slip stitch between the 2 DC.
Chain 1.
Place 2 half double crochets in between each set of 2 DC.
Round 5 (Final Decrease):
Make sure you're on the right side.
Half double crochet two together (HDC2TOG) all the way around.
Finishing
Cut yarn, leaving a long tail.
Use yarn needle to weave through remaining stitches and cinch the top closed.
Weave in all ends securely.
Optional: Add a pom-pom or button to the top for a stylish finish.