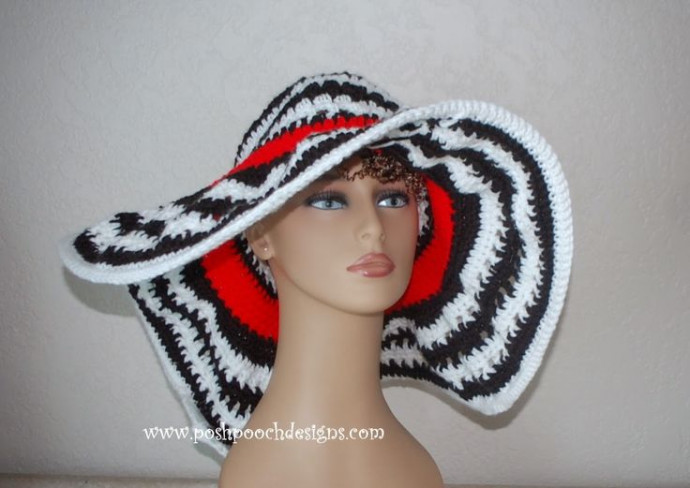
Crochet Summer Hat

Introduction
Looking for the perfect accessory to beat the summer heat in style? Look no further than the delightful crochet summer hat! This charming accessory not only adds a pop of flair to your outfit but also provides much-needed shade and protection from the sun's rays. Whether you're headed to the beach, a picnic in the park, or simply strolling around town, the crochet summer hat is a must-have for your wardrobe. Stay cool and fashionable all summer long with this fun and versatile piece!
Skill Level
Skill: Easy
Materials
- Crochet Hook - H
- Yarn - Worsted Weight (4) - 4 oz of each color
- Colors:
- Black - C1
- White - C2
- Red - C3
- I use Red Heart Super Saver
- Boning - 2 yards, to stiffen the hat brim
- Yarn Needle
Stitches
- Chain (ch)
- Single Crochet (sc)
- Half Double Crochet (hdc)
- Slip Stitch (sl st)
- Skip (sk)
Size
Size - Youth to Adult - 18 to 20 inch head
Pattern
Note: Ch 2 counts as the 1st stitch of the next round.
With C1, Ch 5, join in a circle
Rounds:
RND 1: Ch 2, counts as 1st dc, 9 hdc in the circle, join to ch 3 with a sl st, (10 hdc)
RND 2: Change to C2, leaving C1 attached, Ch 3, 2 hdc in each hdc around, join, (20 hdc)
RND 3: Ch 2, 1 hdc in the same st, *1 hdc in the next st, 2 hdc in the next st*, Repeat from * to * around, join, (30 hdc)
RND 4: Change to C1, leaving C2 still attached, Ch 3, 1 hdc in the same st, *1 hdc in the next 2 st, 2 hdc in the next st*, Repeat from * to * around, join, (40 hdc)
RND 5: Ch 2, 1 hdc in the same st, *1 hdc in the next 3 st, 2 hdc in the next st*, Repeat from * to * around, join, (50 hdc)
RND 6: Change to C2, 1 hdc in each hdc around, join, (50 hdc)
RND 7: Ch 3, skip the next hdc, *hdc in the next st, ch 1, skip the next st*, Repeat from * to * around, join, (50 sts)
RND 8: Change to C1, Ch 2, 1 hdc in the 1st st, *1 hdc in the ch 1 space, 1 hdc in the next hdc*, Repeat from * to * around, join,
RND 9-16: Repeat RND 7 and 8, alternating rows and yarns every 2 rows
RND 17: 1 hdc in each hdc, join, (50 hdc)
RND 18: Change to C3, 1 sc in each st, join, ch 1 (50 sc)
RND 19-21: 1 sc in each sc, join, ch 1 (50 sc)
RND 22: Starting the Brim - Change to C1, 2 hdc in each sc, join, ch 2 (100 hdc)
RND 23: 1 hdc in each hdc, join, (100 hdc)
RND 24: Change to C2, ch 2, *2 hdc in the next st, 1 hdc in the next st*, Repeat from * to * around, join, ch 2 (150 hdc)
RND 25: Ch 3, skip the next hdc, *hdc in the next st, ch 1, skip the next st*, Repeat from * to * around, join, (150 sts)
RND 26: Change to C1, Ch 2, 1 hdc in the 1st st, *1 hdc in the ch 1 space, 1 hdc in the next hdc*, Repeat from * to * around, join,
RND 27: Repeat RND 25
RND 28: Change to C2, Repeat RND 26
RND 29: Repeat RND 25
RND 30: Change to C1, Repeat RND 26
RND 31: Repeat RND 25
RND 32: Change to C2, 1 sc in each st, join, ch 1 (150 sc)
Stop here for a floppy brim.
RND 33: For a Stiff Brim, 1 sc in each sc, stitching over the boning, join, (150 sc)
Blocking the Hat Brim
Lay the hat brim out flat and spray with water. Dampen, but do not soak. Pin to a blocking board and let dry. This will take out any ripples or bumps.
Stiffening the Hat Brim
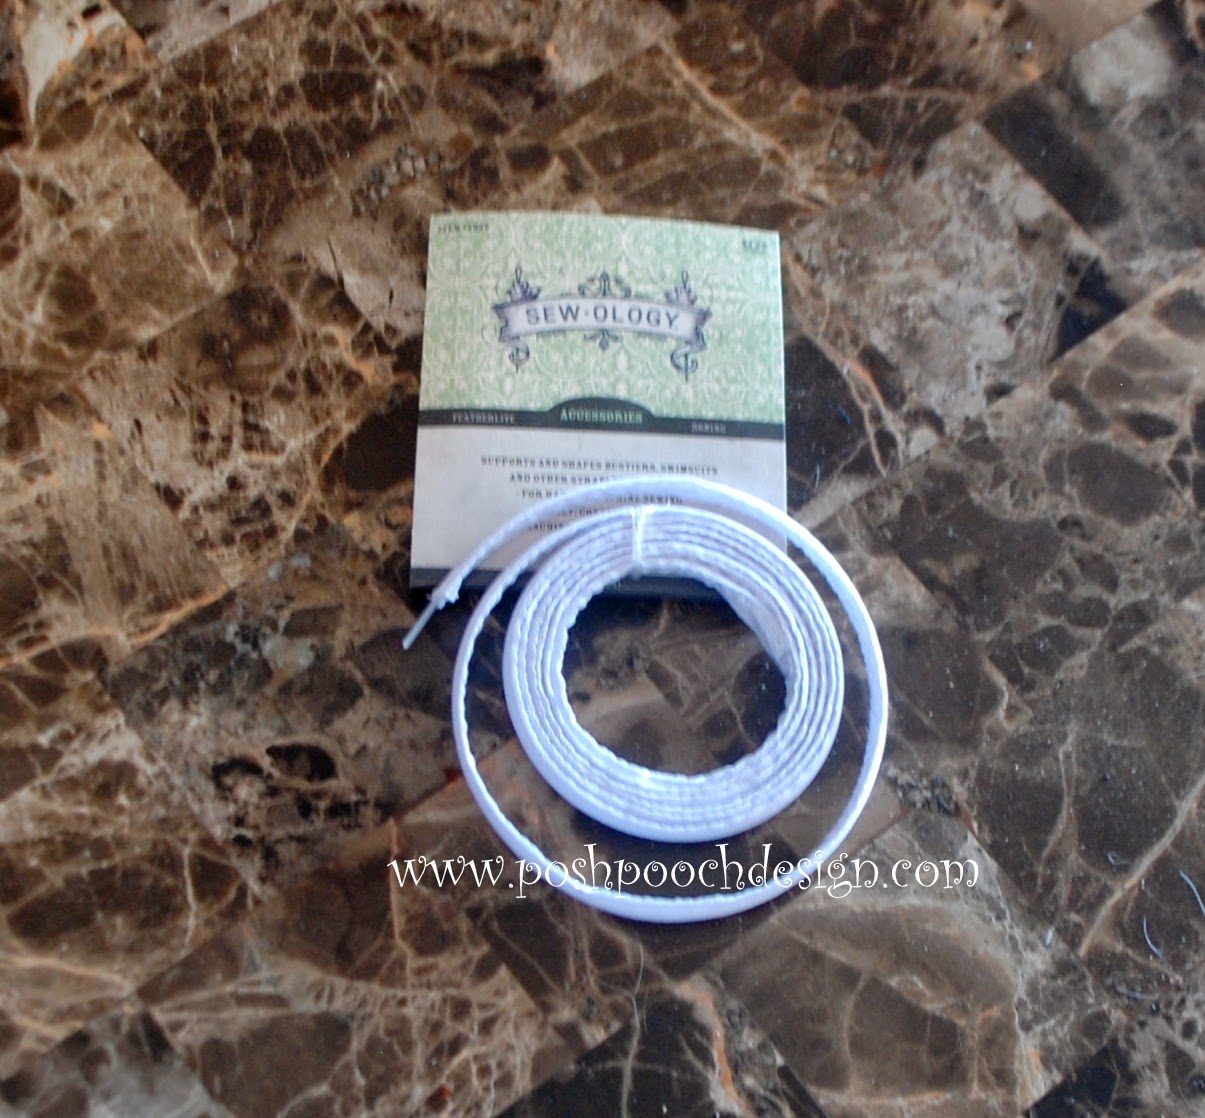
This is the boning
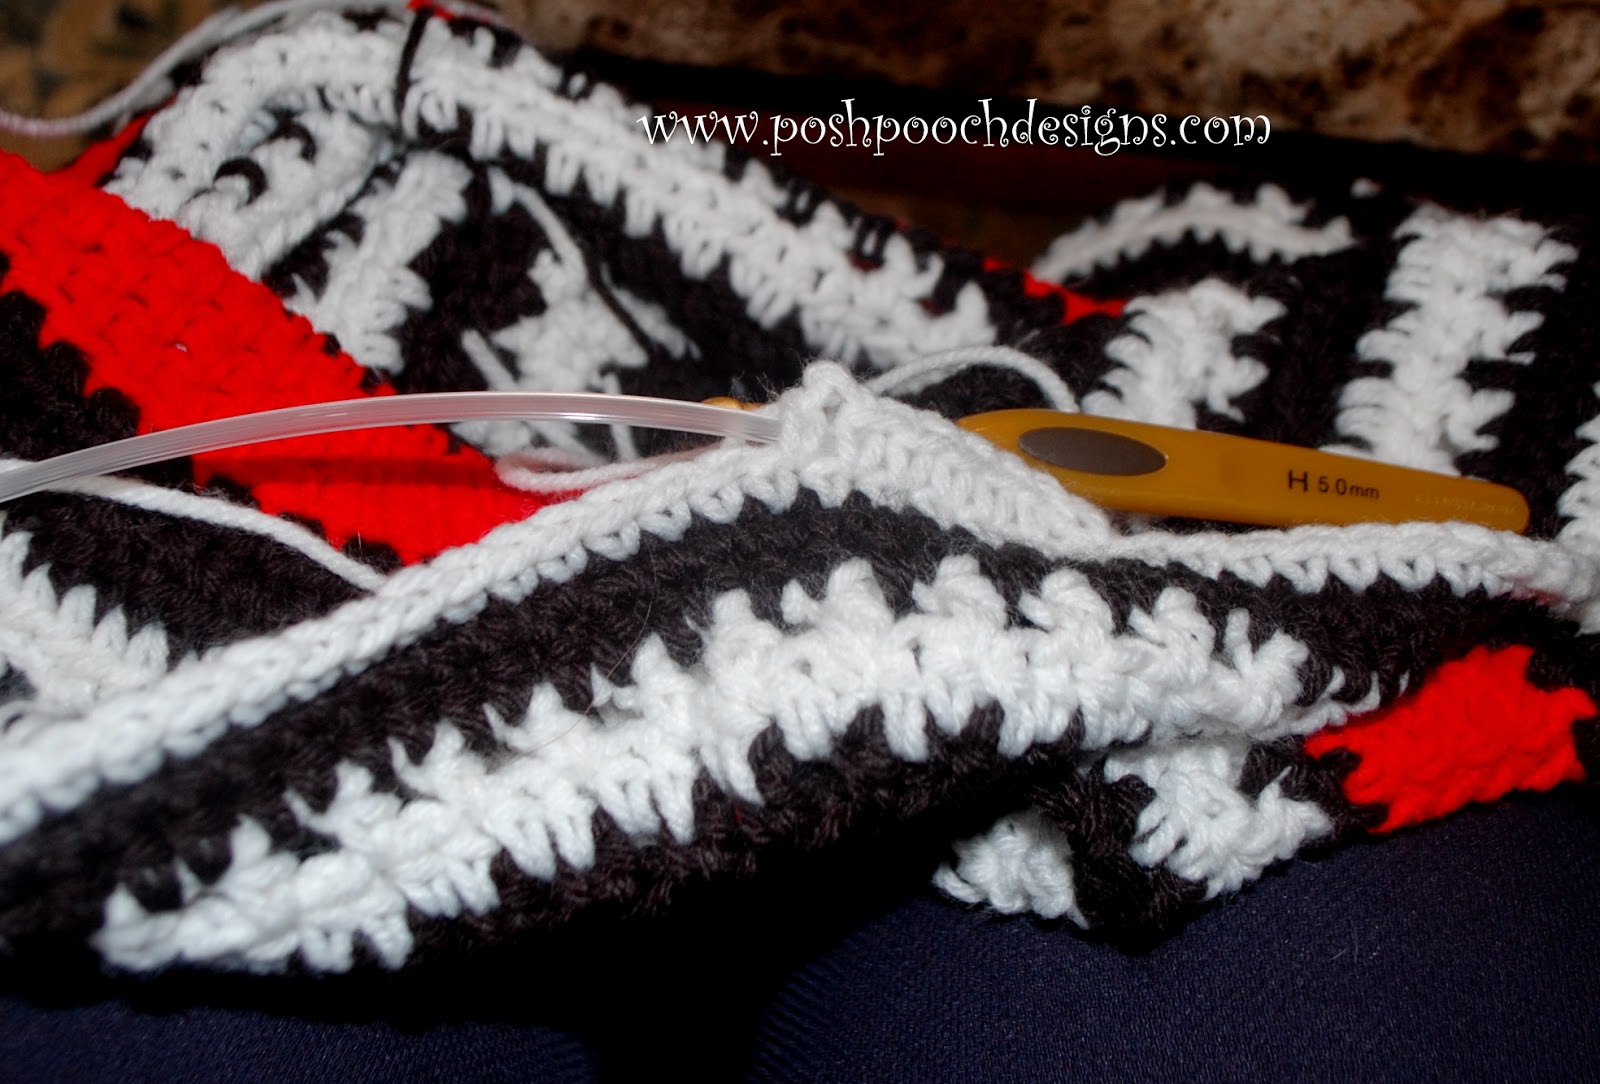
First, sc around the boning, all around the hat brim.
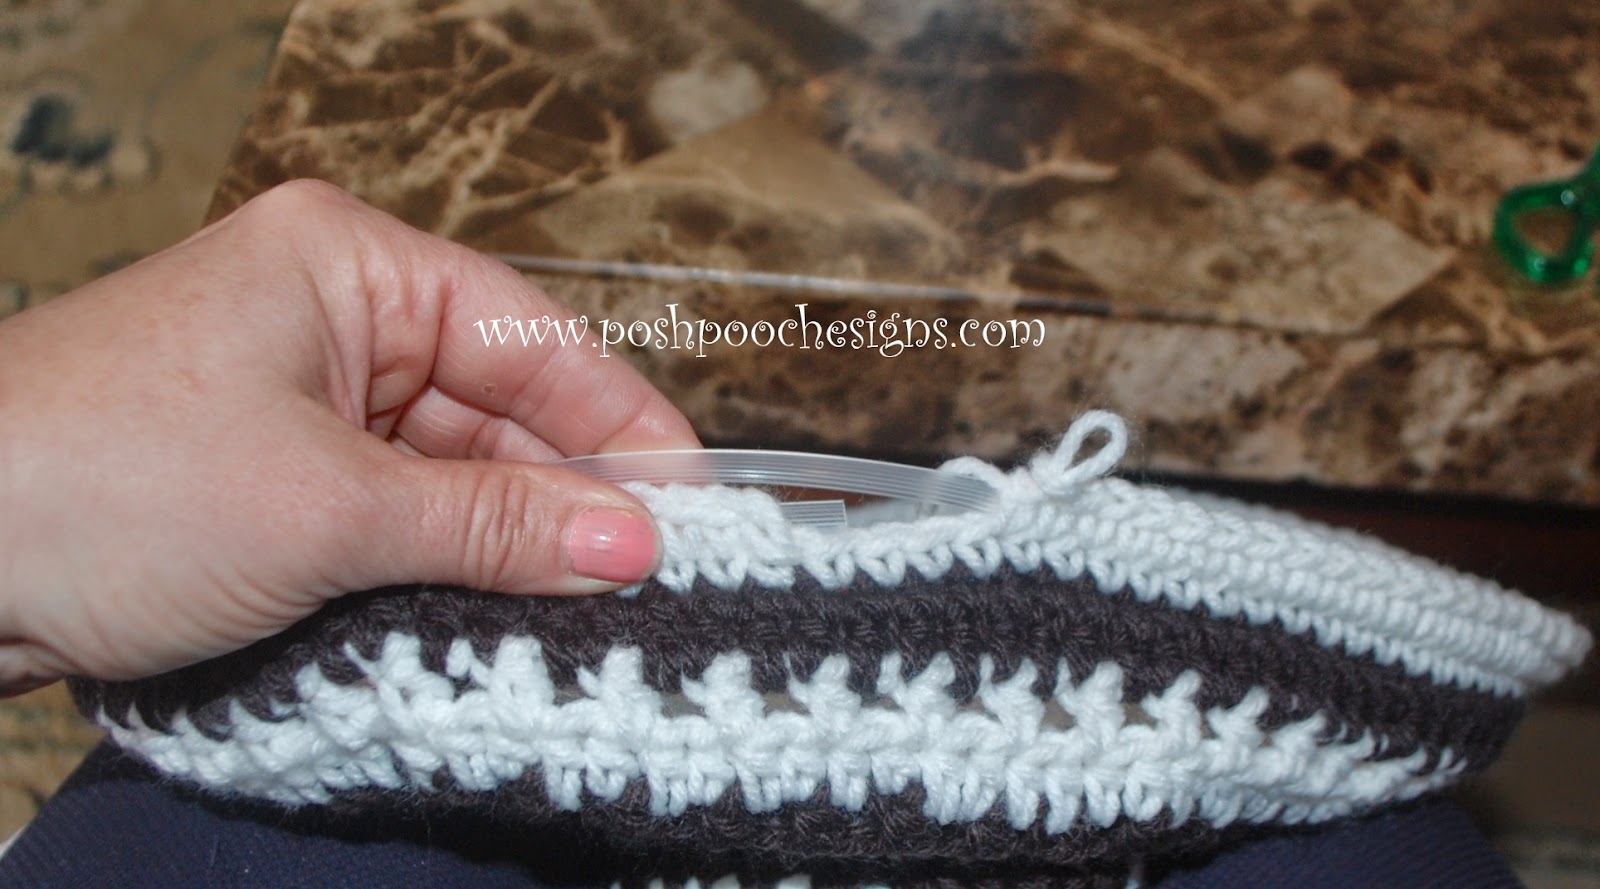
When you come to the end, tuck the ends together and sc. Join and securely sew closed. I did find that the ends do not want to stay together. So, I used some clear packing tape, and taped the ends together, overlapping about 2 inches. And this worked great.