Crochet Summer Top: Step-by-Step Guide

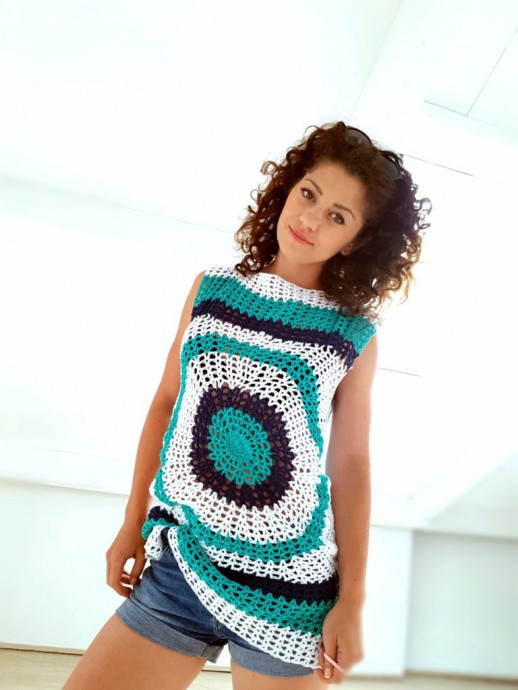
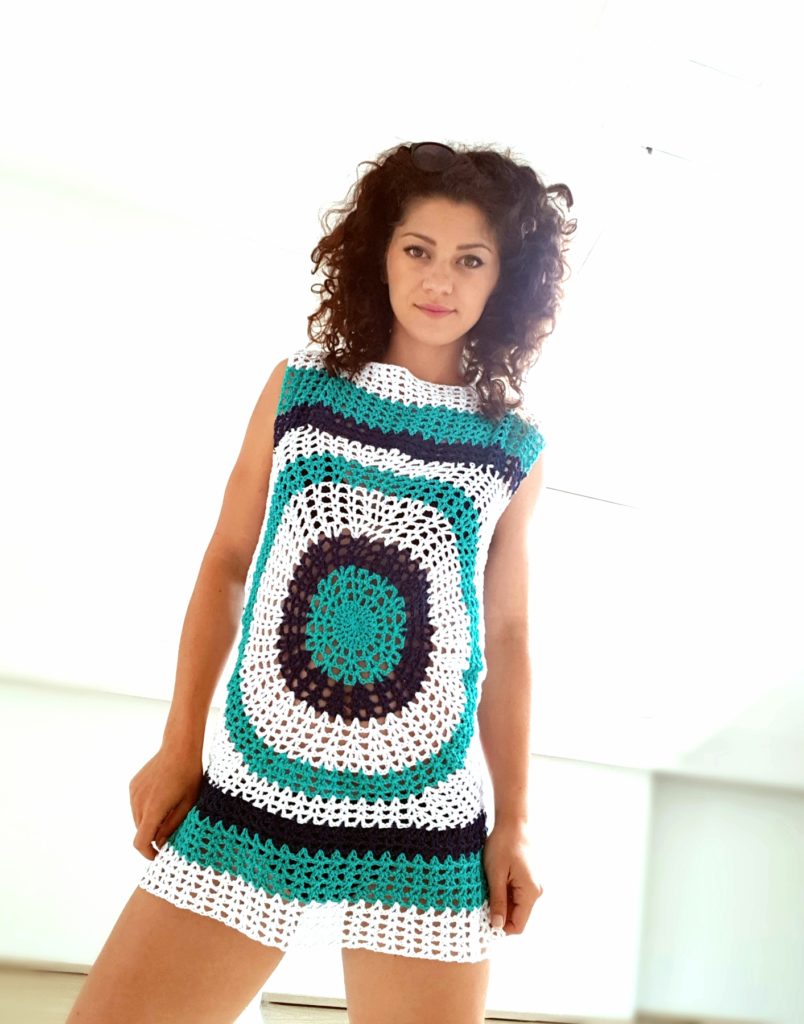
Ah, the versatile and charming crochet summer top! With its intricate patterns and airy design, this wardrobe essential exudes a sense of laid-back chic that effortlessly transitions from beach days to casual outings. The crochet summer top is a delightful blend of style and comfort, perfect for adding a touch of bohemian charm to any summer outfit. Whether paired with denim shorts for a festival-ready look or thrown over a swimsuit for poolside lounging, this versatile piece is a must-have for embracing the carefree vibes of the season. So, grab your crochet hook and some lightweight yarn, and craft your way to a trendy summer staple that radiates warmth and style.
Final Measurements for Each Size
The final measurements for each size are:
- S – Bust 90 cm (36 “)
- M – Bust 100 cm ( 40 “)
- L – Bust 110 cm ( 44 “)
- XL – Bust 120 cm (48 “)
- XXL – Bust 130 cm (52 “)
The length is the same for all sizes, 70 cm (28″), but you can adjust it as you want.
Techniques and Materials Needed
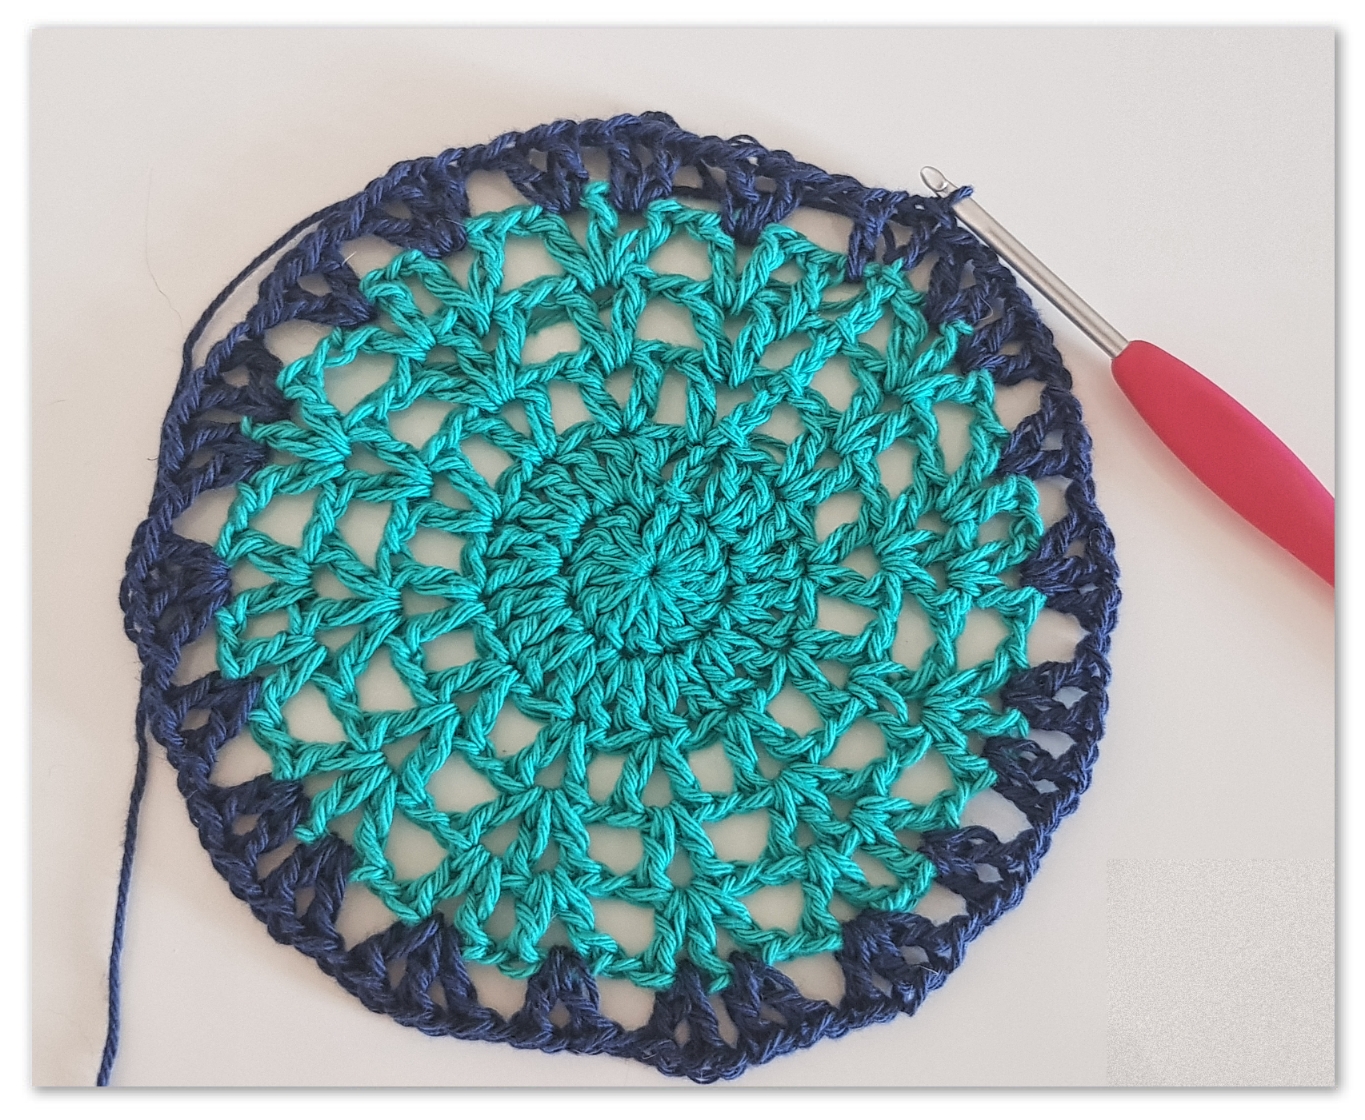
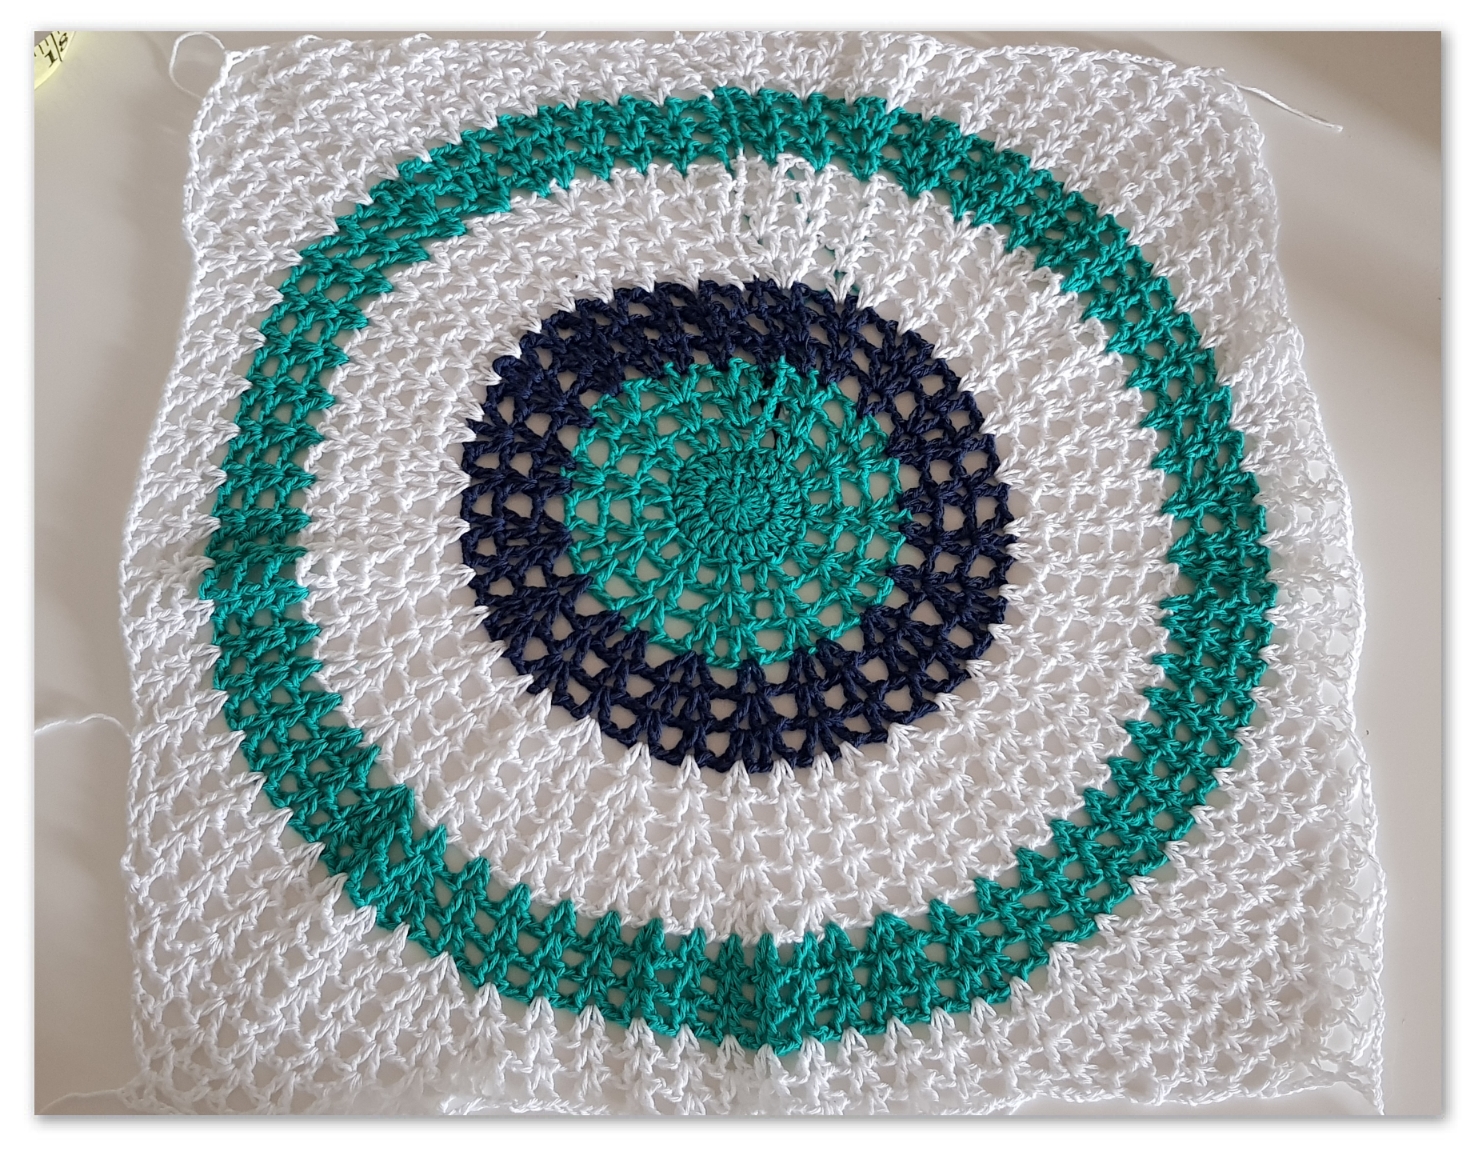
As you saw in the pictures, we will make a circle that will be the center motif of this Enjoy Summer Top and then we will transform this circle into a square.
I will give you the stitch numbers and rows for each size according to my gauge, but if you want to use another type of yarn or you didn’t get to the gauge, just keep the pattern of the circle until you get to the desired width. The width has to be half of your bust or hip circumference.
I used Scheepjes Cotton 8 for my Enjoy Summer Top. This is a Fingering, Super Fine weight yarn, but you can use Fine weight too. I used a 3.5 mm ( E – 4 US Size) crochet hook.
Approximate Yarn Requirements
You will approximately need for each size:
- S – 850 yds (780 m / 230 grams)
- M – 940 yds (860 m / 250 grams)
- L – 1030 yds (940 m / 280 grams)
- XL – 1120 yds (1020 m / 300 grams)
- XXL – 1200 yds (1100 m / 350 grams)
Pattern Abbreviations
Abbreviations used in this pattern:
- Ch – chain
- Dc – double crochet
- St (s) – stitch (es)
- Sl st – slip stitch
- Inc – increase
Special Stitches
- V st – 1 dc, ch 1, 1 dc in the same ch 1 space of the V st of the previous round.
- Inc – 1 dc, ch 1, 1 dc, ch 1, 1 dc in the same ch 1 space.
Gauge
Gauge:
- 18 dc = 10 cm (4 “)
- 8 rows = 10 cm (4 “)
Let's Begin Crochet Summer Top
With all this information set, let’s begin:
Back Side
We will start with a magic ring.
For All Sizes
Round 1
Ch3, 11 dc inside the ring. Sl st with the 3rd st of the starting chain.
Round 2
Ch 3, 1 dc in the same st, 2 dc in each st to the end of the round. Sl st with the 3rd st of the starting chain.
Round 3
Ch 4, 1 dc in the same st, ch 1, skip 1 st,[ 1 V st in the next, ch 1, skip 1 st] – repeat this section to the end of the round. Sl st with the 3rd st of the turning ch.
Round 4
Ch 4, in the first space make 1 dc, ch 1, 1 dc, ch 1, 1 V st in the next space (ch 1 of the previous row V st), ch 1,[ Inc in the next space, ch 1, 1 V st in the next space, ch 1] – repeat the section between [ ] to the end of the round. Sl st with the 3rd st of the starting chain.
Round 5
Ch 4, 1 dc in the same space, ch 1, 1 V st in the next ch 1 spaces until you get to the first V st after the inc made on the previous row and make in this space 1 inc. Continue to the end of the round and sl st with the 3rd st of the starting ch.
Beginning with round 5 we will follow the same pattern until row 15:
1 V st in each ch 1 space (of the V sts of the previous round), 1 Inc in the V st next to the inc made on the previous round.
I dislike counting stitches, which is why I tried to find a pattern that will help avoid counting stitches.
At row 6 I changed the color, but you are free to play with colors as you wish.
Rounds 6 – 15
Repeat round 5
Round 16
Before round 16, I noticed that my circle's edges began to curl. So at round 16, I didn’t increase; I just made 1 V st in each V st of the previous round.
Round 17
1 V st in each V st of the previous round, 1 inc in the st that is after the inc on the round before the previous. Keep repeating the rounds 16 and 17 until you get to the desired width or until you have in total:
- S – 19 rounds (83 V sts)
- M – 24 rounds (93 V sts)
- L – 29 rounds (103 V sts)
- XL – 34 rounds (113 V sts)
- XXL – 39 rounds (123 V sts)
Transforming the Circle into a Square
After finishing the circle, it is time to transform it into a square.
This is how we will do that:
Lay the circle flat. You will notice 4 segments that are straight (top, bottom, and side edges). Next to the straight segment, put a notebook or cardboard or something with straight and hard edges and mark the first st that is beginning to be far from the notebook.
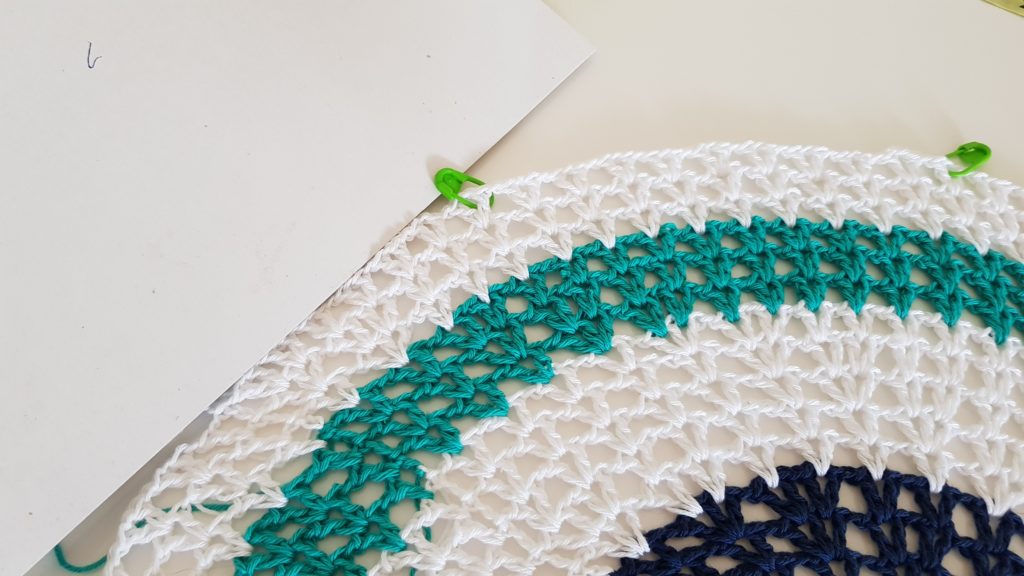
Proceed the same until you have the first corner marked.
Now you will have to count the V sts and make sure that you have the same number of sts on the corners and on the straight lines that are opposite. You notice that at the end of the rounds we have 1 V st more but it is not such a big deal. Just let this st on one side edge and keep the top and bottom with the same number of V sts.
Size S
- 10 V sts for the corners
- 10 V sts for the straight line on the top and on the bottom
- 11 V sts for the side edges (on one side you will have 1 V st more)
Size M
- 12 V sts for the corners
- 11 V sts for the straight lines (all 4)
Size L
- 13 V sts for the corners
- 12 V sts for the straight lines on the top and on the bottom
- 13 sts on the side edges
Size XL
- 14 V sts for the corners
- 14 V sts for the straight lines
Size XXL
- 15 V sts for the corners
- 15 V sts for the straight lines on the top and bottom
- 16 V sts for the side edges
After you marked the sts for the corners, it's time to transform the circle into a square.
We will work each corner separately.
Row 1
Begin working on the right side and insert the hook and yarn in the first st of the corner. Ch 4, 1 V st in the next V st, 1 V st in each V st until you have 2 V sts left. In these 2 make 1 dc in the first, ch 1, 1 dc in the last V st. Turn.
In this way, we will decrease at the beginning and at the end of each row.
Repeat row 1 until you have no sts left.
Proceed the same with all corners. This is how your square will look after you finish all the corners.
It may not be perfect, but it’s a square!
Now, after you have the square, all you have to do is work several more rows on the top and on the bottom until you get to the desired length. I made 13 more rows on each side.
Now that you have the desired length, the back side of the Enjoy Summer Top is done, and you will have to make the front part in the same way. After you have both parts, join them to finish the top.
Sew on the shoulders 6 V sts on each side, approximately 8-9 cm. Leave for the armholes 20 cm for sizes S and M, and 23 – 25 cm for larger sizes. Then sew the side edges. I left a split on each side of 13 rows.
This was it!