Crochet Little Itty Bitty Bunny Guide

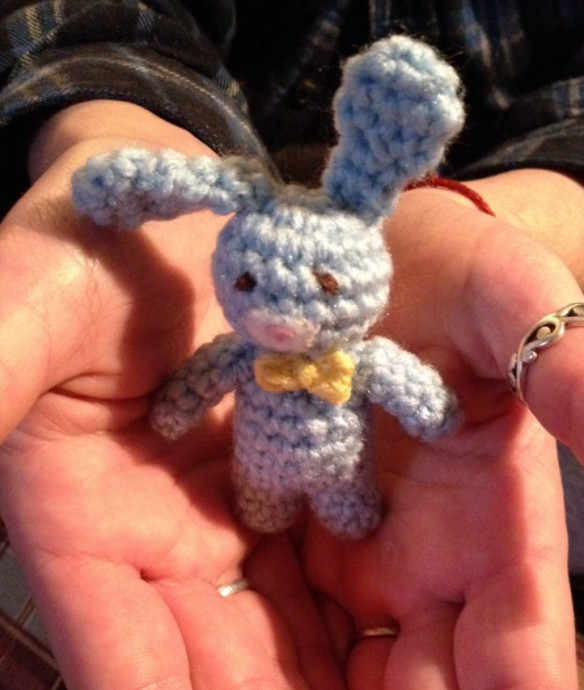
The Crochet Little Itty Bitty Bunny is an adorable and charming project for anyone who loves yarn crafts and cuteness overload! With just a few simple stitches, you can create a tiny bunny that's perfect for Easter, baby showers, or just adding a touch of whimsy to your day. This sweet little project is sure to bring a smile to your face and joy to your heart as you craft your very own lovable bunny friend. So grab your yarn and hook, and let's crochet some happiness together!
Supplies
- F – hook
- Worsted weight yarn (any color)
- Embroidery floss
- Poly fil stuffing
- Yarn needle
- Small piece of white felt
Terms
- ch – chain
- sc – single crochet
- inc – increase
- dec – decrease
Legs
Make two
Starting with a magic circle:
- sc 7 in magic circle – 7
- sc around – 7
- sc around – 7
F/O, weave in ends.
Body
Connect the two legs with a single crochet and continue crocheting around both legs – 13:
- sc 6, inc, sc 6 – 14
- sc around – 14
- sc around – 14
- sc 6, dec, sc 6 – 13
- sc 5, dec, sc 6 – 12
Stuff, dec 6, sew shut, weave in ends.
Arms
Make two
Starting with magic circle:
- sc 5 in magic circle – 5
- sc around – 5
- sc around – 5
- sc around – 5
F/O, leave tail for sewing. Do not stuff.
Head
Starting with a magic circle:
- sc 6 in magic circle – 6
- 2sc in each st around – 12
- (sc, inc) 6x – 15
- sc around – 15
- sc around – 15
- (sc, dec) 6x – 12
dec 6x, F/O, leave tail for sewing.
Ears
Make two
Starting with a magic circle:
- 4sc in magic circle – 4
- 2sc in each st around – 8
- sc around – 8
- dec 4 – 4
- sc around – 4
- sc around – 4
- sc around – 4
F/O, leave tail for sewing.
Face
Using white felt, cut a small circle for the muzzle. Embroider on the nose and eyes.
Bow (Optional)
Ch 4
- Starting in the second ch from hk, sc across – 3
F/O, weave in ends. Wrap a piece of yarn tightly around the center, tie tightly.
Assembly
- Sew head onto body.
- Sew arms onto body.
- Sew ears onto head.