Crochet Baby's Pumpkin Beanie

Introduction
Introducing the adorable Crochet Baby's Pumpkin Beanie! This charming accessory is perfect for keeping your little one warm and stylish during the autumn season. Handcrafted with love and attention to detail, this beanie features a delightful pumpkin design that will surely capture everyone's attention. The Crochet Baby's Pumpkin Beanie is not just a hat, but a statement piece that will make your baby stand out in any gathering. Whether it's a family gathering, a photoshoot, or a trip to the pumpkin patch, this beanie will add a touch of cuteness and charm to your baby's outfit. So why wait? Get your hands on this adorable accessory and let your little one shine like a pumpkin in the autumn breeze!
Size
Approximately 13-15 inches, depth about 6.5 inches
Materials
- Worsted weight yarn, approximately 1.5 ounces orange
- Worsted weight yarn small amount of brown or green
- I (5.5 mm) crochet hook (if you crochet loosely, use an H hook)
- G (4.5 mm) crochet hook for stem and tendril
- Tapestry needle
Notes
- Read instructions all the way through before beginning.
- Should fit most babies.
- When joining with a slip stitch, pull the slip stitch tight.
- Do not count the ch 2 at the beginning of rounds as a dc.
- On the very last round, don’t join with a slip stitch but use your tapestry needle for the invisible fasten off.
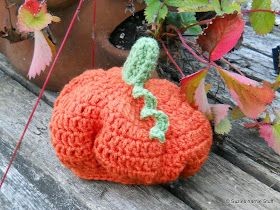
- Cap in photo was crocheted with Red Heart Super Saver: Beanie = Carrot, Stem = Tea Leaf.
Abbreviations
- Ch = chain
- Dc = double crochet
- Ea = each
- St = stitch
- Sts = stitches
- Sc = single crochet
- Sc2tog = single crochet two together
- Hdc = half double crochet
- Fphdc = front post half double crochet
Instructions
Round 1
Ch 3, working over tail, 12 dc in first ch. Join with a slip stitch in first st. (12 sts)
Round 2
Ch 2, dc and sc in same st as join, 2 dc in next st. *Dc and sc in next st, 2 dc in next st. Repeat from * around. Join with a slip stitch in first st. (24 sts)
Round 3
Ch 2, 2 dc in same st as join, sc in next st. *2 Dc in next st, dc in next st, 2 dc in next st, sc in next st. Repeat from * around. Join with a slip stitch in first st. (36 sts)
Round 4
Ch 2, 2 dc in same st as join, dc in next st, sc in next st. *2 Dc in next st, dc in 2 st, 2 dc in next st, dc in next st, sc in next st. Repeat from * 4 times. 2 Dc in next st, dc in next 2 st. Join with a slip stitch in first dc. (48 sts)
Round 5
Ch 2, 2 dc in same st as join, dc in 2 st. *Sc in next st, 2 dc in next st, dc in next 3 st, 2 dc in next st, dc in 2 st. Repeat from * 4 times. Sc in next st, 2 dc in next st, dc in 3 st. Join with a slip stitch in first st. (60 sts)
Round 6
Ch 2, 2 dc in same st as join, dc in 3 st. *Sc in next st, 2 dc in next st, dc in 4 st, 2 dc in next st, dc in 3 st. Repeat from * 4 times. Sc in next st, 2 dc in next st, dc in 4 st. Join with a slip stitch in first st. (72 sts)
Round 7
Ch 2, 2 dc in same st as join, dc in 4 st. *Sc in next st, 2 dc in next st, dc in 5 st, 2 dc in next st, dc in next 4 st. Repeat from * 4 times. Sc in next st, 2 dc in next st, dc in 5 st. Join with a slip stitch in first st. (84 sts)
Rounds 8-10
Ch 2, dc in same st as join and next 5 st. *Sc in next st, dc in 13 st. Repeat from * 4 times. Sc in next st, dc in next 7 st. Join with a slip stitch in first st. (84 sts)
Round 11
Ch 1, *sc2tog. Repeat from * around. Join with a slip stitch in first st. (42 sts)
Rounds 12-14
Ch 1, *sc in ea st. Repeat from * around. Join with a slip stitch in first st. (42 sts)
Fasten off. Weave in end.
Stem
Using G (4.5 mm) hook.
Ch 2, 8 hdc in 2nd ch from hook. Do not join.
Working in continuous rounds, *sc in next st, fphdc in next st. Repeat from * until stem is about 1.5 inches. You should have 4 raised ridges.
Fill stem with a small amount of Polyfil or other stuffing material.
Tendril
Slip stitch in next st (remember to pull it tight). Ch 15, 2 sc in 2nd ch from hook and each remaining ch. Slip stitch in same st where first slip stitch was made.
Fasten off leaving about an 8 inch tail to sew to center top of cap. Sew stem and tendril to top of hat, centering over beginning hdc (I went twice around). Pull tail to inside and tie in an overhand knot with the beginning tail.