Crochet Pumpkin Gnome

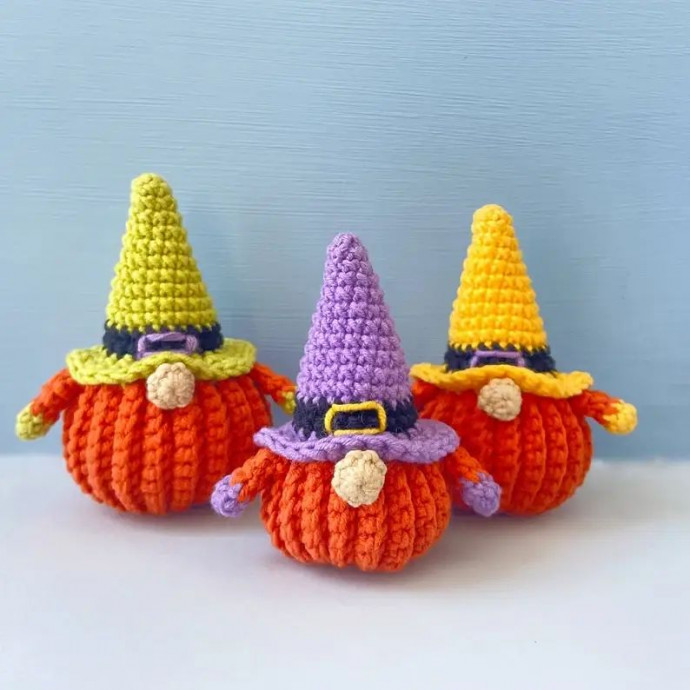
Discover the whimsical charm of crochet pumpkin gnomes! These adorable creations are a delightful fusion of fall vibes and cute craftsmanship. Perfect for adding a cozy and festive touch to your home decor, crochet pumpkin gnomes bring a smile to any space. Their cozy hats and chubby bodies make them a joy to craft and display during the autumn season. Whether you're a seasoned crocheter or a beginner looking for a fun project, creating these lovable gnomes is sure to spark creativity and warm your heart. So grab your yarn and hook, and let's get crafting these magical little beings that will surely bring a touch of enchantment to your fall decor.
Materials You’ll Need
Before we get started, let’s gather all the supplies you’ll need for your pumpkin gnome:
Yarn: You’ll need a few colors to make this pumpkin gnome:
Orange: For the pumpkin body.
Green: For the pumpkin hat (or vine detail).
Beige, tan, or grey: For the gnome’s nose.
White or brown: For the gnome’s beard.
Brown or dark green: For the stem (optional).
Crochet Hook: A 3.5 mm hook works well for this project, but adjust depending on your yarn.
Safety Eyes: Optional, but 6mm or 8mm safety eyes can add a cute touch.
Stuffing: Polyfill for stuffing the gnome.
Tapestry Needle: For sewing the pieces together.
Scissors: For trimming yarn ends.
Stitch Marker: Handy for keeping track of your rounds.
Stitches You’ll Need
Here’s a quick refresher on the stitches used in this project. If you’re new to amigurumi or need a little brush-up, don’t worry—I've got you!
Magic ring (MR): The go-to way to start your amigurumi projects.
Chain (ch): A simple foundation stitch.
Single crochet (sc): The primary stitch for amigurumi.
Increase (inc): Two single crochet stitches in the same stitch.
Decrease (dec): Single crochet two stitches together.
Slip stitch (sl st): For joining rounds or finishing off.
Fasten off: To secure and finish your yarn.
Pattern
Step 1: Crochet the Pumpkin Body
We’ll begin by making the round, pumpkin-shaped body of the gnome, which will act as the foundation for the entire piece.
With orange yarn:
Start with a magic ring.
Round 1: 6 sc into the ring. (6)
Round 2: Inc in each stitch around. (12)
Round 3: (Sc in the next stitch, inc) repeat around. (18)
Round 4: (Sc in the next 2 stitches, inc) repeat around. (24)
Round 5: (Sc in the next 3 stitches, inc) repeat around. (30)
Round 6: (Sc in the next 4 stitches, inc) repeat around. (36)
Round 7-13: Sc around. (36)
At this point, the pumpkin body is starting to take shape. You can stuff it with polyfill as you go to give it a plump, round appearance.
Round 14: (Sc in the next 4 stitches, dec) repeat around. (30)
Round 15: (Sc in the next 3 stitches, dec) repeat around. (24)
Round 16: (Sc in the next 2 stitches, dec) repeat around. (18)
Round 17: (Sc in the next stitch, dec) repeat around. (12)
Stuff the body firmly with polyfill.
Round 18: Dec around. (6)
Fasten off and weave in the end. The body is complete!
Step 2: Crochet the Gnome’s Beard
No gnome is complete without a fluffy beard! Let’s make a simple but bushy beard to give our pumpkin gnome that classic, cozy look.
With white or brown yarn:
Start by chaining 10.
Row 1: Sc in the second chain from hook and in each chain across. (9)
Row 2: Ch 1, turn. Sc2tog in the first two stitches, sc in the next 5 stitches, sc2tog in the last two stitches. (7)
Row 3: Ch 1, turn. Sc2tog in the first two stitches, sc in the next 3 stitches, sc2tog in the last two stitches. (5)
Row 4: Ch 1, turn. Sc2tog in the first two stitches, sc in the next stitch, sc2tog in the last two stitches. (3)
Row 5: Ch 1, turn. Sc3tog. (1)
Fasten off and leave a long tail for sewing. You can trim the beard to the desired length or fluff it out for extra charm!
Step 3: Crochet the Gnome’s Nose
The nose is a small but essential detail that gives your gnome its character.
With beige or tan yarn:
Start with a magic ring.
Round 1: 6 sc into the ring. (6)
Round 2: (Sc in the next stitch, inc) repeat around. (9)
Round 3: Sc around. (9)
Round 4: (Sc in the next stitch, dec) repeat around. (6)
Fasten off, leaving a long tail for sewing. Lightly stuff the nose before attaching it to the gnome later.
Step 4: Crochet the Pumpkin Hat
Now, let’s crochet the pumpkin hat! This will sit on the gnome’s head and give it that fall-themed, pumpkin vibe.
With green yarn:
Start with a magic ring.
Round 1: 6 sc into the ring. (6)
Round 2: Inc in each stitch around. (12)
Round 3: (Sc in the next stitch, inc) repeat around. (18)
Round 4: (Sc in the next 2 stitches, inc) repeat around. (24)
Round 5: (Sc in the next 3 stitches, inc) repeat around. (30)
Round 6-9: Sc around. (30)
At this point, the hat should start resembling a cute little pumpkin top. You can make it as long or as short as you like, depending on how you want it to fit on the gnome.
Fasten off and leave a long tail for sewing.
Optional: You can add a small brown or dark green stem on top of the hat by crocheting a short tube and sewing it to the top.
Step 5: Assemble the Gnome
Now that we have all the parts, it’s time to put them together and bring your pumpkin gnome to life!
Attach the beard: Position the beard on the front of the body and sew it in place using the long tail.
Sew on the nose: Place the nose just above the beard and sew it securely to the body.
Attach the hat: Position the hat slightly tilted or directly on top of the head, covering the top part of the beard and nose, and sew it down.
Add details: If you’re using safety eyes, attach them now. You can also embroider details like a smile or some extra vine details around the hat.
Step 6: Add Final Touches
Now that your pumpkin gnome is assembled, it’s time to add any extra touches to give it some personality:
Make it festive: Add a small crocheted leaf or vine detail around the hat to emphasize the pumpkin theme.
Personalize it: Give your gnome a unique flair by adding accessories like a tiny crocheted pumpkin, a broom, or even a tiny scarf!
Make a whole family: Experiment with different yarn colors, sizes, and hat shapes to create a whole gnome family for your fall decor.