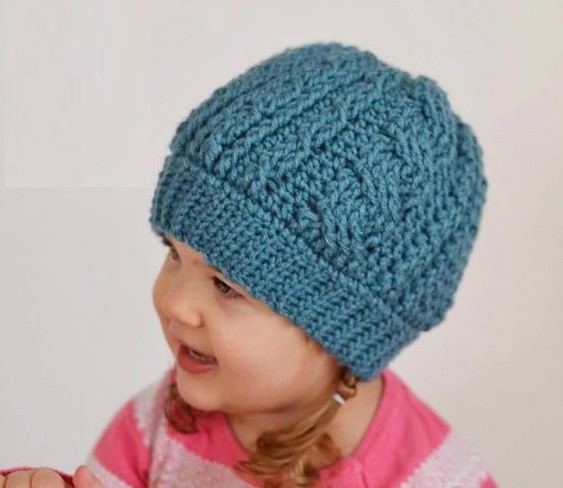
How to Crochet a Stylish Hat for Toddlers and Children


You’ll Need:
2 balls of Lion Brand Vanna’s Choice yarn in Dusty Blue or Wheat colors (3.5 oz / 100g / 170 yd / 156 m / 100% acrylic);
Crochet hooks 5 mm and 6 mm;
Scissors;
Yarn needle.
Size
Toddler: fits 18″ – 19″ circumference
Child: fits 19″ – 20-1/2″ circumference
Notes
The first stitch of each row/round is worked into the same stitch as the beginning/turning chain.
The beginning chain or a row/round does not count as a stitch.
Used Patterns
Forward Cable 2 (FWD Cbl 2)
Skip the next post st, fpdc around the next post st, working in front of the post st just worked, fpdc around the skipped post st.
Forward Cable 6 (FWD Cbl 6)
Skip the next 3 post sts, fptr around each of the next 3 post sts, working in front of the post sts just worked, fptr around each of the 3 skipped post sts.
Instructions
Band
Row 1 (RS): Ch 8, working in the back hump of the foundation chain, sc in the 2nd ch from your hook, sc in each ch across. Turn. (7 sts)
Row 2: Ch 1, BLO sl st in each st across. Turn.
Row 3: Ch 1, BLO sc in each st across to last st, BOTH LOOPS sc in last st. Turn.
Rep Rows 2 – 3, ending with a Row 3 Rep, until your band (unstretched – meaning before it’s been wrapped around a head) measures (13″, 14″). Do not fasten off. Continue on to Seam.
Seam
With the right side facing out, bring the first row up to meet the last row. Make sure to keep your working yarn on the inside of the band. Ch 1, insert your hook from front to back into the FLO of the first row, insert your hook from back to front into the BLO of the last row, yo, pull up a loop and pull it thru all loops on your hook to complete a sl st. Repeat across the short edge of the band. Continue on to Body of Hat.
Hat
Rnd 1: Ch 1, working into the sides of the band, sc 65 (70) sts evenly around the band. Join w/ a sl st to the 1st sc. (65, 70 sts)
Note: Beginning with round 2 we will be working in continuous rounds so that we do not have a visible seam in our hat. I highly suggest using a stitch marker or a 3-4″ long scrap piece of yarn place between the first and last stitches of each round. Move it up as you complete each round.
Rnd 2: Ch 1, [ hdc in the next st, fpdc around each of the next 4 sts ] work from [ to ] 4 times, hdc in the next st, fpdc around each of the next 2 sts, hdc in each of the next 2 sts, fpdc around each of the next 6 sts, hdc in each of the next 2 sts, fpdc around each of the next 2 sts, then work from [ to ] 6 (7) times.
Rnd 3: [ hdc in the next st, fpdc around the next post st, FWD Cbl 2, fpdc around the next post st ] work from [ to ] 4 times, hdc in the next st, FWD Cbl 2, hdc in each of the next 2 sts, FWD Cbl 6, hdc in each of the next 2 sts, FWD Cbl 2, then work from [ to ] 6 (7) times.
Rnds 4 – 5: [ hdc in the next st, fpdc around each of the next 4 post sts ] work from [to ] 4 times, hdc in the next st, fpdc around each of the next 2 post sts, hdc in each of the next 2 sts, fpdc around each of the next 6 post sts, hdc in each of the next 2 sts, fpdc around each of the next 2 post sts, then work from [ to ] 6 (7) times.
RND 1: (Toddler) Rnds 6 – 13: Rep Rnds 3 – 5, ending w/ a Rnd 4 rep. Do not fasten off. Continue on to Crown Shaping.
RND 1: (Child) Rnds 6 – 15: Rep Rnds 3 – 5, ending w/ a Rnd 3 rep. Do not fasten off. Continue on to Crown Shaping.
Crown
Rnd 1: [ hdc in the next st, fpdc around the next post st, fpdc2tog around the next 2 post sts, fpdc around the next post st ] work from [ to ] 4 times, hdc in the next st, fpdc2tog around the next 2 post sts, hdc in each of the next 2 sts, fpdc around each of the next 6 post sts, hdc in each of the next 2 sts, fpdc2tog around the next 2 post sts, then work from [ to ] 6 (7) times. (53, 57 sts)
Rnd 2: [ hdc in the next st, fpdc2tog around the next 2 fpdc (skipping over the fpdc2tog from the previous rnd) ] work from [ to ] 4 times, hdc in the next st, fpdc around the next post st, hdc in each of the next 2 sts, ( fpdc2tog around the 1st & 3rd post sts of the next 3 post sts (skipping over a fpdc) ) twice, hdc in each of the next 2 sts, fpdc around the next post st, then work from [ to ] 6 (7) times. (29, 31 sts)
Rnd 3: [ dc2tog over the next 2 sts ] work from [ to ] 4 times, dc in each of the next 2 sts, (dc2tog over the next 2 sts) 3 times, dc in the next st, then work from [ to ] 6 (7) times. Join w/ a sl st to the 1st st of the rnd. (16, 17 sts)
The finished height of your hat should be approximately (6.75″, 7.25″).
Fasten off leaving an 8″ tail. Using a yarn needle and tail of yarn, weave in and out of the stitches from the last round of crown shaping, pull tail of yarn tight to cinch and close the hole, weave in ends.