How to Create a Minimalist iPhone Sleeve Through Crocheting

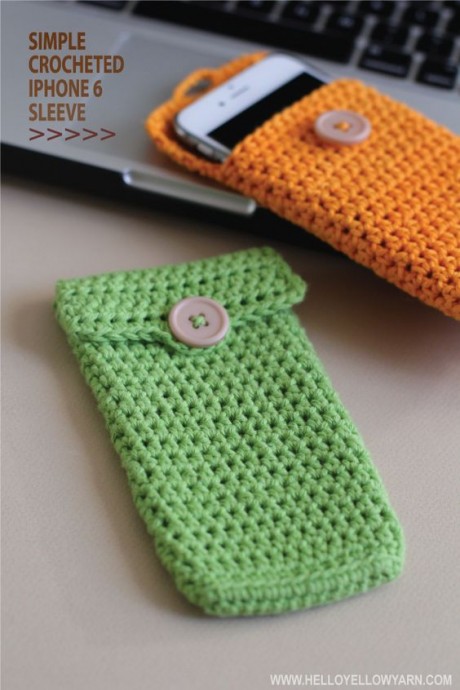
Create a minimalist iPhone sleeve using the art of crocheting. Craft a sleek and stylish cover for your device by following a simple crochet pattern. This DIY project allows you to customize the sleeve to fit your phone perfectly, ensuring a snug and secure fit. Choose your favorite color of yarn to add a personal touch to your creation. Crocheting a sleeve for your iPhone is not only practical but also a fun and creative way to protect your device from scratches and bumps. Handmade iPhone sleeves are a great way to showcase your crafting skills and make a unique accessory for your phone. Crocheting a sleeve is a cost-effective alternative to buying a pre-made case, and you can tailor it to your preferences. Whether you prefer a classic design or want to experiment with different stitches and textures, crocheting allows you to create a one-of-a-kind sleeve that reflects your style. Embrace the art of crocheting and make a simple yet elegant iPhone sleeve that is both functional and fashionable.
Materials
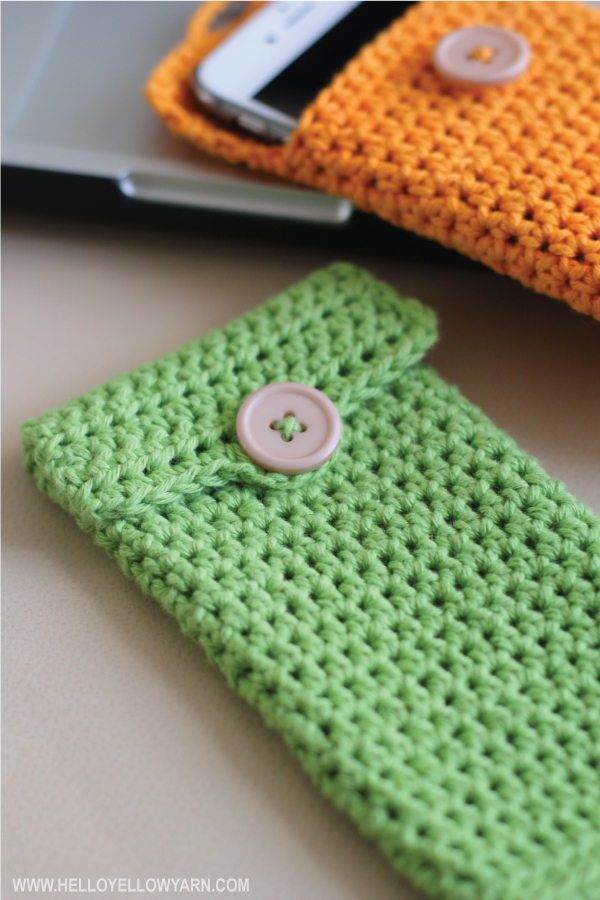
For this sleeve, I used an 8 ply cotton yarn and a size 3.5mm hook. Cotton yarn is thinner than your average wool yarn so if you’re going to use wool, you may want to keep your stitches tighter or use a smaller hook.
Terms
(I follow US terminology):
- SC – Single Crochet
- HDC – Half Double Crochet
You’ll need:
- 8 ply Cotton Yarn
- 3.5mm hook
- Scissors
- Yarn Needle
- Button (at least 1.5cm in diameter)
Instructions
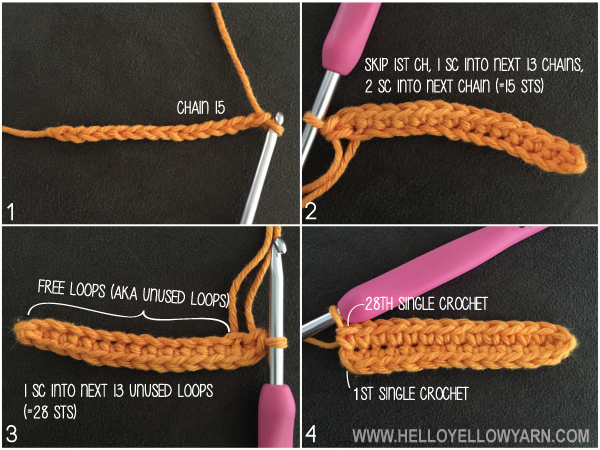
1. Chain 15.
2. Skip 1st chain from hook. 1 SC into next 13 chains. 2 SC into next chain. (15 stitches)
3. 1 SC into the next 13 free loops (also known as unused loops).
4. You should have a total of 28 stitches. DO NOT join round. Work continuously in the round.
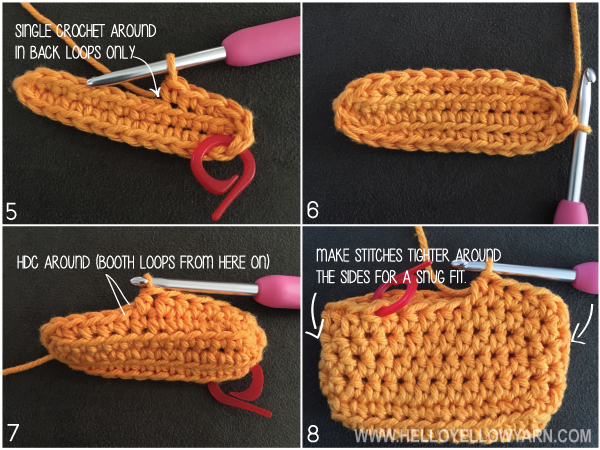
5. 1 SC in each of the 28 stitches in the back loops only.
6. Your work will naturally curve outwards.
7. 1 HDC in each of the 28 stitches around, working on both loops from here on.
8. Make the stitches tighter around the sides for a snug fit for your phone.
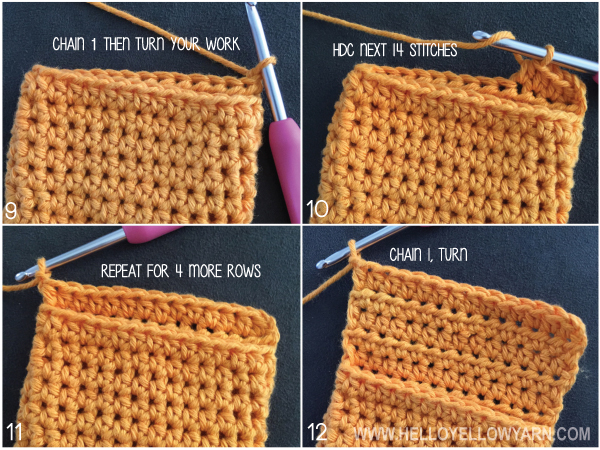
9. Continue to make stitches until you have reached the desired height for your phone. Mine worked out at 22 rounds – that’s including the first round. To make the cover, make sure you start off your stitch from the right side – (see above picture, no. 9). Chain 1 then turn your work.
10. HDC next 14 stitches.
11. Chain 1 and turn. HDC next 14 stitches. Repeat this until you have 5 rows.
12. Chain 1, turn.
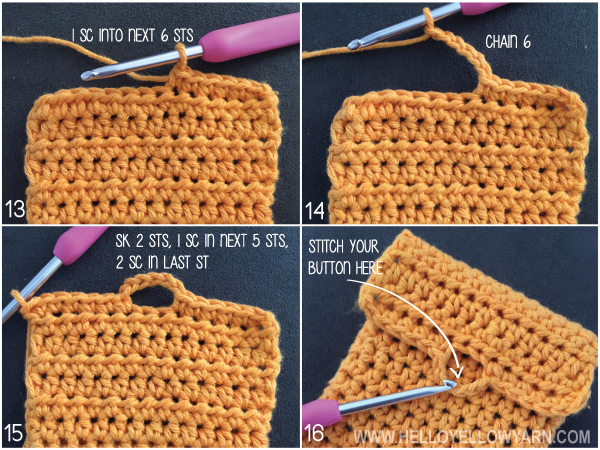
13. 1 SC into next 6 stitches.
14. Chain 6.
15. Skip 2 stitches. 1 SC into next 5 stitches. 2 SC into last stitch. Slip stitch into next stitch to finish off. Cut yarn and weave into stitches to hide.
16. Slip your phone into the sleeve. Fold the cover to the front and mark the spot where you will stitch your button.
Sew in your button and you’re done!