Handmade Crochet Polar Bear: A Step-by-Step Guide
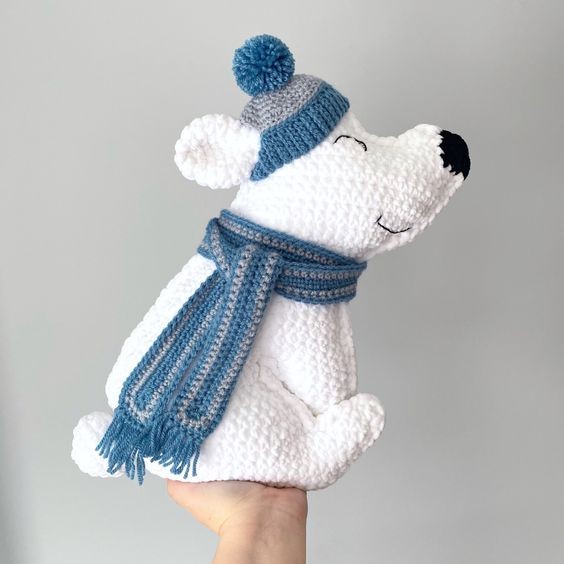
Imagine creating your very own handmade polar bear using the art of crochet. With just a hook and some yarn, you can bring this adorable arctic animal to life in the comfort of your own home. Crocheting a polar bear allows you to customize every detail, from the size and shape to the color of its fur. You can even add unique touches like a scarf or hat to give your creation extra personality. Crocheting a polar bear is a fun and rewarding project that is perfect for crafters of all skill levels. Whether you are a beginner looking to improve your crochet skills or an experienced crafter seeking a new challenge, this project is sure to bring you joy. As you work on each stitch, you will feel a sense of accomplishment knowing that you are creating something special with your own two hands. So grab your crochet hook and get ready to embark on a creative journey to make your very own crochet polar bear.
The Details
As usual, the body of this pattern is made in the same style as my Ragdoll patterns; separate pieces worked in flat rows and then joined together to give them that unique 2-D look.
The finished measurements are approximately 35cm/14″ from top to bottom.
Notes:
- The body panels are worked from the bottom up in flat rows. The foreleg is made first and set aside and is then joined to the body panel as you work the body.
- There is a small amount of colour work in rows 38-40 of the body to create the nose. When changing colours, insert your hook into the last stitch of colour ‘A’, YO, pull up a loop, YO with colour ‘B’ and finish the stitch with ‘B’. Continue with colour ‘B’ as needed. Always drop the yarn on the back/wrong side of the panel.
- When working the front panel, the front/right side of the panel will be facing you when working odd-numbered rows and the back/wrong side will be facing you when working even-numbered rows. This is reversed for the back panel.
- The face is stitched onto the front panel before assembly.
- The body panels are single crocheted together to join them and then stuffed.
- The tail and ear are worked in continuous rounds and attached after assembly of the panels.
- The hat is worked in rounds and the scarf is worked around a starting chain.
- The hat and scarf are worked in a light weight (size 3) yarn with a 3.75mm hook. If you are using a lighter weight yarn for the polar bear, be sure to size down 3 weights for the yarn used for the hat and scarf. For example, if using a bulky (size 5) for the bear, use a fine (size 2) for the accessories. Be sure to adjust your hook accordingly as well.
- Ch 1 at the end of each row does not count as a stitch.
Materials:
(Affiliate links coming at you!)
- 6mm hook for main
- 3.75mm hook for hat and scarf;
- Loops & Threads Chenille Home Slim in white (or any super bulky size 6 yarn of choice)(250g);
- Hobbii Honey Bunny in Black (or any super bulky size 6 yarn of choice)(10g);
- Hobbii Amigo in Steel Blue and Light Gray (or any light weight/size 3 yarn of choice)(20g each);
- Black crochet thread, size 5 for eye and mouth (or alternatively, a 16mm safety eye);
- Stitch markers;
- Stuffing;
- Tapestry needle.
Terms and Stitches:
Ch – Chain
Ch-sp – Chain space
Slst – Slip stitch
MR – Magic Ring
Sk – Skip a stitch
Sc – Single Crochet
Inc – Increase. Work a regular sc increase
Inc twice – Work a regular sc increase in each of the next 2 sts
Dec – Decrease. Work a regular sc decrease
Dec twice – Work a regular sc decrease two times over the next 4 sts.
BLO = Back loops only
Sc3tog – Single crochet three stitches together
Hdc – Half double crochet
Dc – Double crochet
Invisible join – After last st, cut yarn and pull up on the working loop until the yarn tail is pulled all the way through. With tapestry needle, thread yarn tail through the next st from back to front and then down into the centre of the “V” of the last st worked. Pull tight. Weave ends.
Pattern
Foreleg (Make 2):
Row 1: In white, ch 7, starting in 2nd ch from hook, sc in each ch (6 sts), ch 1, turn.
Rows 2-10: Sc in each st across (6 sts), ch 1, turn.
Row 11: Sc 5, inc (7 sts), ch 1, turn.
Rows 12-13: Sc in each st across (7 sts), ch 1, turn.
Row 14: Inc, sc 6 (8 sts).
Place a stitch marker into the first st of row 14. Tie off. Weave ends to the back. Set aside.
Body (Make 2 Panels):
Row 1: In white, ch 20, starting in 2nd ch from hook, sc in each ch across (19 sts), ch 1, turn.
Row 2: Inc in first st, sc 17, inc in last st (21 sts), ch 1, turn.
Row 3: Sc 20, inc in last st (22 sts), ch 1, turn.
Row 4: Sc 21, inc in last st (23 sts), ch 1, turn.
Row 5: Inc, sc 21, inc (25 sts), ch 1, turn.
Row 6: Sc in each st across (25 sts), ch 1, turn.
Row 7: Inc, sc 23, inc (27 sts), ch 1, turn.
Row 8: Sc 21, leave remaining sts unworked (21 sts), ch 1, turn.
Row 9: Dec, sc 19 (20 sts), ch 1, turn.
Row 10: Sc 18, dec (19 sts), ch 1, turn.
Row 11: Dec, sc 15, dec (17 sts), ch 1, turn.
Row 12: Sc 13, dec twice (15 sts), ch 1, turn.
Row 13: Sc in each st across (15 sts), ch 1, turn.
Row 14: Dec, sc 13 (14 sts), ch 1, turn.
Row 15: Dec, sc 12 (13 sts), ch 1, turn.
The foreleg will be joined to the body in the next row.
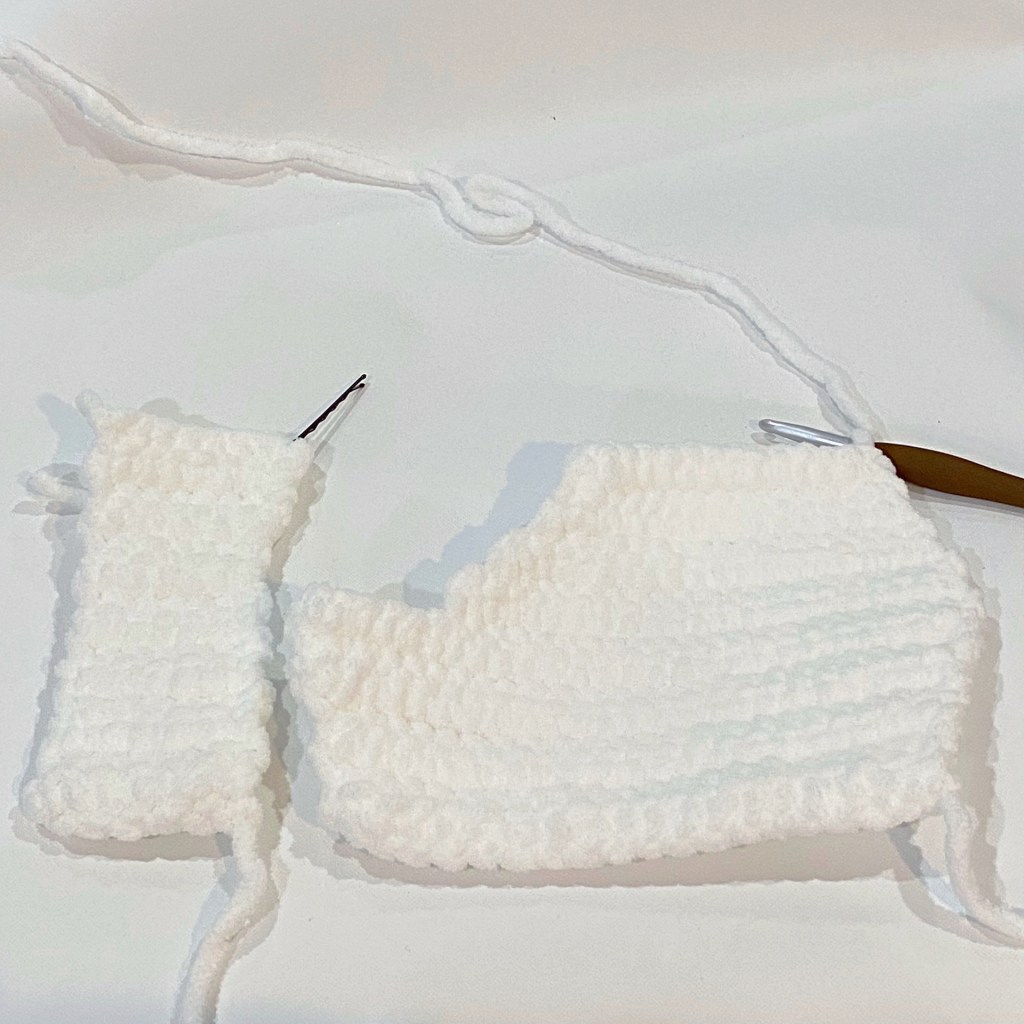
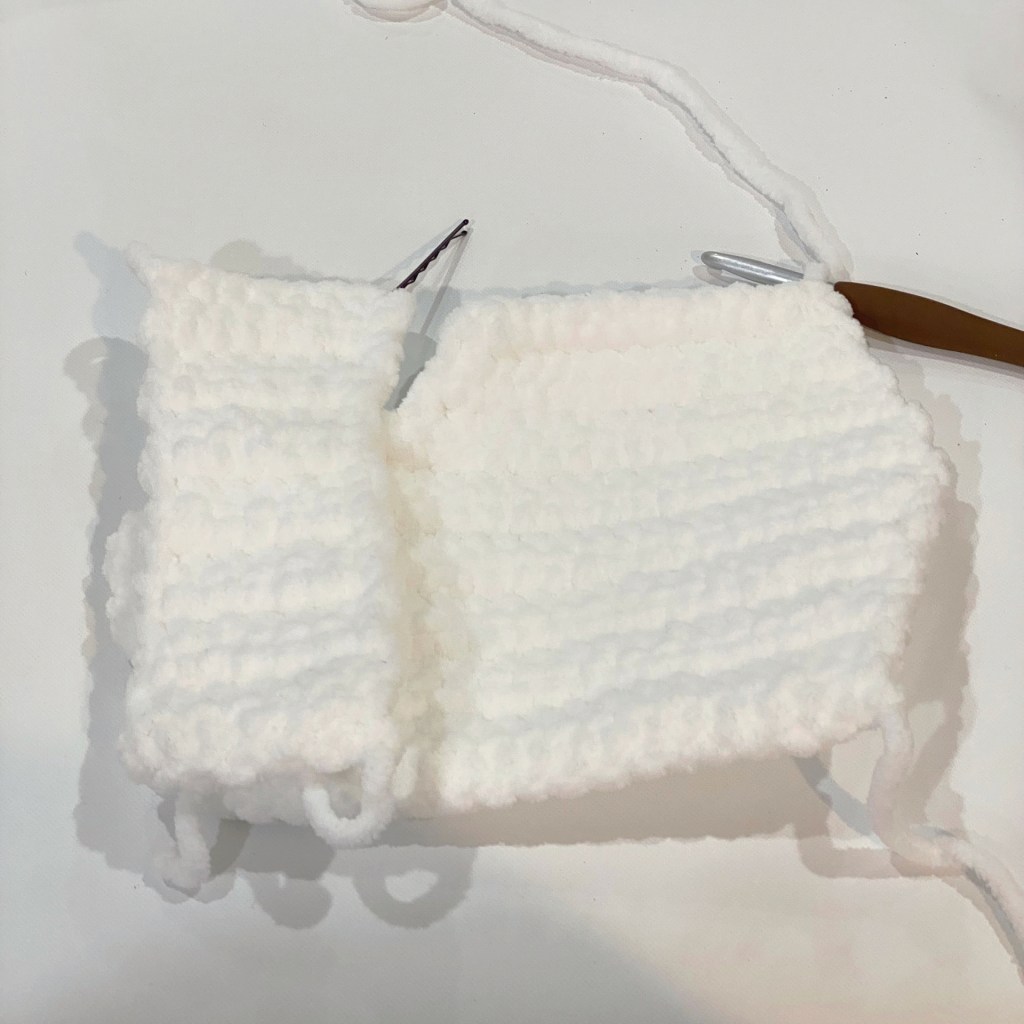
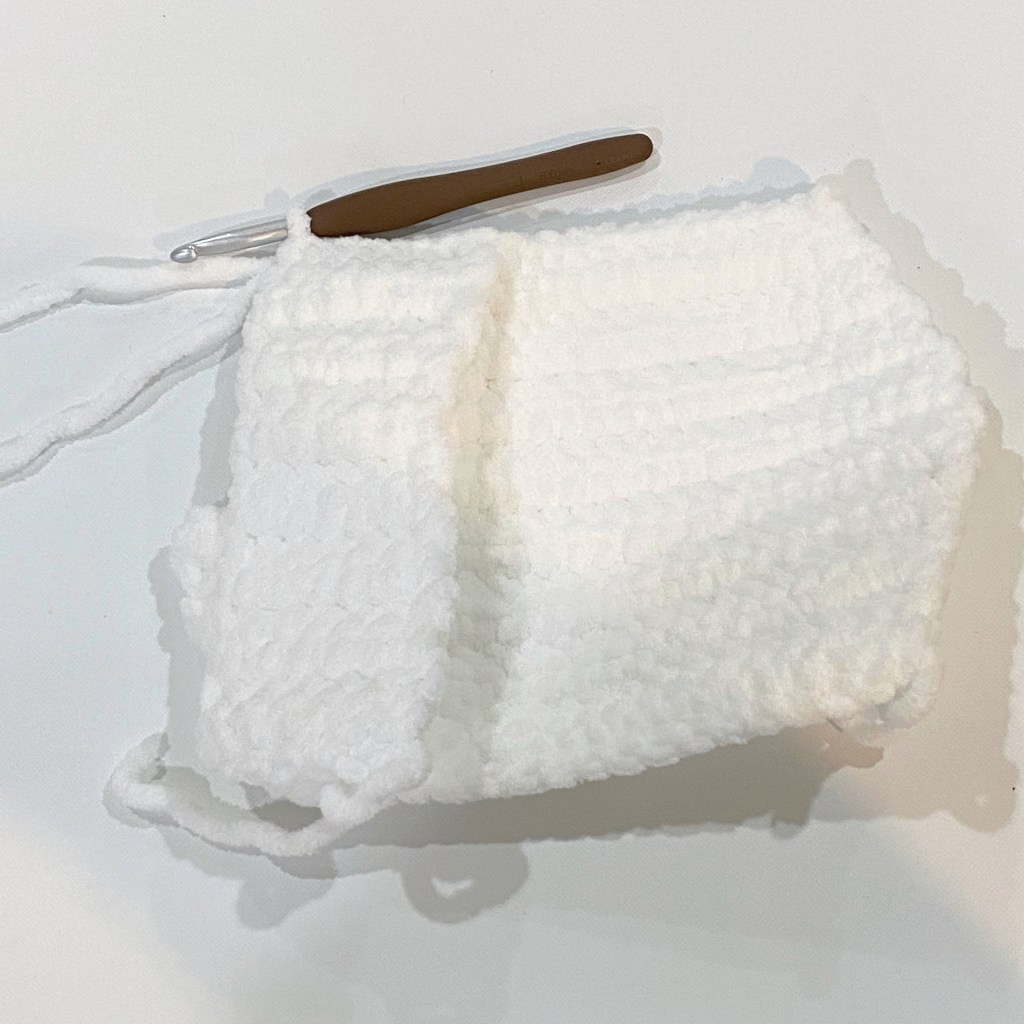
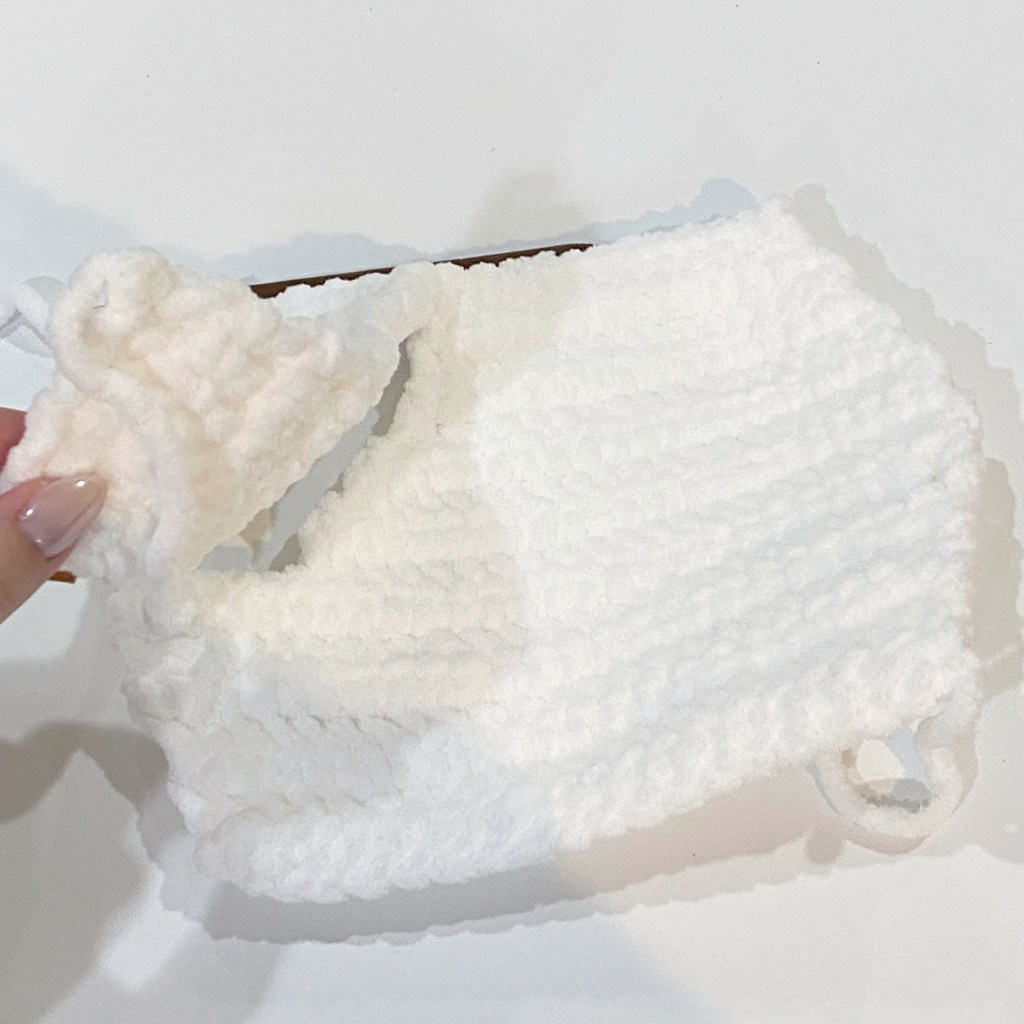
Row 16: Dec, sc 11, insert hook into the st on the foreleg with the marker and continue crocheting across foreleg by sc 8 (20 sts), ch 1, turn. Remove marker.
Row 17: Sc in each st (20 sts), ch 1, turn.
Row 18: Dec, sc 18 (19 sts), ch 1, turn.
Row 19: Sc in each st across (19 sts), ch 1, turn.
Row 20: Dec, sc 17 (18 sts), ch 1, turn.
Row 21: Sc in each st across (18 sts), ch 1, turn.
Row 22: Dec, sc 16 (17 sts), ch 1, turn.
Row 23: Inc, sc 14, dec (17 sts), ch 1, turn.
Row 24: Sc in each st across (17 sts), ch 1, turn.
Row 25: Inc, sc 14, dec (17 sts), ch 1, turn.
Row 26: Dec, sc 14, inc (17 sts), ch 1, turn.
Row 27: Inc, sc 14, dec (17 sts), ch 1, turn.
Row 28: Sc 15, inc twice (19 sts), ch 1, turn.
Row 29: Inc, sc 16, dec (19 sts), ch 1, turn.
Row 30: Sc 18, inc (20 sts), ch 1, turn.
Row 31: Inc, sc 17, dec (20 sts), ch 1, turn.
Row 32: Sc in each st across (20 sts), ch 1, turn.
Row 33: Sc 18, dec (19 sts), ch 1, turn.
Row 34: Sc 18, inc (20 sts), ch 1, turn.
Row 35: Sc 18, dec (19 sts), ch 1, turn.
Row 36: Dec, sc 17 (18 sts), ch 1, turn.
Row 37: Inc, sc 17 (19 sts), ch 1, turn.
Colour work for the nose begins in the next row.
Row 38: In white, sc 16, in black sc 3 (19 sts), ch 1, turn.
Row 39: Sc 3, in white sc 3, leave remaining sts unworked (6 sts), ch 1, turn.
Row 40: Slst 2, sc 1, in black sc 1, dec (5 sts).
Tie off. With the nose pointing to the right, rejoin your white yarn in the 8th st of the unworked sts of row 38, counting from the left. Continue as follows:
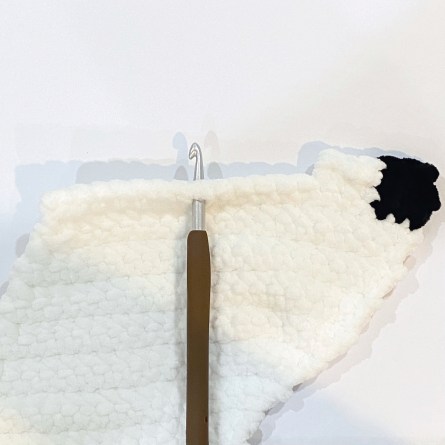
Row 41: Sc 4, dec twice (6 sts), ch 1, turn.
Row 42: Dec three times (3 sts).
Tie off. Do not turn the work (the head should be pointing to the left). Rejoin yarn in the 4th stitch of the unworked sts of row 7, counting from the left and complete the foot as follows:
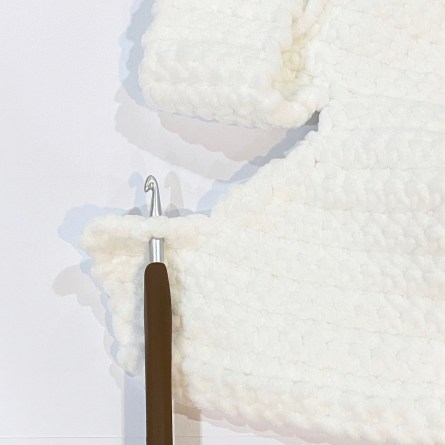
Row 1: Sc 4 (4 sts), ch 1, turn.
Row 2: Sc 2, leave remaining sts unworked.
Tie off. Weave ends to the back/wrong side of the panel. Set aside.
Ear (Make 1):
Rnd 1: In white, work 6 sc into a MR (6 sts).
Rnd 2: Inc in each st around (12 sts).
Rnd 3: *Sc 1, inc in next st, repeat from * five more times (18 sts)
Rnds 4-6: Sc in each st around (18 sts)
Rnd 7: *Sc, dec, repeat from * five more times (12 sts)
Rnd 8: Dec 6 times (6 sts)
Rnd 9: Sc in each st (6 sts)
Tie off. Do not stuff. Flatten the ear to make a concave shape. Set aside.
Tail (Make 1):
Rnd 1: In white, work 6 sc into a MR (6 sts)
Rnd 2: Inc in each st around (12 sts)
Rnd 3: *Sc, inc in next st, repeat from * five more times (18 sts)
Rnds 4-5: Sc in each st around (18 sts)
Rnd 6: *Sc, dec, repeat from * five more times (12 sts)
Rnd 7: Dec 6 times (6 sts)
Stuff. Tie off, leaving a long tail for closing. Weave the tail through each stitch, down through the centre, and pull to close. Weave end. Set aside.
Hat (Make 1):
Brim:
Row 1: In blue light weight yarn and 3.75mm hook, ch 6, starting in 2nd ch from hook, slst in each ch (5 sts), ch 1, turn.
Row 2: In BLO, slst in each st across (5 sts), ch 1, turn.
Rows 3-60: Repeat row 2.
Slst short ends together to create a circle. Tie off. Weave ends.
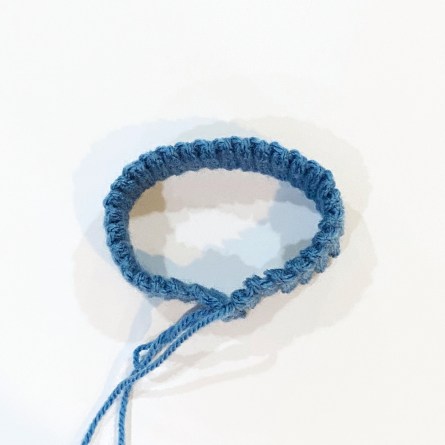
Hat Body:
Rnd 1: Continuing in blue, *sc into the top of each of the next 2 rows, skip the top of the next row, repeat from * until 40 sts are worked, sc 2 (42 sts), join with a slst.
Rnd 2: In grey light weight yarn, BLO slst 24, sk 6, ch 6, BLO slst 12 (42 sts)
Rnd 3: In BLO, sc in each st around, including the chains from previous row (42 sts)
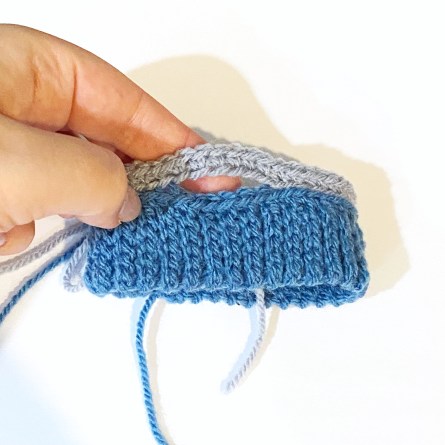
Rnd 4: *Sc 5, dec, repeat from * five more times (36 sts)
Rnd 5: *Sc 4, dec, repeat from * five more times (30 sts)
Rnd 6: *Sc 3, dec, repeat from * five more times (24 sts)
Rnd 7: *Sc 2, dec, repeat from * five more times (18 sts)
Rnd 8: *Sc 1, dec, repeat from * five more times (12 sts)
Rnd 9: Dec around (6 sts)
Tie off, leaving a long tail for closing. Weave the end through each stitch and then down through the centre to close. Weave ends. Make a pompom in blue yarn if desired and attach to the top of the hat.
Scarf (Make 1):
Row 1: In blue, ch 151, starting in 2nd ch from hook, sc in each ch until the last ch, in the last ch work (2 sc, ch 1, 2 sc, ch 1, 2 sc), working on opposite side of chain, sc in each ch until the last ch, in the last ch work (2 sc, ch 1, 2 sc, ch 1, 1 sc), slst to beg st to join.
Row 2: In grey, sc in each st until first ch 1-sp, *in ch 1-sp work (sc, ch 1, sc), sc to next ch 1-sp, in next ch 1-sp work (sc, ch 1, sc), sc in each st until the ch 1-sp on the other end, repeat from * until end of round.
Row 3: In blue, repeat round 2.
Tie off. Weave ends. Add fringe to each end of the scarf if desired.
Move on to assembly below!
Assembly:
- Using black crochet thread or yarn, stitch a happy eye onto the front body panel at rows 36-37, counting 6 stitches in from the left and spanning about 3 stitches (alternatively, insert a safety eye).
- Using black crochet thread or yarn, stitch a mouth onto the front body panel at rows 29-30, spanning about 6 stitches.
- Place both panels together, matching up all rows and with the front facing you. Starting near the top on the left side, begin attaching the panels together by inserting your hook through both panels and single crocheting around the outside edge of the panels in white. Once you’ve crocheted around the foot, stop and stuff the foot. Continue crocheting up the back leg, then down and around the foreleg, then up the right side of the body. Stuff as you go. When only the top remains open, stuff firmly. Continue crocheting around and close with an invisible join. Weave ends.
- With white, stitch the ear onto the left side of the body at rows 35-36. Weave ends.
- With white, stitch the tail onto the left side of the body at rows 3-7. Weave ends.
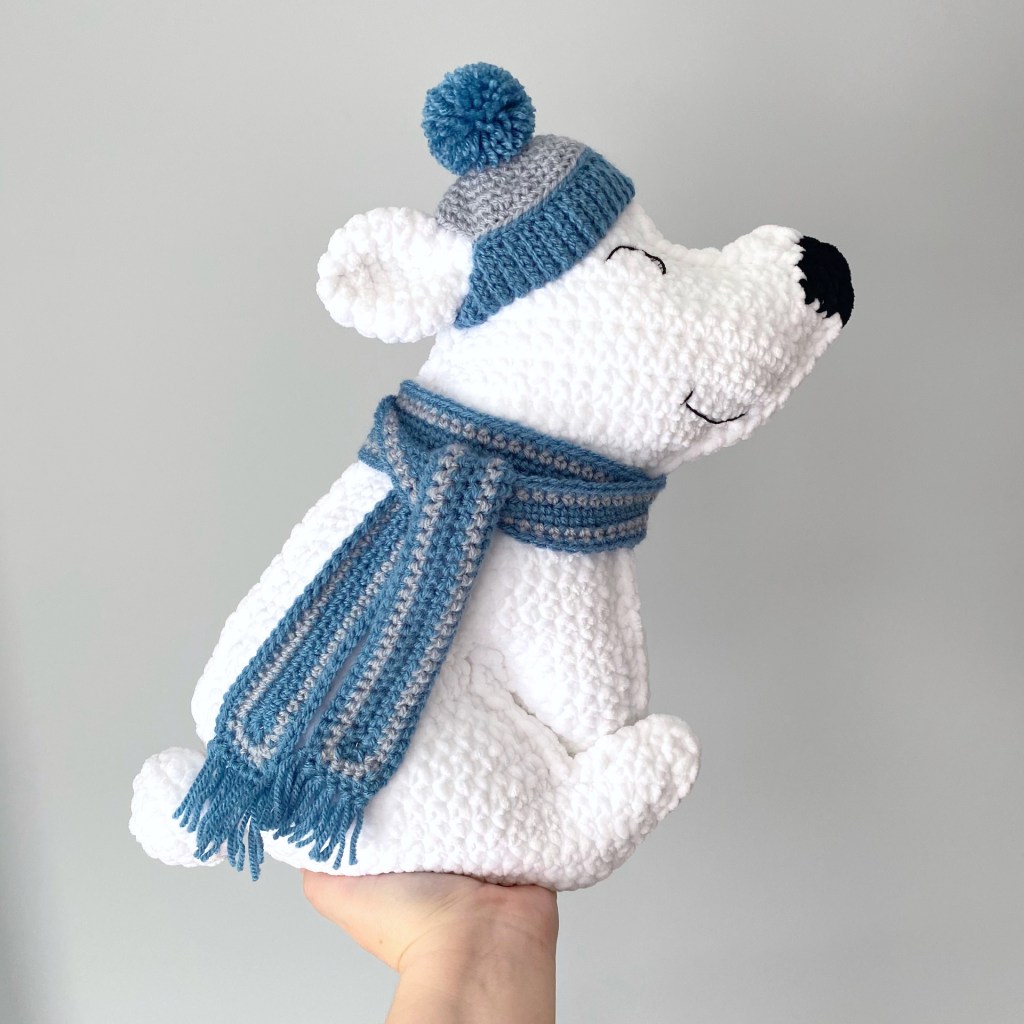
- Insert ear through the hole in the hat and pull hat over top of head.
- Wrap scarf around neck.
You’re done!
