How to Make the Cozy Crochet Chalet Cardigan


Imagine a cozy winter evening, sitting by the fireplace in your favorite armchair, wrapped in a beautifully crafted Crochet Chalet Cardigan. This stylish and comfortable cardigan is perfect for adding a touch of warmth and elegance to your winter wardrobe. The intricate crochet design gives it a unique and charming look that is sure to turn heads wherever you go. Whether you're heading out for a casual brunch with friends or a romantic dinner date, this cardigan will elevate your outfit and make you feel confident and chic. With its soft fabric and flattering fit, you'll never want to take it off. Embrace the cozy vibes of winter with the Crochet Chalet Cardigan and make a fashion statement that is both timeless and trendy.
Materials Needed
Sizing
This cardigan is meant to be oversized. It is quite roomy. It is also very long. The length in the back comes to right behind the knee. To get the width for the back, take your chest measurement in inches, then divide by 2. Then, you will add 2 inches to that number. This is how long you will want your foundation chain to be. If you would like to go up a size, add 6 more stitches. If you would like to go down a size, decrease 6 stitches. The pattern is written for a size M/L.
Materials
- Lion Brand Scarfie yarn. You will need:
- 3.5 skeins for XS/S
- 4 skeins for M/L
- 4.5 skeins for XL
- 5 skeins for 2X
- 6.5 mm crochet hook
- 5.5 mm crochet hook
- Scissors
- Tapestry needle
- Measuring tape
- 2 stitch markers
Abbreviations
- Chain (ch)
- Herringbone Double Crochet (hbdc)
- Herringbone Double Crochet Decrease (hbdc dec)
- Double Crochet (dc)
- Single Crochet (sc)
- Skip (sk)
- Stitch (st)
- Front Post Double Crochet (fpdc)
- Back Post Double Crochet (bpdc)
Chalet Cardigan Pattern
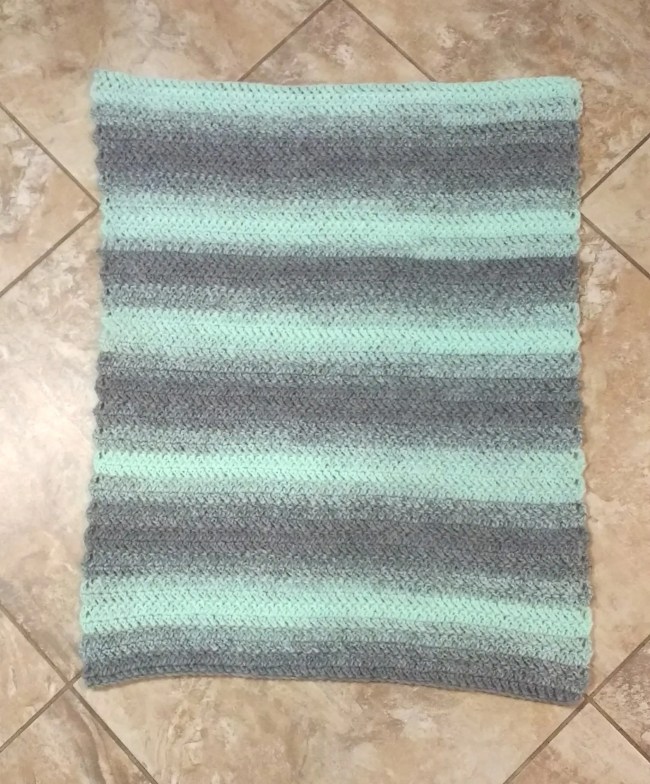
For the Back:
With 6.5 mm hook
Ch. 60
Row 1 – hbdc in the 4th ch from the hook and each ch across. (58)
Row 2 – Ch. 3 turn, hbdc in the first st and each st across. (58)
Rows 3 thru 51 – Repeat row 2
Bind off
The BACK should measure approx. 31″ x 25″
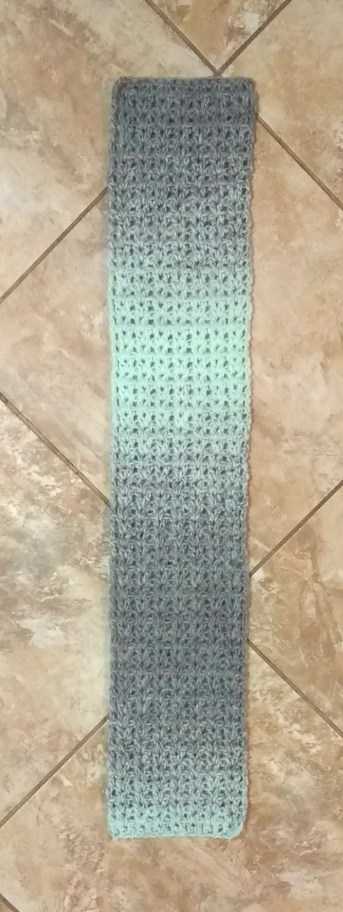
Side Panels: (Make 2)
The side panels are crocheted using the V-stitch. If you are not familiar with this stitch, follow these instructions:
With 6.5 mm hook
Ch. 18
Row 1 – 2 dc in the 4th ch from the hook, sk next ch. *2 dc in the next ch, sk next ch* Repeat *til last two chains remain. sk next ch, dc in the last ch. (16)
Row 2 – Ch. 2 turn, 2 dc in between the first two dc of the previous row and each set of dc across. There will be two stitches left. sk next st, dc in top of ch. 2 of previous row. (16)
Rows 3 thru 56 – Repeat Row 2
Note – Your PANEL will be longer than the BACK.
Your PANEL should measure approx. 36″ x 7″
Assembling the Cardigan
Next, take the BACK and lie it down with the wrong side facing you. Then, take both PANELS and lie them on each side of the BACK with wrong side facing you. Sew both panels to the top of the BACK using the mattress stitch.
Mattress Stitch
Next, measure approx. 7.5″ on each side from the top down. Place stitch marker on each side. Sew each side from the stitch marker all the way down to where the BACK ends. This creates the armholes.
Next, turn your work right side out.
Sleeve:
With 6.5 mm hook
Attach yarn to the edge of the opening for the armhole, preferably underneath the armpit area.
Round 1 – Ch. 1 and sc all the way around the edge of the armhole. Join to first sc of the round. (34 sc’s)
Round 2 – Ch. 2 hbdc in the same st and each st around. Join. (34)
Rounds 3 thru 10 – Repeat round 2
Round 11 – Ch. 2 hbdc in the same st and the next st, hbdc dec. in the next. *hbdc in the next 7 stitches, hbdc dec. in the next* Repeat *til there are three stitches left. hbdc in the last three stitches. (30)
Rounds 12 thru 21 – Repeat round 2 (30)
Round 22 – Ch. 2 hbdc in the same st and the next st, hbdc dec. in the next. *hbdc in the next 4 stitches, hbdc dec. in the next* Repeat *til there are two stitches left. hbdc in the last two stitches. (25)
Round 23 – Ch. 2 dc in the same st, sk next st. *2 dc in the next st, sk next st* Repeat *til the last stitch. Note that you will end this round with 2 dc in the last st. (25)
Round 24 - Ch. 2 dc in the same st, 2 dc in between the 2 dc of the previous round and each set of dc in the round. Join. (25)
Rounds 25 thru 30 – Repeat round 24 (25)
With 5.5 mm hook
Rounds 31 & 32 – Ch. 1 sc in the same st and each st around. Join. (25)
Bind off
Repeat rounds 1 thru 32 for the other sleeve.
Trim:
Starting at the bottom edge of the right PANEL, ch. 2 and dc all the way around the edge of the opening. I ended up with 244 dc’s. The stitch count doesn’t matter too much as long as you end up with an even amount of stitches.
Row 1 – Ch. 3 fpdc around the dc of the previous row, bpdc around the next dc of the previous row. *fpdc around the next dc of the previous row, bpdc around the next dc of the previous row* Repeat *til end of the row. (244)
Row 2 – Ch. 3 bpdc around the dc of the previous row, fpdc around the next dc of the previous row. *bpdc around the next dc of the previous row, fpdc around the next dc of the previous row. Repeat *til end of the row. (244)
Rows 3 & 4 – Repeat rows 1 & 2 respectively
Bind off
To get the cinched look like in the pictures, do the following:
With 2 strands of yarn: Ch. 85
On the last ch, pull yarn through to make a knot.
Starting at the bottom of one of the panels and going up, begin to thread your chain underneath every other fpdc until you have threaded 13 fpdc.
Next, work the chain underneath and across. Going back down, begin to thread underneath and over the same fpdc’s that you did when you went up, all the way to the end.
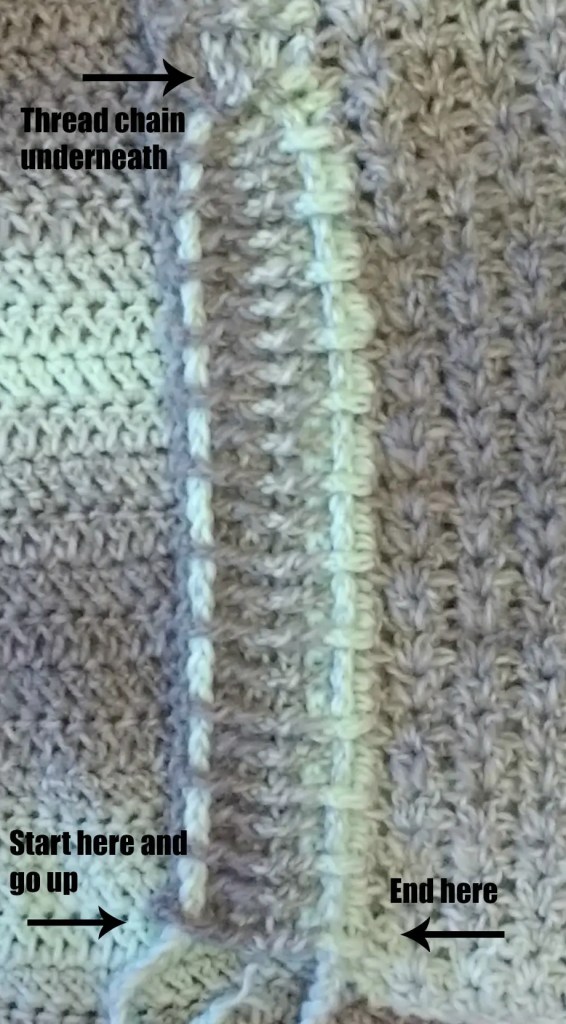
Pull both strands to cinch. Tie.
Do the same for the other side of the cardigan.
Weave in any loose ends.
That’s it! You’re finished!