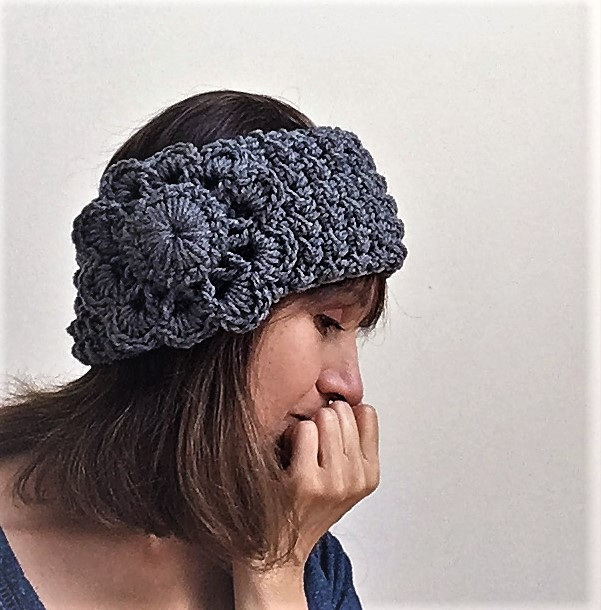
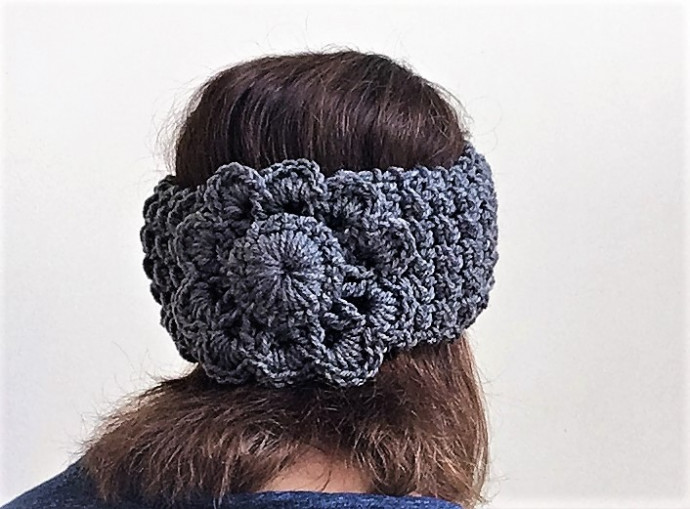
How to Crochet a Stylish Headband with Flower and Button


You’ll Need:
6 oz. of Red Heart Super Jumbo Saver Yarn in color Grey Heather;
Crochet hooks G, I, and E;
Yarn needle.
Instructions
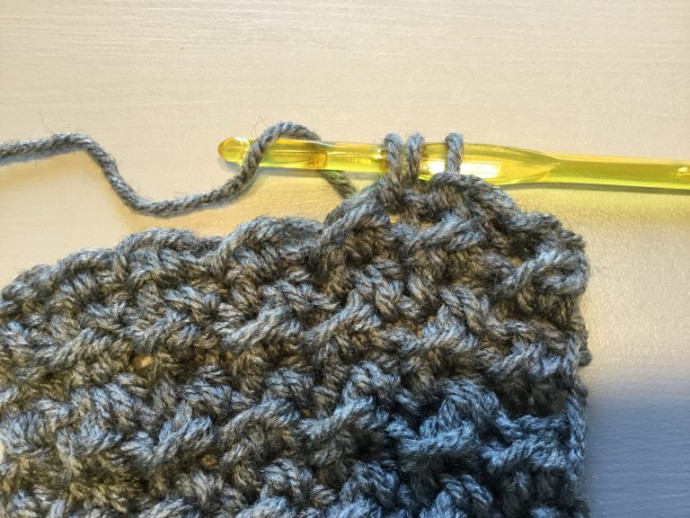
Headband
Crochet hook I.
Ch 14
Row 1: Slip stitch in 2nd ch from hook. (hdc in next ch, sl st in next ch) repeat to end. Turn.
Row 2: Ch 1, sl st in 2nd st from hook. (hdc in next st, sl st in next st), repeat to end. Turn.
End with slip stitch at the end of each row.
Repeat Row 2 until the headband measures 18”. Adjust length as needed.
Turn work right sides together. Use your preferred method to join the two ends.
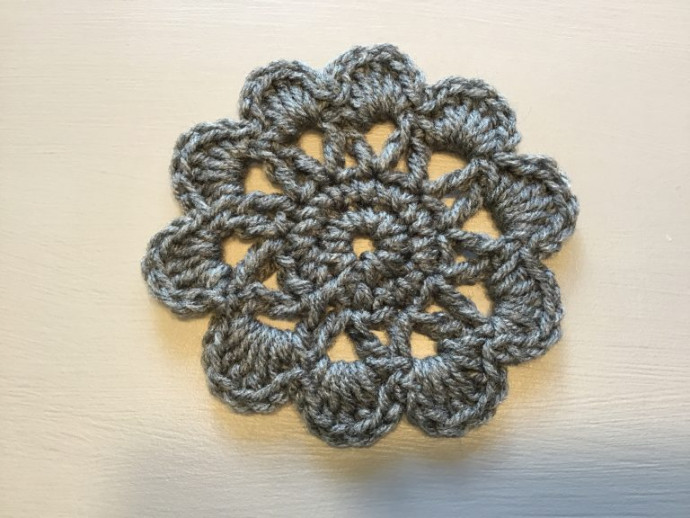
Flower
Crochet hook G.
Ch 4, sl st in 1st ch for a ring.
Row 1: Ch 1, 10 sc, sl st in 1st sc.
Row 2: 2 sc in each sc to end. 20 sc
Row 3: 6 ch, 1 dc in the base of 6ch. Skip 1 sc, (1 dc, ch 3, 1 dc) in the next sc. Repeat from * to * to last sc. Skip last sc, sl st in 3rd ch of ch 6. You will have 10 ch 3 spaces.
Row 4: Ch 1, * (1 sc, 1 hdc, 4 dc, 1 hdc, 1 sc) in the next ch 3 space*. Repeat from * to *. Tie off. 10 clusters total.
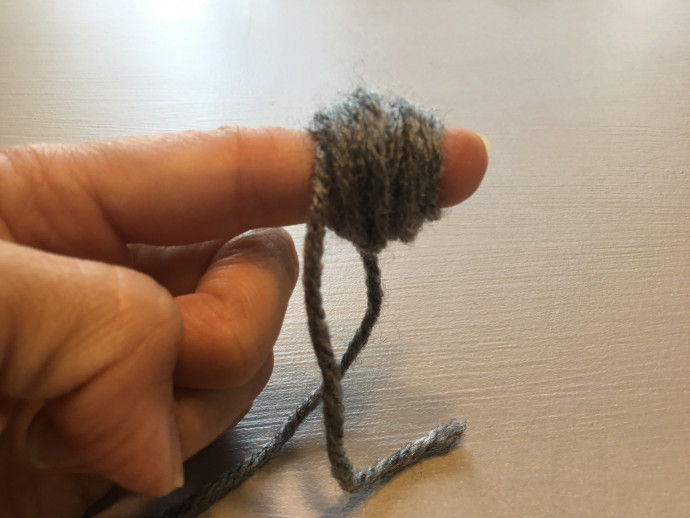
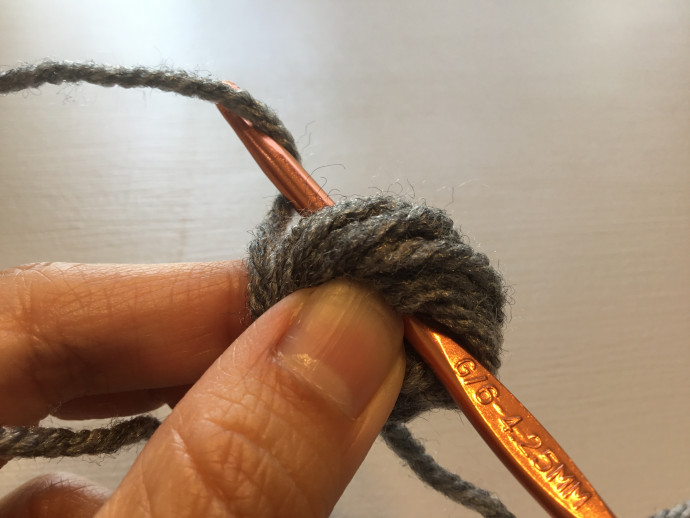
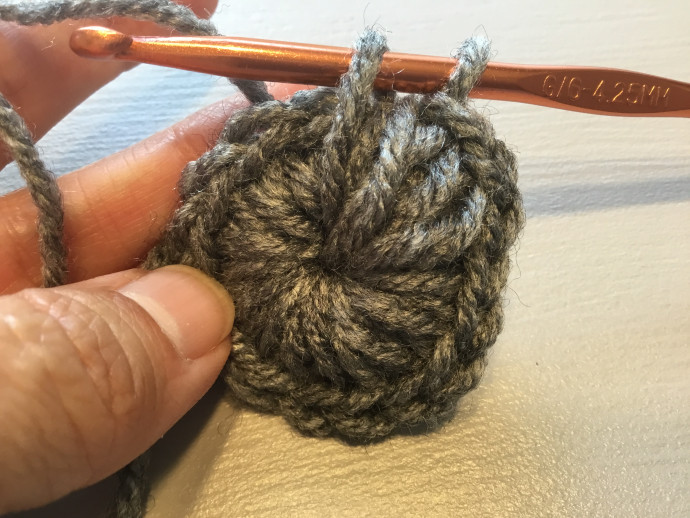
Button
Crochet hooks G and E.
Wind yarn around your index finger (or a pen) about 17 times. Carefully remove, holding tightly so it does not unwind.
Row 1: Insert hook G through center to pull yarn through for a sc. Continue with sc all the way around for as many as needed to cover and create a ring. Sl st in 1st sc. It will be thick!
Row 2: Without turning, sc around the ring again, working over the row of previous sc’s. The goal is to create a puffy button with the center hole barely showing.
Row 3: Working from right to left (backward), using hook E, sc in each st around the ring. Sl st in 1st st. Tie off.
Assembly
Using a yarn needle, attach the button to the center of the flower.
Using a yarn needle, attach the flower to the headband at the seam.