
Creating Beautiful Copper Plate Flowers with Fusible Granules


You'll Need
Copper plate 0,15 mm wide, 30 x 45 cm;
Fusible granules (yellow, orange, light-red, light-blue, and blue);
Tool for graving;
Coffee spoon;
Table spoon;
Etcher's needle;
Old scissors;
Soft packing cardboard;
Oven;
Leather glove;
Flint paper;
Glass or metal container;
Carbon paper.
Instructions
Transfer the selected motive from the sheet of motives, enlarging it, to thin transparent paper and cut it, stepping back from the contour. Cut the copper plate with old scissors on each side about 4 cm larger than the size of the motif. Transfer the template using carbon paper onto a copper plate.
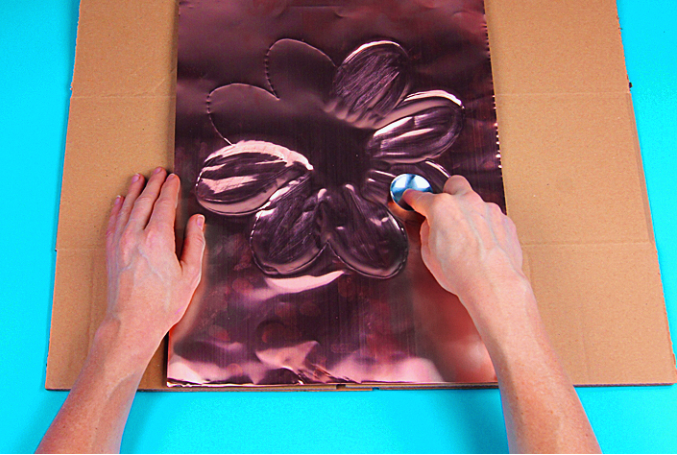
Put the copper plate for engraving on the litter of soft cardboard. Use a ballpoint pen or etcher's needle to repeat the outline of the motive. Then use a thinner ballpoint pen or a round needle (engraving tool) to repeat the contour lines for the second time.
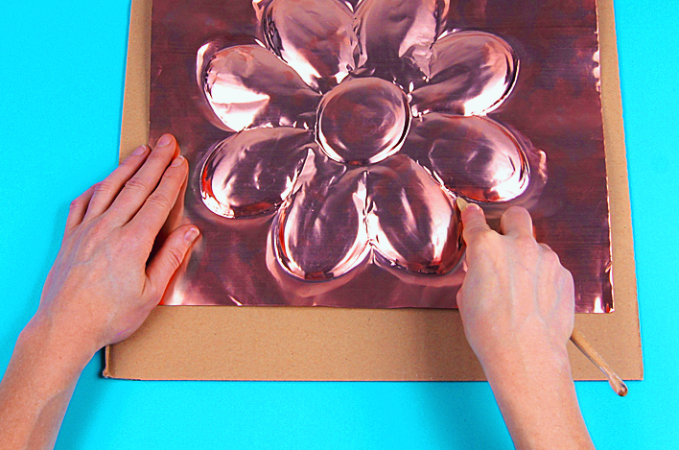
Now turn the copper plate over and press the handle of the spoon into the inner sections approximately to a depth of 2-3 mm. Then turn the plate over again and gently repeat the contours with a thin ballpoint pen (or round needle). Turn the sheet over and the motive again carefully squeeze the handle of the spoon to a depth of 1-2 mm; as a result, you should get a beautiful recess.
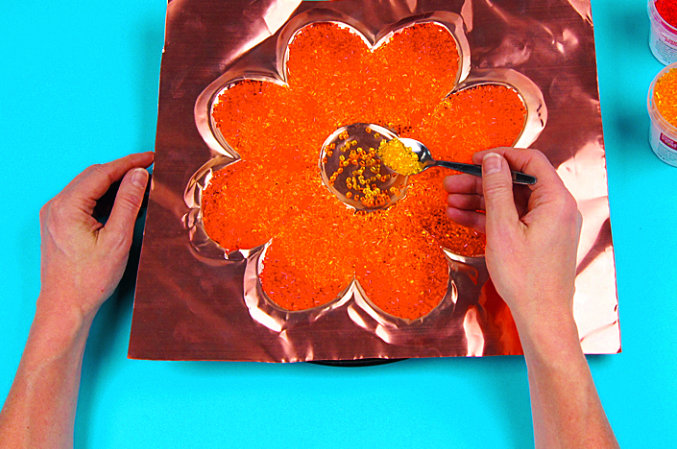
Now, starting from the middle, fill the shape of the flower with fusible granules. The middle of the flower is yellow, the petals are orange, and pour red granules along the edges. It is best to distribute the granules with a small coffee spoon. Fill the form to the brim, while squeezing the granulate along the edges with a spoon. Fill the second form, as shown in the photo.
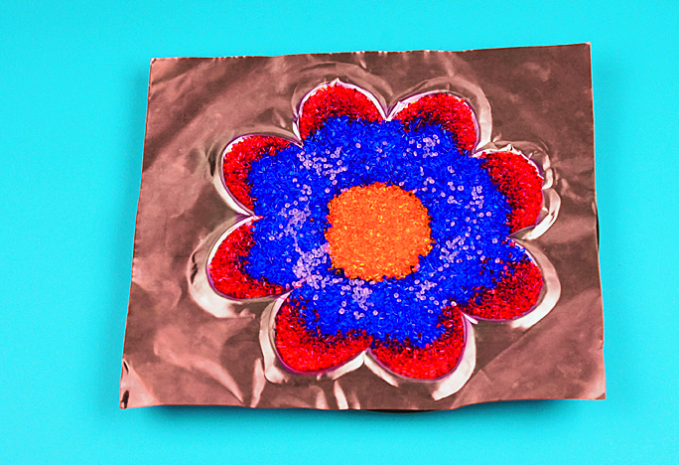
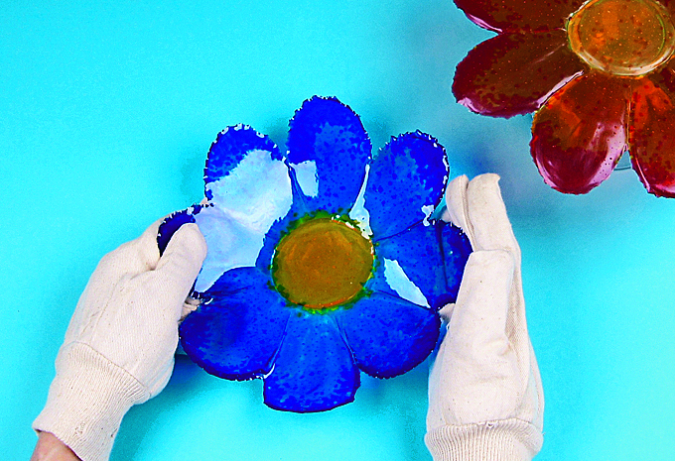
Now, separately prepare the prepared forms at the middle level of the oven and at 150 °C, melt for about 15-20 minutes until a smooth surface is formed. When the surface is flat, remove the mold from the oven and allow to cool. After cooling completely, remove the motive from the form, knocking it over. If necessary, clean the edges of the flowers with a file or sandpaper.
For further processing, put the flower on a suitable vessel, for example, a glass that is resistant to heat. Then put the vessel with the flower in the oven and heat for 5-7 minutes, as a result of which the disk of the flower is deformed and will fit into the shape of a glass. At this working stage, it is necessary to carefully monitor the firing and immediately remove the flower from the oven, as soon as it takes the desired curved shape. Using a lint-free cloth or leather glove, you can manually change the shape of the flower a little further. You need to work quickly.