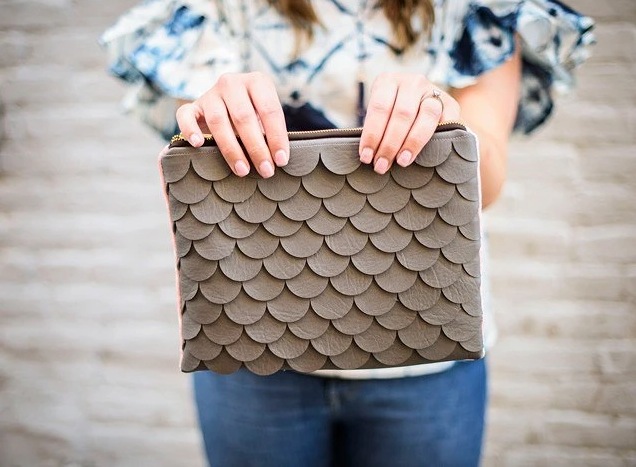
How to Create Your Own Clutch Bag with Scallops


You Will Need:
Piece of leather or vinyl;
Cutter or craft knife;
Mat;
Ruler;
Pencil;
Clasps;
Sewing machine;
Threads.
Instructions for Crafting Your Clutch Bag
Draw stripe patterns with scallops. In width, they should be equal to the width of the bag, including allowances; the size of the festoons is at your discretion.
You need two patterns with scallops in a checkerboard pattern. The template is good to make from thick cardboard, as it will be easier to work with.Cut a piece of vinyl from the inside into strips of festoons. If you want the whole bag to be covered with scallops, as in this example, the amount of material required will be about twice the size of the decorated part of the bag. You need the same number of stripes, drawn according to the first and second patterns. Cut the strips of scallops with a scalpel or knife.
Start sewing scallops from the bottom. Attach the strip with clamps and sew the stitch.
Sew the following stripes on top of the previous ones, ensuring equal distances between the stripes and the checkerboard order of the festoons.
The top strip of the last scallop should go into the allowance at the top of the bag.
Decide on the size of the clutch you need and draw a pattern on paper. Make five small parts for pockets on the inside of the clutch, constructing them the size you need and in the right amount. The rest of the details should match the size of the sides of the clutch. Don’t forget to add seam allowances.
If you knit parts by hand, do so now. You will need one clutch side part and one pen part. Wash and dry parts before working, laying them out on a flat surface. If you are cutting these parts out of finished knitwear or fabric, do this while remembering the allowances for the seams for the handle.
Cut the rest out of leather and lining.
Prepare the details of the pockets: work on their upper edges and iron the allowances on the sides. If the fabric frays a lot, treat the sections with a zigzag stitch.
Mark the places for sewing the pockets and sew them to the lining fabric details.
On both sides of each part of the lining, iron the seam allowances (see photo). The zipper will be sewn here. Fold the lining details with the sides inward and sew on the other two sides.
Cut the corners and iron the seams.
Sew on the braid, strengthening the clutch handle.
Along the perimeter of the leather part, stepping back from the edges by the allowance distance, punch holes for the seam.
Fold the leather and knitwear parts with the wrong sides inward. Check which two sides need to be sewn together on the finished lining, and sew them by hand, having sewn a handle folded in half between the parts.
Fold the parts as shown in the photo, pin the zipper, and sew it—first from the lining side, then from the leather and knitwear side.
