How to Craft an Adorable Crochet Basket

Unleash your creativity and embark on a delightful crochet journey to craft an adorable basket that will add a touch of charm to any space. With just a few simple materials and a dash of imagination, you can transform a humble ball of yarn into a functional and eye-catching masterpiece. Whether you're a seasoned crochet enthusiast or a beginner eager to dive into the world of yarn crafts, this project is perfect for you.
Crochet Basket Pattern
Lion Brand Yarn Hometown USA. The colorway shown is Portland Wine.
This is a size '6 - Super Bulky' weight yarn.
This pattern uses every bit of two 5-oz. skeins of this yarn. If you want to make a taller basket, you will need at least one additional skein.
N Hook (work somewhat tightly to achieve a sturdy finished piece)
This piece is worked with 2 strands of yarn held together for the entire piece.
*See Pattern Notes at the end of the pattern if you are unfamiliar with any of the terms used.
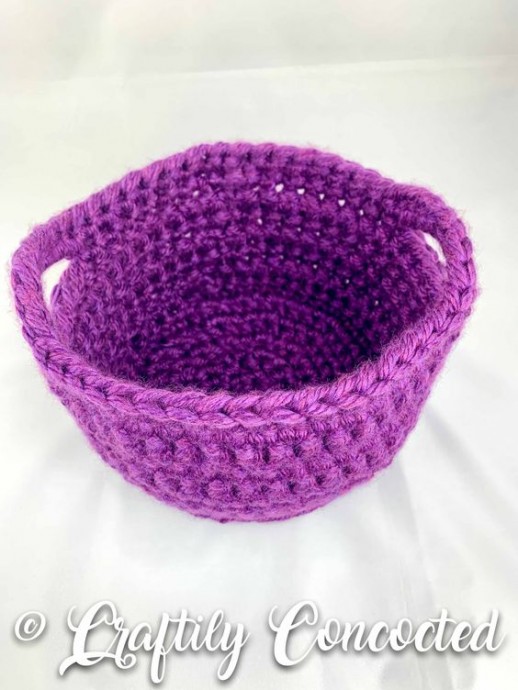
The finished basket is approximately 8 inches in diameter and 5 inches tall.
Base
1. In magic circle, hdc 8. Sl st to beg. Pull tail tightly to cinch center ring closed.
2. Ch 1, 2 sc in each stitch around. Do not sl st to beg. Mark stitch and continue working in a spiral. This method avoids creating an obvious seam.
3. (Hdc in next st, 2 hdc in next st) repeat around until you reach the marked stitch. Move stitch marker up one row.
4. (Hdc in next 2 sts, 2 hdc in next st) repeat around until you reach the marked stitch. Move stitch marker up one row.
5. (Hdc in next 3 sts, 2 hdc in next st) repeat around until you reach the marked stitch. Skip next st, sl st. Remove stitch marker.
*At this point, I like to fasten off so there is no transition between working the base and the upper portion.
*Also, if you haven’t already, weave in the tail from the center of the work. It is much easier to weave in before continuing with the upper portion of the basket.
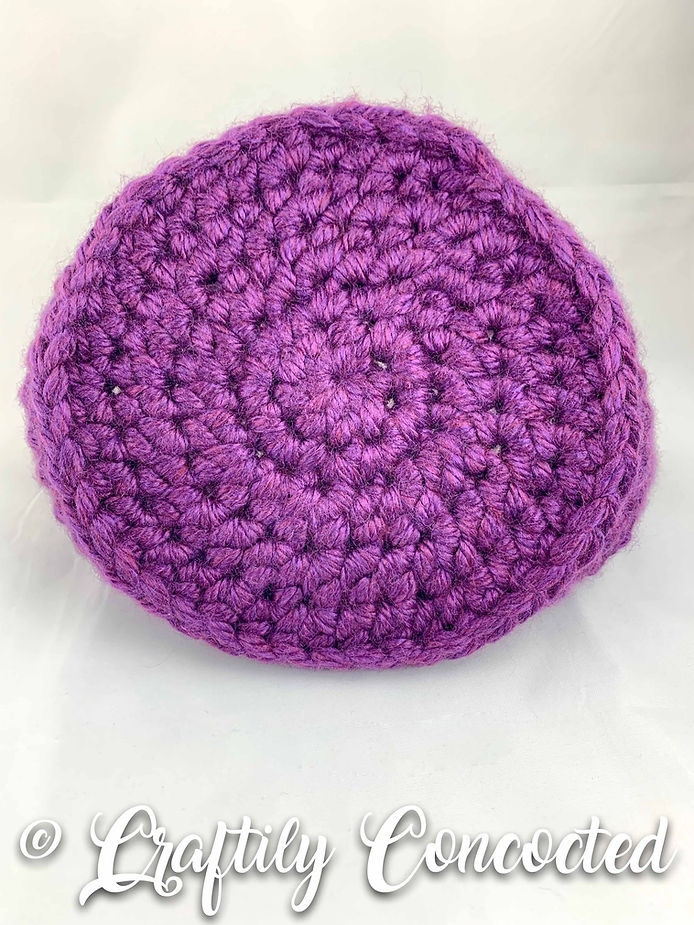
This is what the bottom of the basket will look like when finished.
Upper Portion
6. Join to any hdc in the back ridge of the stitch with a standing sc. Sc in the back ridge of each hdc around. Sl st to beg.
7. Ch 1 (loosely), hdc in same st, hdc in each st around. Sl st to beg.
8. Ch 1, sc in same st. Sc in each st around. Sl st to beg.
9. Repeat row 7.
10. Repeat row 8.
11. Repeat row 7.
12. Repeat row 8.
*You can repeat rows 7 and 8 as many times as you’d like to achieve the desired height of your basket. However, adding more rows will require additional skeins of yarn.
*At this point, count your stitches. I have 44 stitches around. If you have more or fewer stitches, use the calculation shown in the pattern notes at the end of this pattern to add in the handles.
13. Ch 1, sc in next 8 sts. Ch 7. Skip 6 sts. Sc in next 16 sts. Ch 7. Skip 6 sts. Sc in next 8 sts. Sl st to beg.
14. Ch 1, sc in same st. Sc in each st until your first handle (the ch 7 space). Make 8 sc around the chain that forms the handle (don’t work into the stitches, but around the chain). Sc in the next 16 sts. This will bring you to the next handle space. Make 8 sc into the handle space. Sc in the remaining 8 sts. Sl st to beg (or use your preferred final join method). Weave in ends.
Pattern Notes
Use the following formula to calculate how to add in handles if you have a different number of stitches than 44:
Number of stitches, divided by 4. Subtract 3. This is the number of sc to start off the round. Add in the handle by chaining 7 and skipping 6 stitches. Then sc twice the number of your calculation result. Add in the second handle by chaining 7 and skipping 6 stitches. Sc in each remaining stitch around.
Example: If you have 47 stitches, 47 divided by 4 = 11.75. Subtract 3 = 8.75. Round this to 9.
Start off the round with 9 sc. Then ch 7. Skip the next 6 sts, 18 sc {9 times 2}, ch 7, skip the next 6 sts, sc the remaining 8 sts.
(9 + 6 + 18 + 6 + 8 = 47 stitches)
This is how to get the handles to be exactly across from each other without being right up against the seam.
Standing SC: Create a slip knot. With the slip knot on your hook, insert hook into indicated stitch. Pull up a loop. Yarn over, pull through both the loop and the slip knot.
Magic Circle: With tail of the yarn in your dominant hand, loosely wrap the yarn around your non-dominant index finger twice. Release the tail. The working yarn should be somewhat along the palm of your hand and extending toward your wrist. Insert your hook under both loops of yarn on your finger. Pull the loop closest to your wrist through the loop toward the end of your finger and gently slide the work off your finger. Chain 1. Work your stitches into the center of the ring created. When you’ve completed the stitches around, pull the yarn tail tightly to close the center of the work.
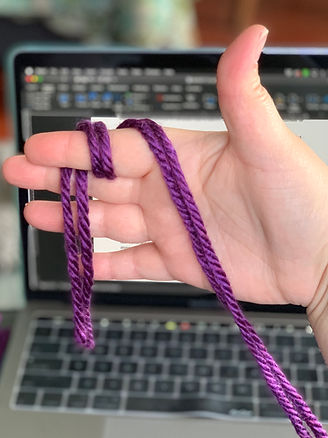
*Remember I'm a lefty. This is my non-dominant hand.
Crochet Terms Used in This Pattern
sc - Single Crochet
hdc - Half Double Crochet
sl st - Slip Stitch
sts - Stitches
ch - Chain
beg - Beginning