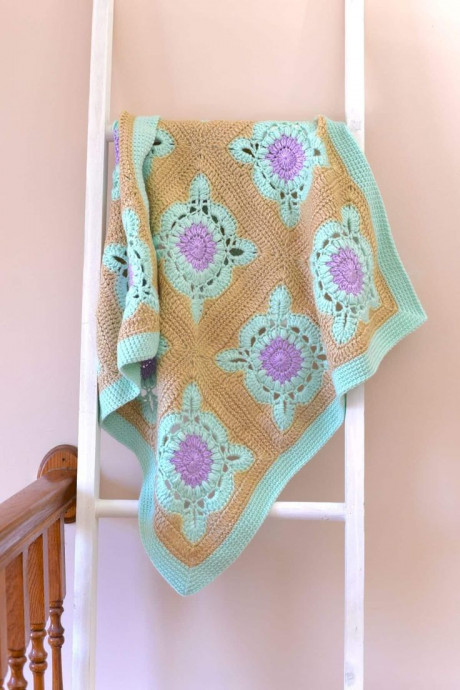
Create Your Own Adorable Crochet Blanket

Crocheting an adorable blanket is such a delightful and cozy project! Whether you're a seasoned crocheter or just starting out, creating a soft and snuggly blanket filled with colorful yarns can be such a rewarding experience. Choose your favorite pastel shades or bold hues to bring your vision to life, and watch as each intricate stitch adds a touch of warmth and charm to your handmade creation. Before you know it, you'll have a beautiful and unique blanket to cherish or to gift to a loved one - handmade with love and passion! Crocheting truly is a wonderful way to spread warmth and joy one stitch at a time.
Materials
- Worsted Weight (4) yarn – more on the yarn below.
- Scissors
- Yarn needle
- Stitch marker
- Tapestry Needle
- 5 mm (US H) Crochet Hook
Abbreviations (US Terms)
- ch(s): chain(s)
- dc: double crochet
- hdc: half double crochet
- modified ps: modified puff stitch
- mc: magic circle
- sl st: slip stitch
- st(s): stitch(es)
- ps: puff stitch
- RS: Right Side
- sp: space
Measurements
A 3×3 simply soft crochet blanket, including the single crochet stitch border, measures approximately 30” x 30” (76 x 76 cm).
Instructions
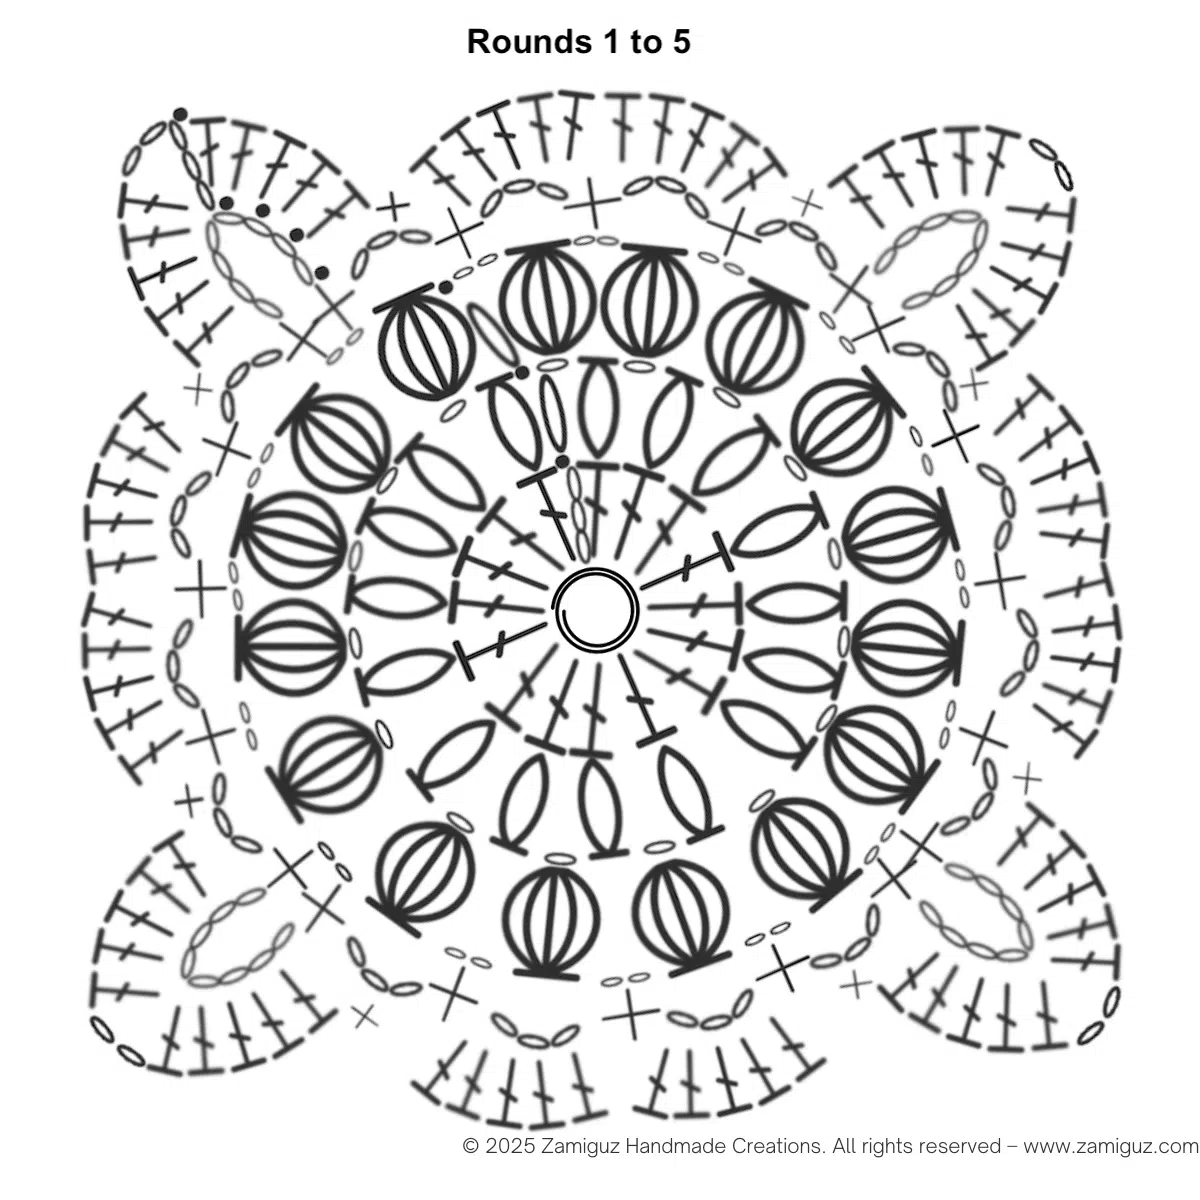
Step 1: Crochet the Squares (x9)
Start this simply soft crochet blanket with C1. See the “about the yarn” section for the details and more color combination ideas.
RND 1: in a mc, ch 3 (won’t count as a st), dc 16, join to the 1st dc st with a sl st. [16]
RND 2: extend the last loop on the hook to about ½ inch, (modified ps, ch 1) around, sl st to join. [16]
FO. Cut the yarn. Switch to C2.
Modified ps explanation (this is a ps with less loops on the hook):
- Yo, and insert the hook into the st.
- Yo, and pull up a loop (3 loops on the hook).
- Yo, insert the hook into the same st again.
- Yo, and pull up another loop (5 loops on hook).
- Yo, pull through all 5 loops on the hook to complete the skinny ps.
RND 3: Attach C2 into the ch1 sp between any two of the sts around. Extend the last loop on the hook to about ½ inch, (ps into the ch 1 sp, ch 2) around, sl st to join. [16]
Puff stitch (ps) explanation:
- Yo, and insert the hook into the next st.
- Yo, pull up a loop (3 loops on the hook).
- *Yo again, insert the hook into the same space, and pull up another loop (5 loops on the hook).
- Repeat from * three more times (11 loops on the hook).
- Yarn over, and pull through all nine loops to complete the ps.
RND 4: sl st into the next ch 2 sp, *ch 8, sc into the same ch 2 sp, (ch 3, sc in next ch 2 sp) 4 times. Repeat from the * 3 more times.
RND 5: sl st in the next 4 chs in the first 8 ch sp, (ch 4, dc 5) into the same ch 8 sp, *sc into the next ch 3 sp, (dc 5 into the next ch 3 sp) two times, sc into the next ch 3 sp, (dc 5, ch 2, dc 5) into the next ch 8 sp. Repeat from the * 3 more times. At the last ch 8 sp, place 5 dc sts on top of the initial 4 sl sts, join with a sl st to the first ch 5.
FO. Cut the yarn. Switch to C3.
RND 6: Attach C3 into one of the ch 2 corner sp, (ch 2, sc) into the same ch 2 corner sp, *3 sc, hdc, 3 dc, hdc, 6 sc, hdc, 3 dc, hdc, 3 sc, (sc, ch 1, sc) into the next ch 2 corner sp. Repeat from the * 3 more times, sc into the first ch 1 corner sp and sl st to the first ch 2 to join.
RND 7: (ch 5, dc 2) into the first ch sp, *dc in every st to next corner, (dc 2, ch 2, dc 2) into the next ch 1 corner sp. Repeat from the * 3 more times, dc 2 into the first ch 1 corner sp and sl st to the ch 5 to join. [112 dc].
RND 8: *sc 2 in the 1st ch 2 corner sp, sc in the next 28 sts. Repeat from the * 3 more times, join with a sl st. FO. Cut the yarn.

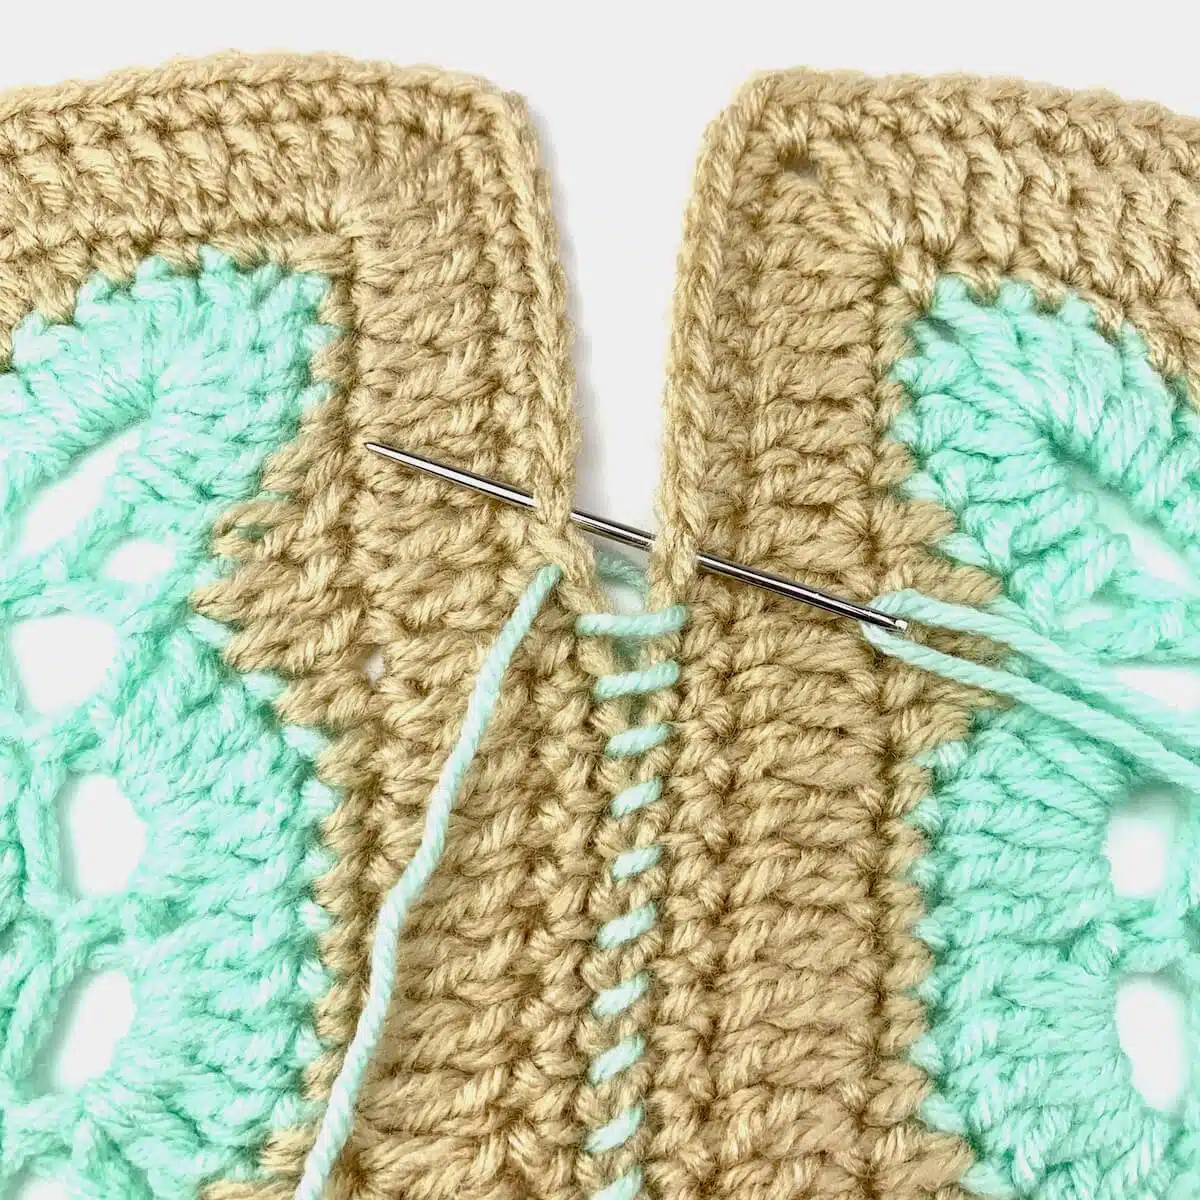
Step 2: Blanket Assembly
For this simply soft crochet blanket pattern, I selected a contrasting color for better visibility in the picture. Sew the squares together using the whip stitch.
Grab the first two squares and place them together (wrong side facing wrong side).
Thread the needle.
Insert the needle in the corner of the square from the right side.
Insert the needle in the corresponding stitch on the second square. From the wrong side, bring it up and pull it tight enough to attach both corners.
Insert the needle in the next stitch in the square on the right again, from the right side.
Insert the needle in the corresponding stitch in the second square, from the wrong side, and draw it out on the right side. Pull it as you go, but not too tight. You want the stitches to look like small, uniform, angled bars.
Repeat the previous two steps until you have all the squares you need for the width of your blanket.
You will first attach the squares horizontally, then vertically.
FO in every attached row. Weave in the ends.
Step 3: Crocheting the Edging
The simply soft crochet blanket border is crocheted in sc in continuous rounds all around. To do so, crochet one sc st for every st on the edge of the blanket. I used the blanket’s main color, but you can use any of the three colors or a combination of all three.
To start, insert the hook in any stitch on the blanket’s edge (RS); it doesn’t matter which stitch.
RND 1: sc around. In each corner of the blanket: (sc 1, ch 1, sc 1) into the ch space. There is no need to join the rounds with a slip stitch. Continue in a spiral until you reach the width you want for the border. Use a stitch marker to mark the beginning of every round.
RND 2-6: repeat instructions in the first round.