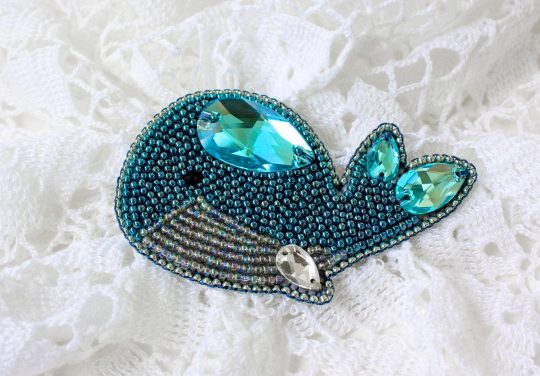
How to Create a Stunning Whale Brooch with Beads and Rhinestones


Materials Required
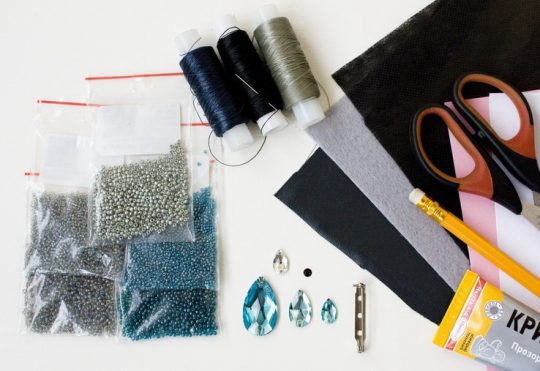
For this purpose, we will need:
- Seed beads TOHO:
- Blue #108BD, 11/0 and 15/0
- Grey #176, 11/0 and 15/0
- Silver Grey #PF565, 11/0
- Sew on Swarovski rhinestones (drops):
- 12 mm color Light Turquoise (blue) — 1
- 18 mm color Light Turquoise — 1
- 28 mm color Light Turquoise — 1
- 12 mm color Crystal (white) — 1
- Round black bead 4 mm for the eye — 1.
- Brooch clasp (pin).
- Felt, leather.
- Threads (dark grey, light grey, black) and needles.
- Glue
- Pencil, scissors, paper, cardboard.
Creating the Brooch Pattern
Take a piece of grey felt.
On a paper, draw a pattern of our brooch, which is a whale. Everyone sees a whale differently, so you can end up with quite a fantasy whale. Cut the pattern out and transfer it onto felt.
Embroidering the Whale
Sew rhinestones on the tail, fin, and eye. We sewed blue rhinestones with a dark grey thread, and a white rhinestone with a light grey thread. The black eye is sewn with a black thread. We will not need black thread anymore, so you can put it away.
Let’s start embroidering. First, we embroider the belly with grey beads of size 11 with a light grey thread. Following the contour of our pattern, we embroider with a back stitch.
Fasten the thread on the backside, bring the needle to the right side, and string a bead. Sew it on, and right after using a needle on the backside, move one bead back, then bring the needle to the right side and again through the already sewn bead, and just after it string the second bead and sew it. Then, in the same order, come back and put the thread again through it, etc. This way, the thread comes through each bead twice, which allows them to be fastened more securely and evenly.
Now, embroider the contour on the back with blue beads (size 11/0) and a dark grey thread. The tail’s end and the fin near the rhinestones are left without beadwork. Sew the big blue rhinestone onto the back with a dark grey thread, and sew beads inside the holes of the rhinestone.
Then, we embroider the belly with grey beads along the contour in straight lines, with the same feather stitches. This simulates a striped whale belly. In the tiniest gaps, in corners where beads of size 11 cannot fit anymore, we fill the space with beads of size 15/0 of the same color.
Now we pass to embroidering the main part – the whole body of the whale. Sew blue beads in a chaotic manner. Sew beads one by one, every time in a different direction related to the previous one so that all beads would “look” in all directions. Just as with the belly, tiny gaps and in corners where beads of size 11 cannot fit, we sew beads of size 15/0 of the same color to fill the gaps optimally.
The embroidery is ready.
Finalizing the Brooch
The next stage: we carefully cut out the embroidery along the contour, leaving 1-2 mm from the edge.
Now we take a piece of cardboard and cut out the same pattern, but 3 mm smaller from the edges (these will be used for tacks in edging), and glue it to the backside. This hides seams and knots and compacts our brooch.
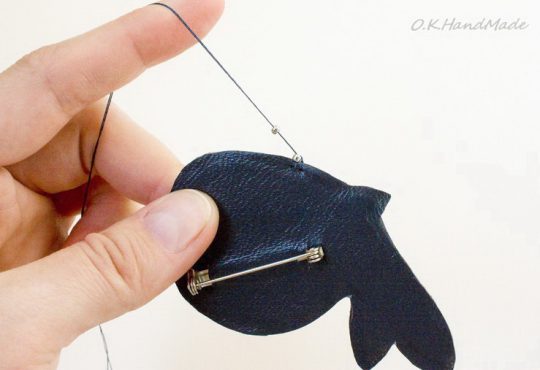
According to the form of our embroidered item, we cut out the leather pattern 1 mm bigger on the edge for the backside of the brooch. Mark the place for the pin.
Make slashes and put in the pin.
Glue the leather preparation together with a pin to our embroidery.
The final stage of work is overseaming. For this, we use silver grey seed beads 11/0 and a dark grey thread.
Double-fold a thread, run it through a needle eye with two ends so that a loop occurs at the other end. Put a needle on the backside (stitch around 2-3 mm high) and run the needle through the loop – the thread is fastened.
String one bead.
Again run a needle to the backside, make a stitch 3mm from the previous one; when the needle is run to the right side, put it through a bead from the bottom up. Fasten. The bead now lies with its hole up.
String the second bead and in a similar way make a stitch on the backside, run the needle to the right side and through a bead from the bottom up; then repeat with the third bead, etc.
We finished overseaming the edge, now the thread end should be hidden among the embroidered beads.
