Crochet Fia The Amigurumi Flamingo

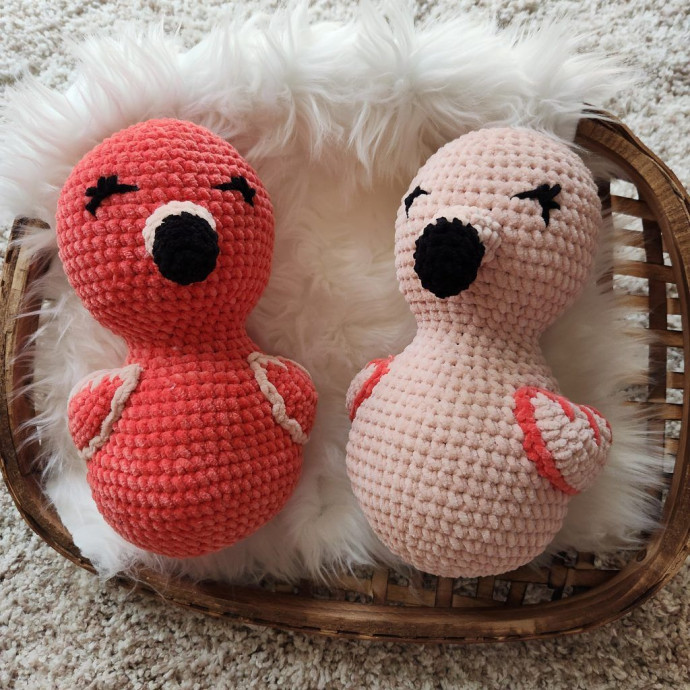
Crochet Fia The Amigurumi Flamingo is an adorable and charming handmade creation that will bring a touch of whimsy to any space. This crocheted flamingo is lovingly crafted with vibrant yarn that captures the essence of these majestic birds. With its fluffy pink feathers, expressive eyes, and delicate details, Fia is sure to melt your heart and put a smile on your face. Whether as a cute decoration for your home or a special gift for a loved one, Fia the Amigurumi Flamingo is a delightful addition to any collection. Get ready to bring a little bit of handmade magic into your life with this lovable crochet creation!
Supplies
US G/6 4.0 mm crochet hook
Hobbii Toucan Fine weight (4) worsted, 100% Polyester, 196 yds / 180 m, 3.5 oz / 100 g per skein:
- C1: Coral (10) 80 yds
- C2: Dusty Rose (7), 20 yds
- C3: Black (34), 20 yds
Poly Fill
Stitch Marker
Straight pins (optional)
Tapestry needle
Note: I was able to make 2 flamingos with one skein of each color yarn. For the first flamingo, I used C1 and C2 as written in the materials list. For the second flamingo, I swapped the colors for the body and wings but kept the beak the same.
Finished Measurements
8.5” (21.5 cm) tall by 5” (12.5 cm) wide
Abbreviations (US Terms)
- ch: chain
- dec: decrease (see special sts for an invisible decrease)
- FO: Finish Off / Fasten Off
- inc: increase (2 sc in the same st)
- lsc: long single crochet (see special sts)
- rep: repeat
- rnd(s): round(s)
- RS: Right Side
- sc: single crochet
- sk: skip
- sl st: slip stitch
- st(s): stitch(es)
- WS: Wrong Side
- YO: Yarn Over
* Indicates the beginning of a rep within a row
Special Stitches
Long Single Crochet (lsc)
Insert hook into the 2, 3, or 4th row below current row, YO, pull up a loop, YO and pull through both loops.
Invisible Decrease
Use when working in the round on the body. Insert hook under the front loop only of the first st, insert hook under the front loop only of the second st, YO and pull through both sts, YO and pull through both loops on hook.
Invisible Join
After working the last sc, do not ch, cut the yarn leaving a 4” tail. Pull the tail straight up through the center of the last sc and thread onto a tapestry needle. Working into the first st of the round, insert the needle from front to back under both top loops of the st. Insert the needle back down into the center of the last st made; this is the same spot the yarn tail came out of, and pull gently to close the gap.
Gauge
8.5” (21.5 cm) tall by 5” (12.5 cm) wide
Notes
Body is worked as one piece. Body and beak are worked in continuous rounds without joining unless otherwise noted. Mark the first st of the round with a st marker and move up with each new round.
Body is worked top down.
Skill level: Easy
Free Crochet Pattern: Fia The Amigurumi Flamingo
Body
With C1
Rnd 1: 5 sc into magic circle. (5)
Rnd 2: inc in each st around. (10)
Rnd 3: *sc, inc; rep from * around. (15)
Rnd 4: sc, *inc, sc 2; rep from * to last 2 sts, inc, sc. (20)
Rnd 5: *inc, sc 3; rep from * around. (25)
Rnd 6: sc, *inc, sc 4; rep from * to last 4 sts, inc, sc 3. (30)
Rnd 7: *sc 5, inc; rep from * around. (35)
Rnd 8: *inc, sc 6; rep from * around. (40)
Rnd 9: sc 3, *inc, sc 7; rep from * to last 5 sts, inc, sc 4. (45)
Rnd 10: *inc, sc 8; rep from * around. (50)
Rnds 11 – 18: sc around. (50)
Rnd 19: *dec, sc 8; rep from * around. (45) Begin stuffing, continue to stuff as you work the remainder of the body.
Rnd 20: sc around
Rnd 21: *sc 7, dec; rep from * around. (40)
Rnd 22: sc 4, *dec, sc 6; rep from * to last 3 sts, dec, sc 2. (35)
Rnd 23: sc, *dec, sc 5; rep from * to last 5 sts, dec, sc 4. (30)
Rnd 24: *dec, sc 4; rep from * around. (25)
Rnds 25 – 26: sc around.
Rnd 27: *inc, sc 4; rep from * around. (30)
Rnd 28: *sc 5, inc; rep from * around. (35)
Rnd 29: sc 2, *inc, sc 6; rep from * to last 5 sts, inc, sc 4. (40)
Rnd 30: *sc 7, inc; rep from * around. (45)
Rnd 31: sc 3, *inc, sc 8; rep from * to last 6 sts, inc, sc 5. (50)
Rnds 32 – 38: sc around.
Rnd 39: *dec, sc 8; rep from * around. (45)
Rnd 40: *sc 7, dec; rep from * around. (40)
Rnd 41: sc 3, *dec, sc 6; rep from * around to last 5 sts, dec, sc 3. (35)
Rnd 42: *dec, sc 5; rep from * around. (30)
Rnd 43: *sc 4, dec; rep from * around. (25)
Rnd 44: sc, *dec, sc 3, rep around to last 4 sts, dec, sc 2. (20)
Rnd 45: *dec, sc 2; rep from * around. (15)
Rnd 46: *sc, dec; rep from * around. (10) Make sure body is stuffed fully.
Rnd 47: dec around, FO leaving a 4” to 5” tail. (5)
Using a tapestry needle, weave tail through the remaining sts, pull tight, weave in end.
Wing: (Make 2)
With C2
Row 1: 5 sc into magic ring, pull tight, do not join. (5)
Row 2: ch 1, turn, inc, sc across to last st, inc. (7)
Row 3: rep Row 2. (9)
Row 4: ch 1, turn, inc, sc across to last 2 sts, inc 2 times. (12)
Row 5: ch 1, turn, inc 4 times, sc to last st, inc. (17)
Row 6: ch 1, turn, inc, sc across to last st, inc. (19)
Row 7: ch 1, turn to work down the side of the previous rows, inc, sc 10. (12)
Row 8: ch 1, turn to work into Row 6, inc, sc 10, *sc, inc; rep from * 3 more times. (24)
Change to C2
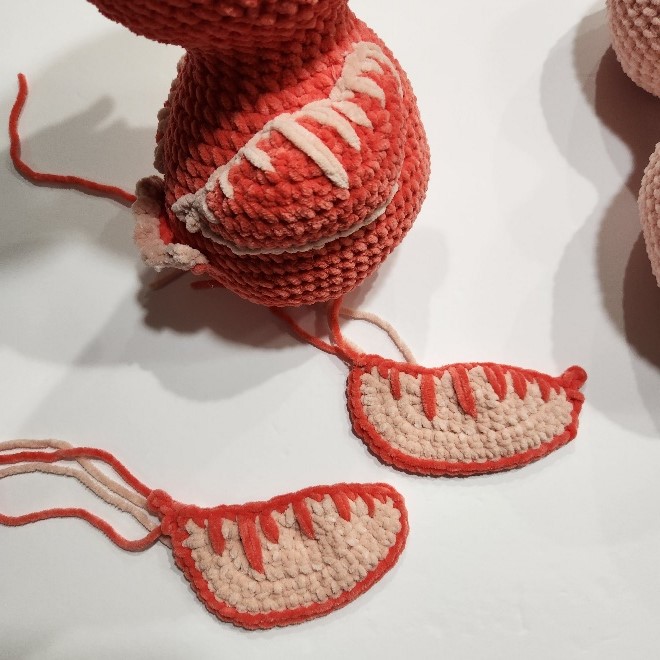
The edging will be worked around the entire wing. The lsc sts will be worked across the flat part of the wing.
Wing 1
Turn, to work into Row 8; sl st 21, 2 sl st in next st, sl st, 2 sl st in next st, ch 3, sc in 2nd and 3rd ch from hook, *sc, lsc; rep from * across the top of the wing. [Note: vary the length of the lsc sts to resemble feathers, see photo.] FO leaving a 6” tail to attach the wing.
Wing 2
Turn to work into Row 8; 2 sl st in first st, sl st, 2 sl st in next st, sl st 21, ch 1, *sc, lsc; rep from * across the top of the wing to last st, sc, ch 3, sc in 2nd and 3rd ch from hook. [Note: vary the length of the lsc sts to resemble feathers, see photo.] FO leaving a 6” tail to attach the wing.
Secure all ends with the exception of the final 6” tail by weaving in or tying them to another tail on the WS of the wing. These tails will be hidden once the wing is attached to the body.
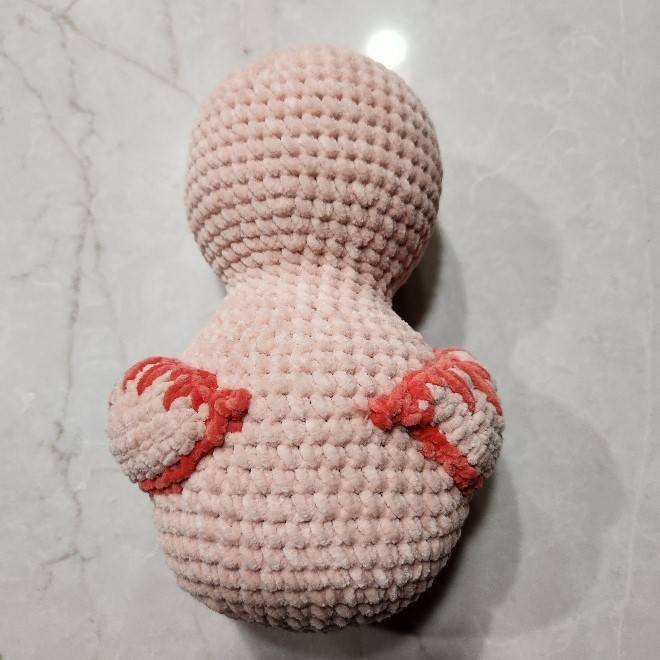
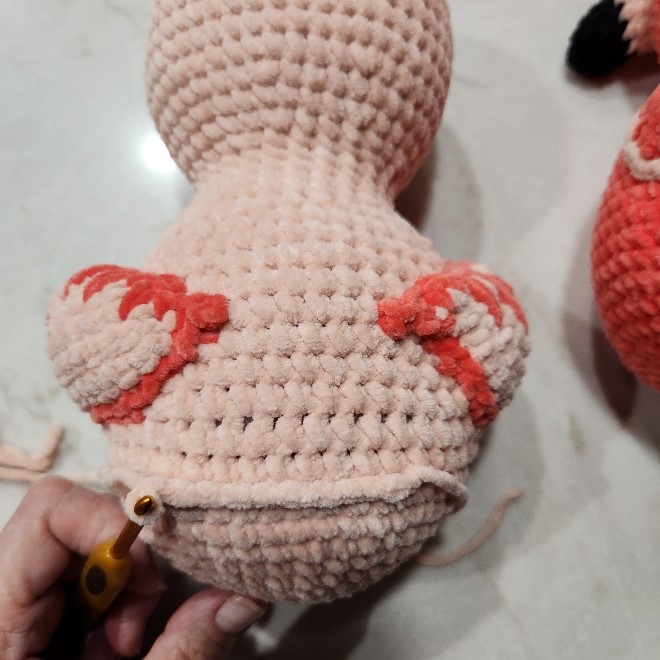
Placing Wings
Position wings at an angle on either side of the body with the tips of the wing (the ch 3 from the instructions above) facing the back, and attach 15 rounds from the bottom of the body, and with 6 sts between the wing tips. Pin in place with straight pins if desired. See photos.

Using a tapestry needle and the 6” tail, sew the first wing to the body around the perimeter until approx 1” remains open. Make sure all other ends are tucked under the wing. Add a little bit of poly stuffing under the wing to shape, then finish sewing the wing to the body. Repeat for wing two, making sure to line up the tips of the wings.
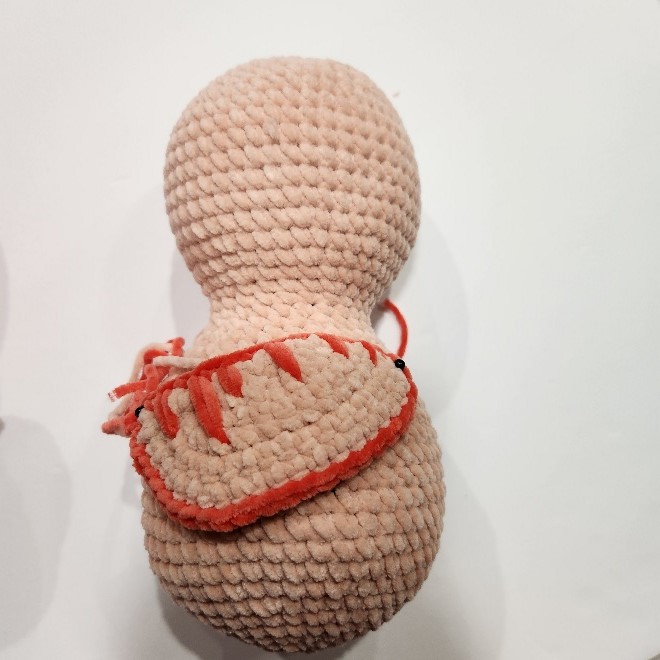
Tail
With C1, the tail is worked directly onto the body, centered between the wing tips. From the bottom of the body, count up 11 rounds. You will be working into 9 sts between the wings.
Row 1: Find the center most stitch, and count 4 sts to the right. Insert the hook and join the yarn with a sl st. Ch 1, sc in same st, and next 8 sts across. (9 sts)
Row 2: Ch 1, turn, inc, sc 7, inc. (11 sts)
Row 3: Ch 1, turn. *sc, ch 1, sc in next st; rep from * to end of row. FO, weave in ends.
Beak
With C3
Rnd 1: 5 sc in MC
Rnd 2: *inc, sc; rep from *, inc last st. (8 sts)
Rnds 3 – 7: sc around.
FO using an invisible join (see special sts) to avoid the jog from the color change.
With C2
Sl st in next to last st of Rnd 7 to join. Tie the tail of C3 and the tail of C2 together and tuck into the beak.
Rnd 8: sc around
Rnd 9: inc, sc 5, inc, sc in last st. (10 sts)
Rnd 10: sc around.
Rnd 11: inc, sc, inc, sc 5, inc, sc. (13 sts)
FO, leaving a 5” tail.
Stuff lightly and shape the tip of the beak downwards.
Attach beak centered on the front of the head with the top of the beak 12 rnds from the top.
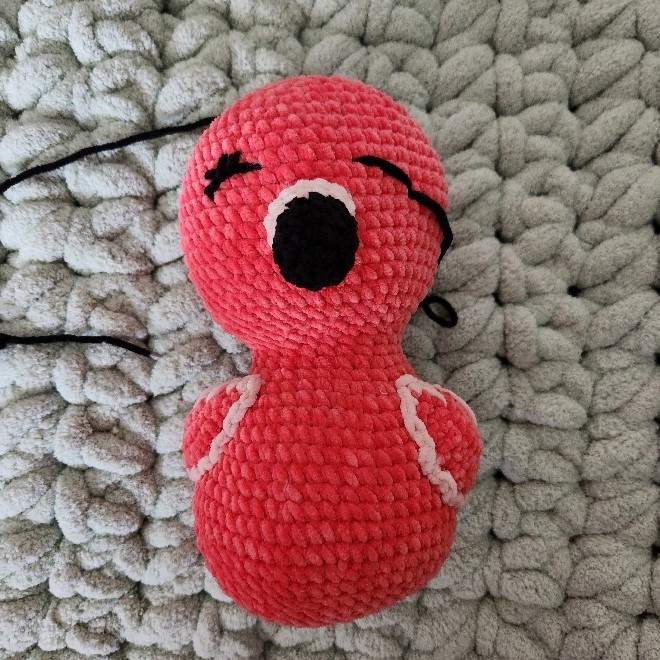
Eyes
With a 24” piece of C3 and a tapestry needle.
Step 1: Insert needle 1 row down from the top of the beak and 4 sts to the right of the edge of the beak (A), and push needle out through the st 1 row up from the top of the beak and 3 sts to the right of the center of the beak (B). Pull through, leaving a tail of at least 3”.
Step 2: Insert needle back into the first st from step 1 (A) and out 2 rows up and 1 st to the right (C).
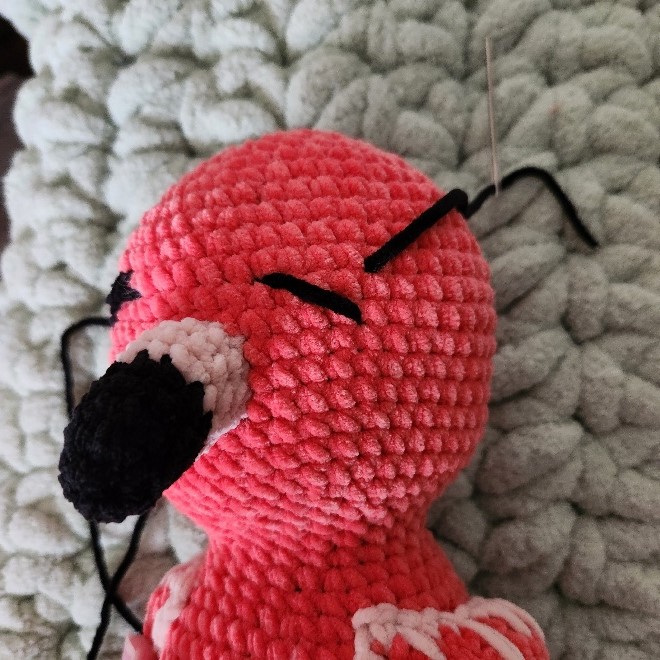
Step 3: Insert needle under the yarn loop created in step 2.
Step 4: Insert needle one row up from st C in step 2 (D) and out one st to the left (E). Pull gently to curve the loop from step 3.
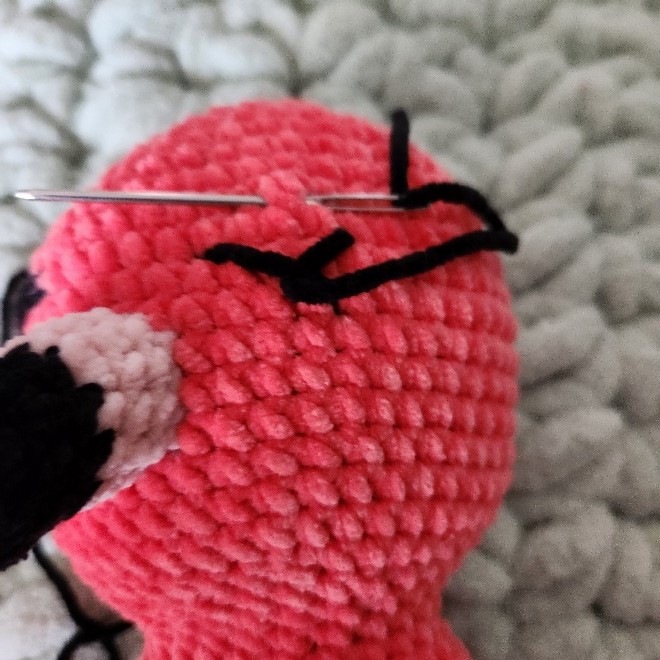
Step 5: Repeat Step 3.
Step 6: Insert needle back into st E.
Repeat instructions for second eye, swapping the Right and Left directions. Weave in all ends.
- Funny Pictures
-
 These are the Pics That Simply Describe Your Life
-
 Hilariously Accurate Parenting Memes That Show the Other Side of Parenthood
-
 Great Pics That Just Depict Our Lives
- Recipes
-
 Crispy Baked Avocado Fries
-
 Baked Beans and Hot Dogs with Biscuit Topping
-
 Roasted Rosemary Lemon Chicken Breasts
- Lifehacks
-
 Crochet Basics: Twisted Fringe
-
 7 Crochet Tips And Tricks
-
 How To Work Crochet Into Denim
- Crochet Ideas
-
 Crochet Snorlax Plushie Doll
-
 Crochet Cat in 1 Row
-
 Crochet Beautiful Penguin Toy
- DIY
-
 Popsicle Stick and Jingle Bell Christmas Tree Ornament
-
 DIY Santa Craft For Kids
-
 Paper Plate Angel Craft
- Knitting Ideas
-
 Knitted Bridger Cowl
-
 Knitted Keepsake Bag
-
 Knitted Cutie Cupcake Dolls