Crochet Clara the Cat Amigurumi: A Fun DIY Project

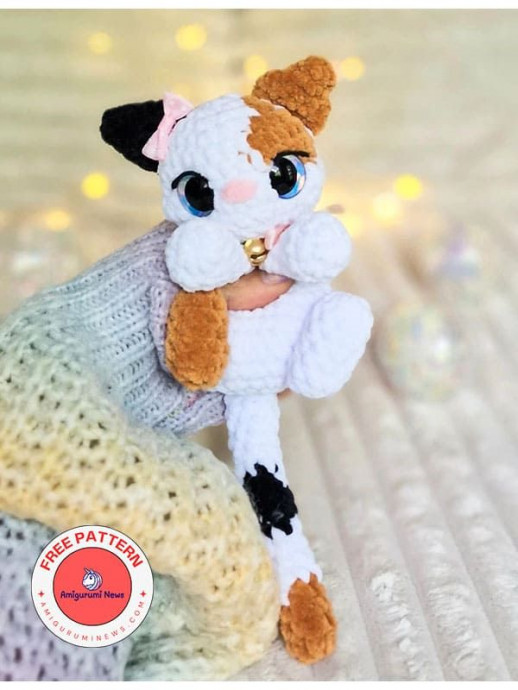
Crochet Clara the Cat Amigurumi is an adorable and fun DIY project that will bring a smile to your face! With its soft yarn and charming details, Clara is sure to become a beloved addition to your amigurumi collection. Whether you're an experienced crocheter or just starting out, creating Clara will surely be a delightful and rewarding experience. So grab your crochet hook, choose your favorite yarn colors, and let's craft our way to creating a lovable feline friend!
Materials
- Yarn
- Crochet hook
- Scissors
- Yarn needle
- Stitch marker
- Safety eyes
- Stuffing
- Felt (optional)
- Glue (optional)
Terminology
- ch - chain
- mr - magic ring
- sc - single crochet
- hdc - half double crochet
- inc - increase
- dec - decrease
- hdcinc - half double crochet increase
- slst - slip stitch
- FO - fasten off
For reference: in the pattern, I’ll be using hobbii honey bunny yarn with a 5mm hook and 25mm safety eyes.
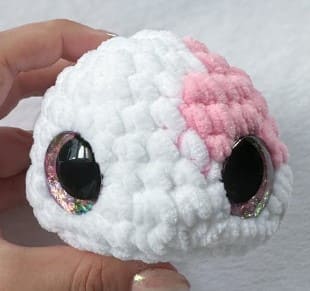
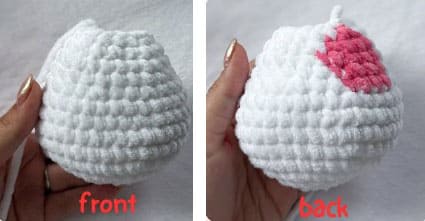
Head
RND 1: 7 sc in mr (7)
RND 2: 4 inc, inc, 2 inc (14)
RND 3: (sc,inc)x4, sc, inc, (sc,inc)x2 (21)
RND 4: (2sc,inc)x3, 2sc, inc, 2sc, inc, (2sc,inc)x2 (28)
RND 5: 14sc, 6 sc, 8 sc (28)
RND 6: 15sc, 5 sc, 8 sc (28)
RND 7: 16sc, 4 sc, 8 sc (28)
I placed my safety eyes between rounds 7 and 8, just above the cheeks about 5 visible stitches apart.
RND 8: 7 sc, 2 hdcinc, 3 sc, 3 inc, 3 sc, 2 hdcinc, 8 sc (35)
RND 9: 7 sc, 2 dec, 3 sc, 3 dec, 3 sc, 2 dec, 8 sc (28)
RND 10: (2sc,dec)x7 (21)
RND 11: (sc,dec)x7 (14)
Begin stuffing.
RND 12: 7 dec (7)
FO, close the hole and weave in your ends.
The increases in round 8 will be the cheeks and nose areas. Add some extra stuffing here.
Body
Note: the spot should be the back of the body.
I stuffed the body very lightly. Feel free to stuff more for a chubbier look, or leave unstuffed for a snuggler/lovey.
RND 1: 8 sc in mr (8)
RND 2: 8 inc (16)
RND 3: (sc,inc)x8 (24)
RND 4: (2sc,inc)x8 (32)
RND 5: (7sc,inc)x4 (36)
RND 6-7: sc around (36) – 2 rounds.
RND 8: (7sc,dec)x4 (32)
RND 9: 28 sc, 4 sc (32)
RND 10: (2sc,dec)x7, 2 sc, dec (24)
RND 11: sc, 20 sc, 3 sc (24)
RND 12: 2 sc, 19 sc, 3 sc (24)
RND 13: sc, dec, (sc,dec)x6, sc, dec (16)
RND 14: (6sc,dec)x2 (14)
FO and leave a tail for sewing to the bottom of the head, in the center.
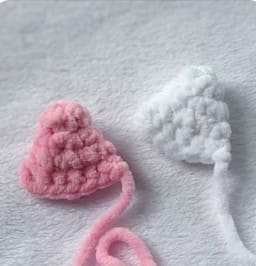
Ears
Make 2, one in your primary color and one in your secondary color. Do not stuff.
RND 1: 4 sc in mr (4)
RND 2: (sc,inc)x2 (6)
RND 3: (2sc,inc)x2 (8)
RND 4: (sc,inc)x4 (12)
Fold then sc 6 across to close. FO leaving a tail for sewing to the sides of the head between rounds 3 and 7, 3-4 stitches back from the eyes.
Tail
RND 1: 7 sc in mr (7)
RND 2-4: sc around (7) – 3 rounds.
RND 5-20: sc around (7) – 16 rounds.
FO and leave a tail for sewing to the back of the body on round 5. I left my tail unstuffed.
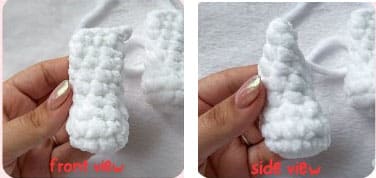
Arms
Make 2 in your primary color, stuff firmly at the base and lightly as you go up the arm.
RND 1: 8 sc in mr (8)
RND 2: 3 sc, 2 inc, 3 sc (10)
RND 3: sc around (10)
RND 4: 3 sc, 2 dec, 3 sc (8)
RND 5-8: sc around (8) – 4 rounds.
Fold and sc 4 across the top to close, in line with the increases.
FO and leave a tail for sewing to the body, just below the head. The arms should be sewn directly next to each other with no space in between.
Feet
Make 2, one in your primary color and one in your secondary color. Stuff lightly.
RND 1: 8 sc in mr (8)
RND 2-6: sc around (8) – 5 rounds.
RND 7: (2sc,dec)x2 (6)
FO and close the hole. Leave a tail for sewing to rounds 4-8 of the body at a slight angle. I left about 8 visible stitches between the feet.
Round 1 will be the toes (top) and round 7 will be the heel (bottom).
- Funny Pictures
-
 Hilarious Memes for Those Bored to Tears
-
 Weekly Treat of Funniest Parenting Memes for Good Laugh out Loud Right Now
-
 Really Funny Pics to End These Weekend Perfectly
- Recipes
-
 Crispy Baked Avocado Fries
-
 Scrambled Chickpea and Spinach Pitas
-
 Cinnamon Pancakes
- Lifehacks
-
 Crochet Basics: Aligned Cobble Stitch
-
 Brick Stitch Crochet Tutorial
-
 Crochet Basics: Wattle Stitch
- Crochet Ideas
-
 Crochet Snorlax Plushie Doll
-
 Crochet Beautiful Penguin Toy
-
 Crochet Tiny Snowman
- DIY
-
 DIY Santa Craft For Kids
-
 Paper Plate Angel Craft
-
 Upcycled Mason Jar Chicken Vase
- Knitting Ideas
-
 Knitted Bridger Cowl
-
 Knitted Keepsake Bag
-
 Knitted Cutie Cupcake Dolls