Crochet Dizzy The Amigurumi Duck

If You're Looking to Add a Touch of Cuteness to Your Crafting Collection
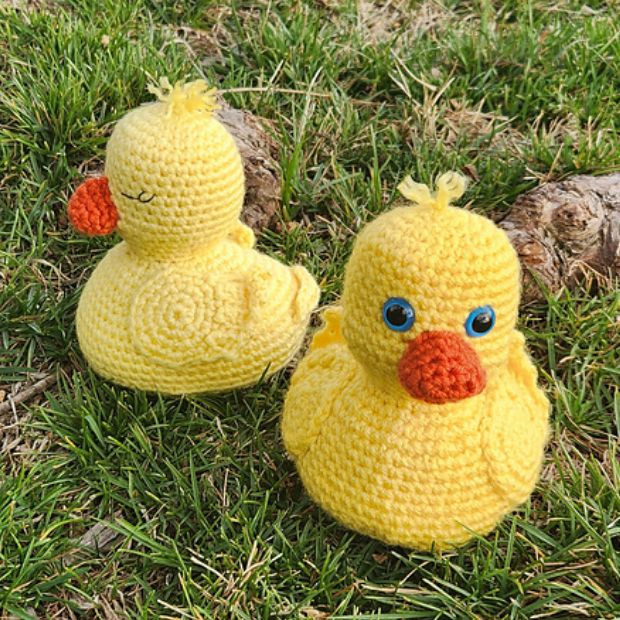
If you're looking to add a touch of cuteness to your crafting collection, look no further than Crochet Dizzy The Amigurumi Duck! This delightful little duck amigurumi pattern is perfect for both beginners and experienced crocheters alike. With its bright colors and adorable design, Dizzy is sure to bring a smile to your face every time you see it. Whether you're making it as a gift for a friend or simply as a fun project for yourself, Crochet Dizzy The Amigurumi Duck is a charming addition to any crochet collection. So grab your yarn and hook, and get ready to create your own lovable duck companion!
Crochet Supplies
- US D / 3.25 mm Crochet hook
- Hobby Lobby I Love This Yarn, weight (4) medium/worsted, 100% Acrylic, 355 yards / 7 oz per skein Pattern requires 90 – 100 yds of yellow for the body, plus a small amount of Orange for the bill
- Stitch Markers
- Tapestry Needle
- 12 mm Safety eyes (or embroidery floss for stitched eyes) **Safety eyes are not recommended for children under 3 years of age
- Straight pins (optional)
Crochet Terminology
Written in US terms.
- bldec: back loop decrease
- blsc: back loop single crochet
- blo: back loop only
- ch: chain
- dc: double crochet
- dec: decrease (invisible decrease is recommended. See special sts)
- FO: Finish Off / Fasten Off
- flsc: front loop single crochet
- flo: front loop only
- hdc: half double crochet
- inc: increase (2 single crochet in same st)
- pm: place stitch marker
- rep: repeat
- sc: single crochet
- sk: skip
- sl st: slip stitch
- st(s): stitch
**Indicates the beginning and end of a rep within a row
( ) indicates sts to be repeated followed by the number of times to repeat
Special Stitches
Invisible decrease: when working a decrease (dec) in amigurumi, it is suggested that you use an invisible decrease to prevent holes and give a seamless look. To work an invisible decrease, insert the hook under the front loop only of the first stitch and then under the front loop only of the second stitch, YO and pull a loop through both sts, YO and pull through both loops on the hook.
Finished Size
Finished size is 5” (12.5 cm) tall x 4.5” (11.25 cm) long making him the perfect size for small hands, or as a desk companion.
Gauge
5 sts x 6 rows = 1” x 1” (5 cm x 5 cm)
Notes
- Body is worked in continuous rounds without joining. Mark the first st of the round with a stitch marker and move up with each round.
- The entire body of the duck is worked in one piece from the top of the head down. The bill and wings are worked separately and sewn onto the body with a tapestry needle.
Pattern
Duck Bill
With Orange
- Round 1: ch 4, inc in 2nd ch from hook, sc in next st, 3 sc in last st, turn to work on the back side of the chain, sc in next st, sc in last st. (8)
- Round 2: 3 sc in first st, sc 3, 3 sc in the next st, sc 3. (12)
- Round 3: sc 4, (inc) 2x, pm (marks top of bill), sc 6. (14)
- Round 4: sc around. FO leaving a long tail, and set aside.
Duck Body
With Yellow
- Round 1: work 6 sc into a magic circle, pull tight, do not join. (6)
- Round 2: inc in ea st around. (12)
- Round 3: (sc, inc) around. (18)
- Round 4: (inc, sc 2) around. (24)
- Round 5: (inc, sc 3) around. (30)
- Rounds 6 – 9: sc around. (30)
- Round 10: sc 3, pm, sc 6, pm, sc 21. (30)
- Rounds 11 – 12: sc around. (30)
- Round 13: (inc) 2x, sc 8, (inc) 2x, sc 18. (34)
Place eyes in marked sts of Round 10.
- Round 14: sc 9, pm, sc 25. (34)
- Round 15: (dec) 2x, sc 8, (dec) 2x, sc 18. (30)
- Round 16: sc 4, dec, sc 2, dec, sc 4, (dec, sc 2) 4x. (24)
- Round 17: (sc 4, dec) around. (20)
- Round 18: sc 3, dec, sc 2, dec, (sc 3, dec) 2x, sc. (16)
- Round 19: (inc, sc) around. (24)
Lightly stuff the head, then lightly stuff the bill. Pinch the top center of the bill to form a point at the increase sts. Position the top of bill (marked side) between the eyes, 1 row below the center of the eye, and line up the bottom of the bill with the round marked in Round 14. Using the tail of the bill and a tapestry needle, sew the bill to the head of the duck until secured. Remove markers and finish stuffing the head.
- Round 20: (sc, inc) around. (36)
- Round 21: (sc 8, inc) around. (40)
- Round 22: (sc 7, inc) around. (45)
- Round 23: sc 7, dec, sc 5, dec, sc 16, inc, sc 3, inc, sc 8. (45)
- Round 24: sc around.
- Round 25: inc, sc, inc, sc 16, (inc, sc) 13x. (60)
- Round 26: sc around.
- Round 27: sc 10, (inc, sc 2) 3x, inc, sc 20, (inc, sc 4) 2x, inc, sc 9. (67)
- Round 28: sc around.
- Round 29: sc 46, blsc 14, sc 7.
- Round 30: sc 46, (dec, sc) 5x, sc 6. (62)
- Round 31: sc 12, (dec, sc 2) 2x, dec, sc 40. (59)
- Round 32: blsc 43, (bldec, blsc 2) 2x, bldec, blsc 6. (56)
- Round 33: (dec, sc 5) 4x, (dec, sc 3) 5x, dec, sc. (46)
- Round 34: sc 7, (dec, sc 2) 3x, dec, sc 25. (42)
- Round 35: dec, sc 5, dec, (sc 2, dec) 2x, sc 5, dec, (sc 3, dec) 3x, sc 3. (34)
- Round 36: (sc 6, dec) 3x, sc 2, dec, dec, sc 2, dec. (28) begin stuffing body. Continue to add stuffing as you work so body is filled firmly.
- Round 37: (sc 5, dec) around. (24)
- Round 38: (sc 4, dec) around. (20)
- Round 39: (sc 3, dec) around. (16) Make sure body is stuffed firmly.
- Round 40: sc, (dec, sc) 5x. (11) FO leaving a long tail. Weave tail through remaining sts and pull tight. Weave in the end.
If your duck doesn’t sit flat, push up on the center of the underside where the last row was worked to flatten out the filling. I also like to flatten out the top of the head so it is not pointed.
Duck Tail
With Yellow and working into the loops left by the blsc sts on Round 29
- Row 1: sl st into the first st, sc 2, hdc 2, dc 4, hdc 2, sc 2, sl st. (12)
- Row 2: ch 1, sk the sl st, sl st in next st, sc 4, (inc) 2x, sc 4, sl st. FO and weave in tail. (12)
Duck Wings
With Yellow
- Round 1: work 6 sc into a magic circle, pull tight, do not join. (6)
- Round 2: inc in ea st around. (12)
- Round 3: (sc, inc) around. (18)
- Round 4: (inc, sc 2) around. (24)
Wing 1
- Round 5: ch 9, sl st in 2nd ch from hook, sc 7, sl st in next 2 sts of Round 4, turn. (7)
- Round 6: flsc 6, sl st flo, turn. (6)
- Round 7: ch 1, sk sl st, sl st blo, blsc 5, sl st in next 2 sts of Round 4, turn. (5)
- Round 8: flsc 4, sl st flo. (4)
- Round 9: ch 1, sk sl st, sl st blo, blsc 3, sl st in next 2 sts of Round 4, turn. (3)
- Round 10: flsc 2, sl st flo. (4)
- Round 11: ch 1, sk sl st, sl st blo, blsc, sl st in next st of Round 4, FO leaving a long tail to attach wing to the body. (1)
Wing 2
- Round 5: ch 3, sl st in 2nd ch from hook, sc, sl st in next 2 sts of Round 4, turn. (1)
- Round 6: inc flo, turn. (2)
- Round 7: ch 1, inc blo, blsc, sl st in next 2 sts of Round 4, turn. (3)
- Round 8: flsc 2, inc flo. (4)
- Round 9: ch 1, inc blo, blsc 3, sl st in next 2 sts of Round 4, turn. (5)
- Round 10: flsc 4, inc flo. (6)
- Round 11: ch 1, inc blo, blsc 5, sl st in next st of Round 4, FO leaving a long tail to attach wing to the body. (7)
Place wings on either side of the body. I like to hold mine in place with straight pins to make sure they are even. Using the tail of the wing and a tapestry needle, sew the wing to the body. I kept the tips of the wings unattached for a “ruffled feathers” look on the tips.
Duck Tuft
Thread a piece of yellow yarn onto a tapestry needle and insert into the center of the top of the head, and out through any st of next row. Insert needle into the st one over from the one the yarn came out of and back out the center top of the head. Using the tip of the needle, separate the strands of yarn and trim to desired length.
Weave in any loose ends and get ready to make more Dizzy friends!
- Funny Pictures
-
 Hilarious Memes for Those Bored to Tears
-
 Weekly Treat of Funniest Parenting Memes for Good Laugh out Loud Right Now
-
 Really Funny Pics to End These Weekend Perfectly
- Recipes
-
 Crispy Baked Avocado Fries
-
 Scrambled Chickpea and Spinach Pitas
-
 Cinnamon Pancakes
- Lifehacks
-
 Crochet Basics: Aligned Cobble Stitch
-
 Brick Stitch Crochet Tutorial
-
 Crochet Basics: Wattle Stitch
- Crochet Ideas
-
 Crochet Snorlax Plushie Doll
-
 Crochet Beautiful Penguin Toy
-
 Crochet Tiny Snowman
- DIY
-
 DIY Santa Craft For Kids
-
 Paper Plate Angel Craft
-
 Upcycled Mason Jar Chicken Vase
- Knitting Ideas
-
 Knitted Bridger Cowl
-
 Knitted Keepsake Bag
-
 Knitted Cutie Cupcake Dolls