Crochet No-Sew Piggy: An Adorable and Easy Craft Project

Crochet No-Sew Piggy is a delightful project that brings out creativity and cuteness without the hassle of sewing. With this fun craft, you can easily create adorable piggy characters using just yarn and a crochet hook. Whether you're a beginner or an experienced crocheter, this project is perfect for anyone looking to add a touch of charm to their collection. The best part? You don't need to worry about sewing the pieces together - simply crochet away and watch your piggy come to life in no time! So grab your supplies, get cozy, and let the creativity flow as you bring your very own Crochet No-Sew Piggy to life. Happy crafting!
Materials
- Super bulky yarn in dark pink and light pink (e.g., Premier Yarns Parfait Chunky in Bubblegum and Candy)
- 4.5mm crochet hook
- 6mm safety eyes
- 4 ply yarn in black or black embroidery floss
- Polyester fiberfill
- Stitch marker, yarn needle, scissors
Abbreviations (US Terms)
- ch – chain
- sc – single crochet
- inc – increase
- invdec – invisible decrease
- FLO – front loop only
- BLO – back loop only
- bo – 4dc bobble stitch
- hdc – half double crochet
- dc – double crochet
- tr – treble crochet
- st/s – stitch/es
[…] – repeat the instructions in brackets
(…) – indicates stitch count at end of round
Special Stitches
4 Double Crochet Bobble Stitch (bo)
Yarn over.
Insert your hook into the indicated stitch.
Yarn over and pull up a loop (3 loops on hook).
Yarn over and pull through first 2 loops (2 loops on hook).
Repeat steps 1-4 three more times in the same stitch (5 loops on hook).
Yarn over and pull through all 5 loops on hook.
Push bobble to the right side of fabric.
Finished Size
The finished pig measures approximately 3.5″ (9cm) long. Size may vary depending on tension and materials used.
Gauge
Gauge is not important in this pattern. Use a hook size to match your chosen yarn. Make sure that your stitches are tight enough to prevent stuffing showing through and adjust hook size if necessary.
Notes
- Pieces are worked in a continuous spiral. Mark the first stitch of each round with a removable stitch marker.
- All bobble stitches are worked in the front loop only.
- R2 is worked in the third loop only.
- In R7, the single crochet stitch before and after each ear is worked in the back loop only.
Identifying the Third Loop in Half Double Crochet
If you look at the top of your work, you’ll see the front loop and back loop of each stitch. Tip your work towards you and you’ll see an extra bar behind each stitch. This is the third loop and what you’ll be working into in R2.
Pattern Instructions
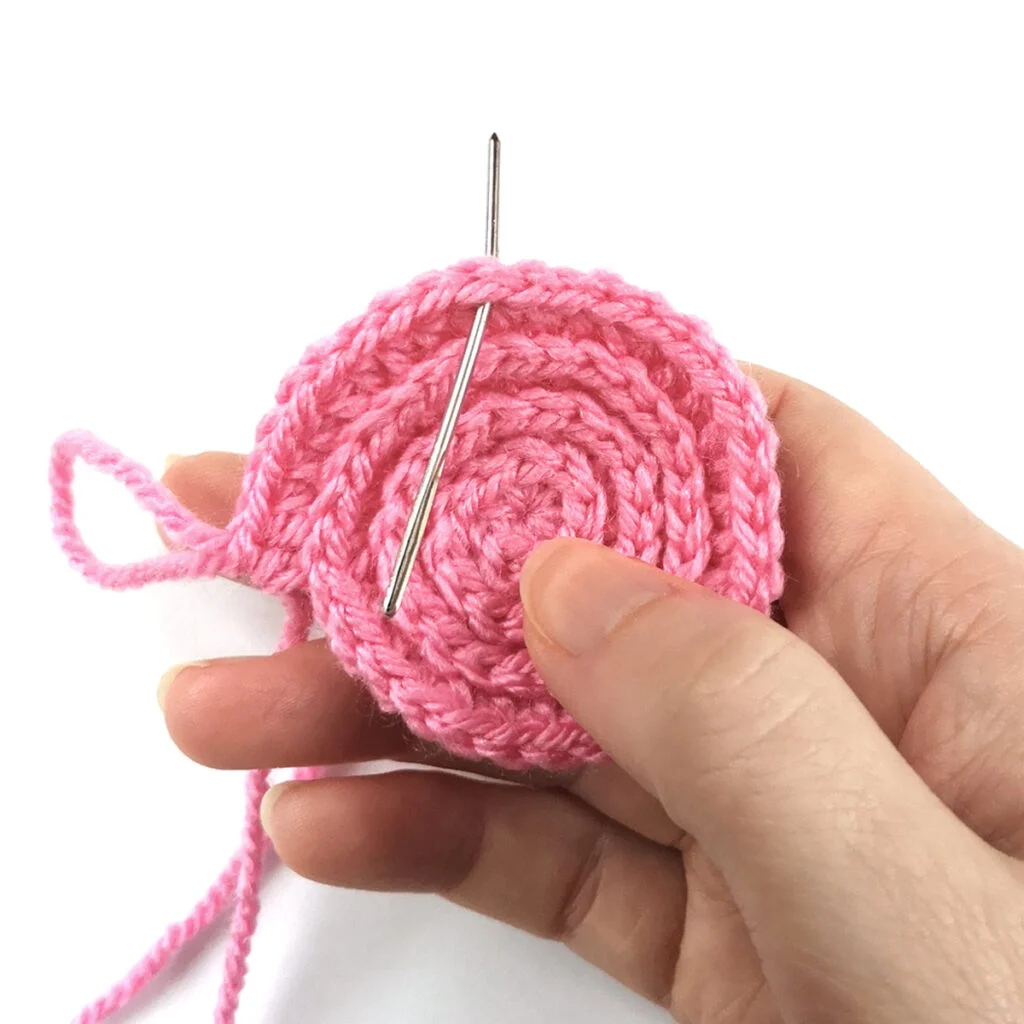
Pig (starting with dark pink)
R1: Ch 2, 8 hdc in second ch from hook (8)
Fasten off invisibly.
This next round is worked in the third loop of the hdc st. Join light pink yarn to the third loop of any st.
R2: Ch 1, sc in same st and in each st around (8)
Continue to work in a spiral without joining.
R3: [Inc] x8 (16)
R4: [Sc, inc] x8 (24)
R5: [Sc] x24 (24)
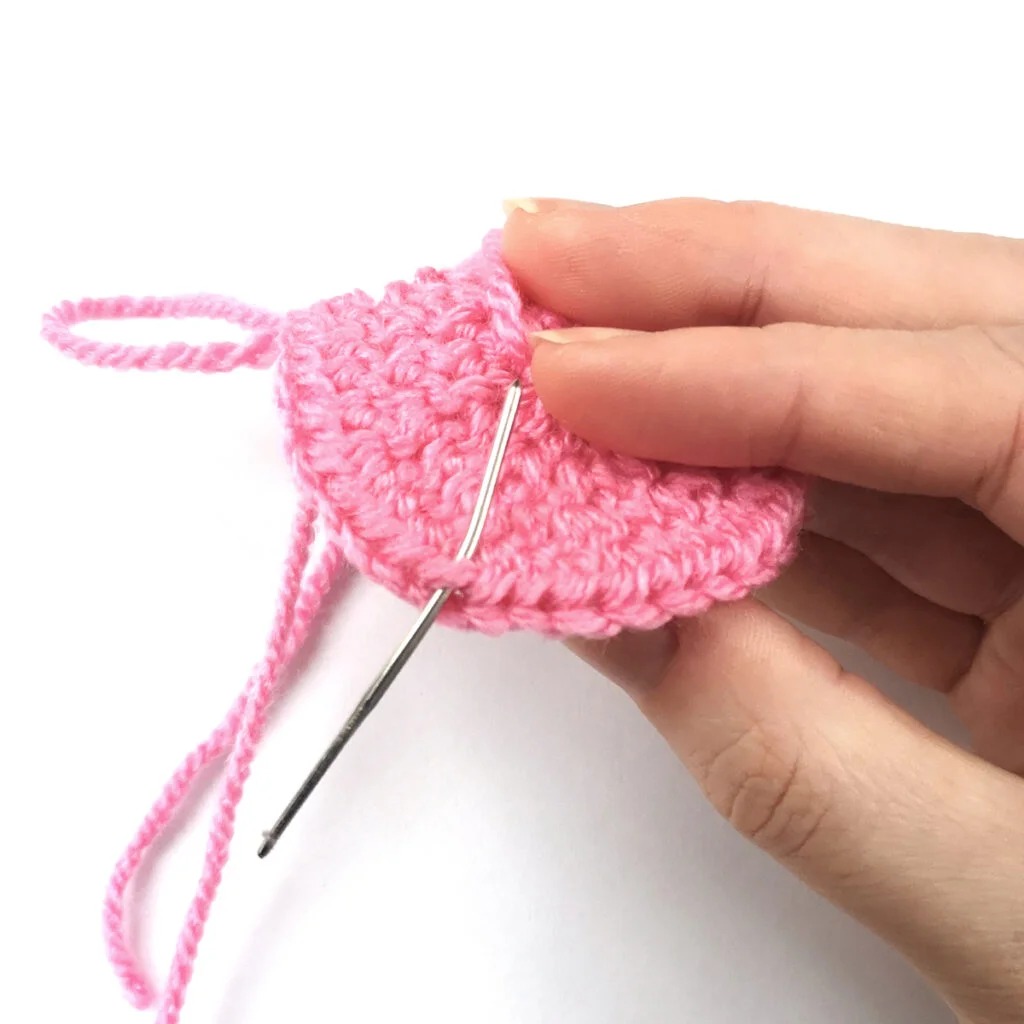
In this next round we’ll be creating the ears by working some stitches in the front loop only.
R6: 9 sc, FLO hdc in next st, (FLO dc, tr, dc, hdc) in next st, 4 sc, (FLO hdc, dc, tr, dc) in next st, FLO hdc in next st, 5 sc, FLO bo, sc
Tip: Use stitch markers to mark the two leftover back loops behind each ear to make them easier to see in the next round.
In R7 we will fold the ears down in front and sc into the leftover back loops behind the ears. The sc sts before and after each ear are worked in the back loop only.
R7: 4 sc, FLO bo, 3 sc, BLO sc, 2 sc, BLO sc, 2 sc, BLO sc, 2 sc, BLO sc, 6 sc (24)
Insert safety eyes between R3 and R4, 4 sts apart.
R8-10: [Sc] x24 (24) 3 rounds
Over the next two rounds we will be adding the back feet. You may need to adjust the placement of the bobble sts, they should be in line with the front feet.
R11: 23 sc, FLO bo (24)
R12: 4 sc, FLO bo, 19 sc (24)
In the next round we’ll be adding the tail. It should be centered between the ears. Keep your sl sts tight for more of a curl.
R13: Invdec, [sc, invdec] x4, ch 9, sl st in second ch from hook and in each ch across, sc [invdec, sc] x3 (16)
Start stuffing and continue to stuff as you go.
Fold the tail down in front and ignore it in the next round.
R14: [Invdec] x8 (8)
Cut the yarn leaving a tail and pull through last st. Weave the yarn tail through the front loops only of the final round and pull to close. Hide the end inside the pig.
Finishing
Gently stretch out the ears and fold them forwards towards the eyes.
Shape the tail into a curl.
Using 4 ply black yarn doubled or black embroidery floss, sew 2 vertical lines on the pig’s snout for the nostrils.
- Funny Pictures
-
 Hilarious Memes for Those Bored to Tears
-
 Weekly Treat of Funniest Parenting Memes for Good Laugh out Loud Right Now
-
 Really Funny Pics to End These Weekend Perfectly
- Recipes
-
 Crispy Baked Avocado Fries
-
 Baked Beans and Hot Dogs with Biscuit Topping
-
 Roasted Rosemary Lemon Chicken Breasts
- Lifehacks
-
 Crochet Basics: Twisted Fringe
-
 7 Crochet Tips And Tricks
-
 How To Work Crochet Into Denim
- Crochet Ideas
-
 Crochet Snorlax Plushie Doll
-
 Crochet Cat in 1 Row
-
 Crochet Beautiful Penguin Toy
- DIY
-
 Popsicle Stick and Jingle Bell Christmas Tree Ornament
-
 DIY Santa Craft For Kids
-
 Paper Plate Angel Craft
- Knitting Ideas
-
 Knitted Bridger Cowl
-
 Knitted Keepsake Bag
-
 Knitted Cutie Cupcake Dolls