Crochet Mason Jar Covers

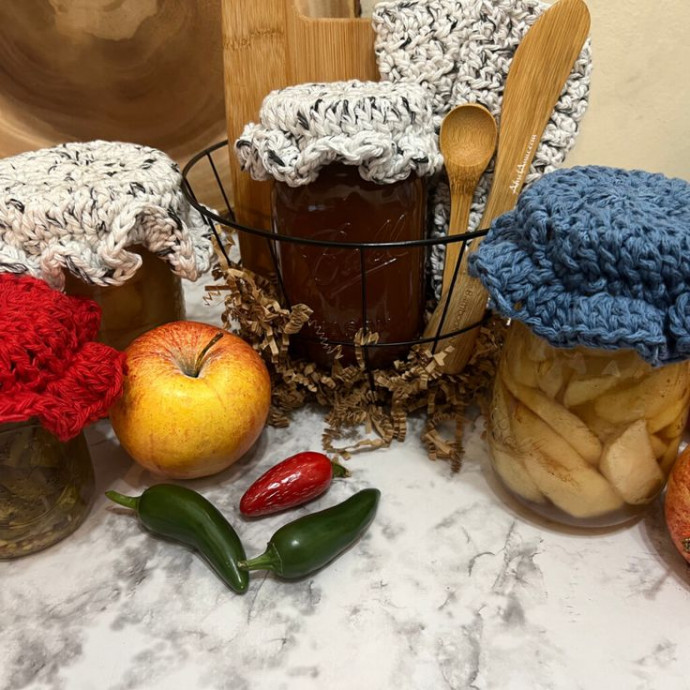
When it comes to adding a touch of whimsy and charm to your home decor, a Crochet Mason Jar Cover is the way to go! These delightful covers not only give your mason jars a cozy makeover but also bring a unique handmade touch to your space. Whether you're using them to store small trinkets, create a cute vase for flowers, or simply as a decorative accent, these covers are sure to bring a smile to your face. Get your crochet hooks ready and let your creativity shine as you craft your very own Crochet Mason Jar Covers to add a personalized and friendly flair to any room in your home!
Materials
- Yarn: Approx 100 yards, 4-weight cotton yarn or cotton yarn blend
- Hook: Crochet Hook 5.5MM/U.S I/9 - Furl Odyssey
- Notions:
- Yarn Needle
- Elastic - round
- Scissors
- Stitch Markers
Finished Measurement
The finished product measured approx. size 3” Regular mouth jars or 3.5” for Wide mouth Mason Jars.
Gauge
Not necessary to complete this project.
Pattern Abbreviations (US Terms)
- ch(s) – chain(s)
- dc – double crochet
- round – Rnd
- sc – single crochet
- sl st – slip stitch
- st(s) – stitch(es)
- 2dc – place 2 double crochet stitches into the ‘same’ stitch
- 3dc – place 3 double crochet stitches into the ‘same’ stitch
Magic Circle – an adjustable loop (or ring) technique that has a yarn tail that pulls to close, allowing the center hole to seal tightly closed.
Pattern Instructions
NOTE: The ch.3 will count as the first stitch in the round.
Complete Magic Circle, ch 3 ‘OR’ Complete Foundation Circle – ch 4, join with sl st in the first ch to form a ring, ch 3
Rnd 1: Place 11 dc into the magic circle (the ch 3 will count as your first dc), pull the circle close, sl st in the first dc to join. [12]
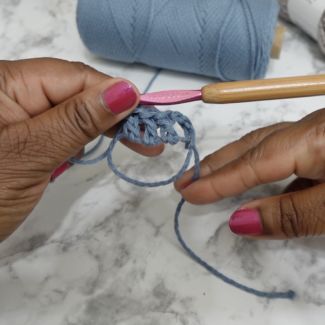
Increase Rounds 2-10
Rnd 2: ch 3, into the same stitch as the ch 3, 1 dc, 2dc into next stitch; *repeat 2dc* in each stitch around, sl st in the first dc to join. [24]
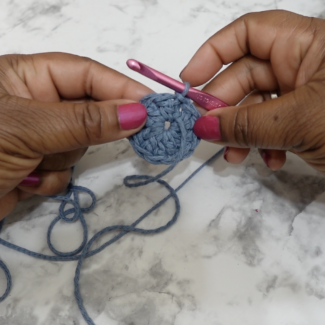
Rnd 3: ch 3, 2dc next stitch, 1 dc, 2dc; *Repeat 1 dc, 2dc*, each stitch around, sl st in the first dc to join. [36] End with 2dc in the same space.
Adding Elastic for Regular Mouth Mason Jar
Rnd 4: ch 3, 2dc in next stitch, 1 dc, 1 dc, 2dc, 1 dc,
1 dc, *Repeat 2dc, 1 dc, 1 dc*, each stitch around, sl st in the first dc to join. [48] End with 1 dc.
Wide Mouth Mason Jar (Approx. 3.5”)
Rnd 4: ch 3, 2dc in next stitch, 1 dc, 1 dc, 2dc, 1 dc, 1 dc, *Repeat 2dc, 1 dc, 1 dc*, each stitch around, sl st in first dc to join. [48] End with 1 dc.
Note: Rnd 4 will be the final increase round for Wide mouth Mason Jar which is approx. 3.5” across.
Adding Elastic for Wide Mouth Mason Jar
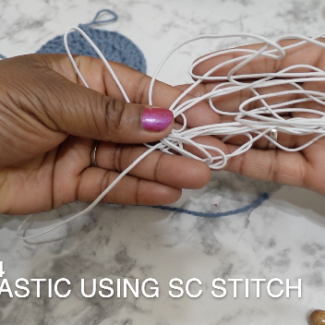
Measure elastic to fit around the top of the mason jar approx. 10″.
Rnd 5: Attach elastic to the first st of the round, using a knot. Hold elastic while single crocheting in each stitch around. Tie together the starting elastic band with the ending elastic band to secure. Sl st in the first dc to join. [36]
Frilly Trim/Border
Rnd 5 (or Rnd 6, depending on size): ch 3; 2dc in next stitch; 3dc in next, *Repeat 2dc, 3dc,* each stitch around, sl st in first dc to join [approx. 90- rnd 5 or approx. 120 rnd 6].

Finishing
Using the yarn needle, weave in ends & ensure up the magic circle.
- Funny Pictures
-
 Cute Cat Memes That Will Make Your Day Brighter
-
 Spot-on and Funny Memes About Introverts Struggles
-
 Top Wonderful Cat Memes on Their Way to Better Your Day
- Recipes
-
 Creamy Old Fashioned Rice Pudding
-
 Russian Tea Cakes (Snowball Cookies)
-
 Rigatoni with Sausage, Tomatoes, and Zucchini
- Lifehacks
-
 How to Crochet a Harlequin Stitch
-
 Removing The Toughest Stains
-
 Crochet Basics: Crumpled Griddle Stitch
- Crochet Ideas
-
 Crochet Christmas Tree
-
 Crochet Goblet of Fire
-
 Crochet Adorable Ammonite
- DIY
-
 DIY Snowman Wreath
-
 Mini Santa Sleigh Ornament
-
 Crochet Gingerbread House Blanket
- Knitting Ideas
-
 Knitted Easter Bunny
-
 Knitted Mobile Phone/Glasses Case
-
 Knitted Cabled Wallet