Crochet Balloon Sleeve Cardigan

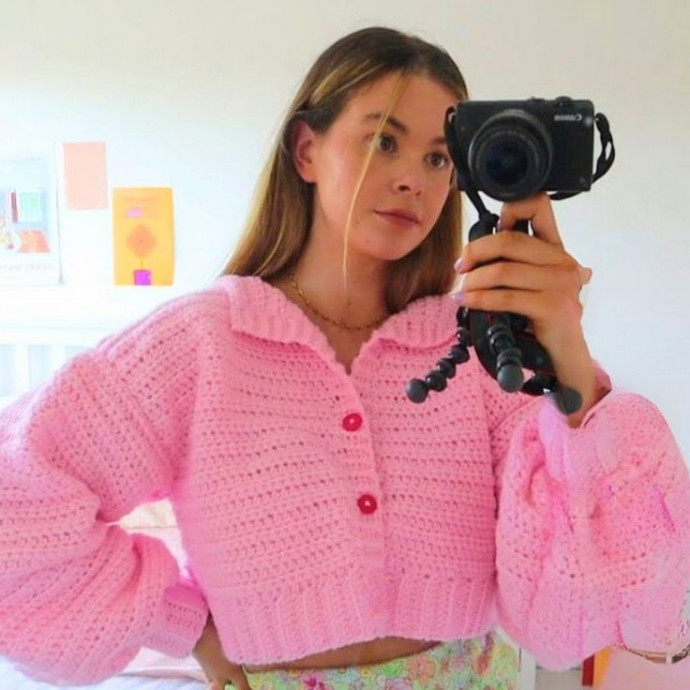
If you're looking for a cozy and stylish addition to your wardrobe, the Crochet Balloon Sleeve Cardigan is the perfect choice! This delightful cardigan features oversized balloon sleeves that add a touch of fun and flair to any outfit. Whether you're lounging at home or heading out for a casual coffee date, this cardigan will keep you comfortably chic all day long. The intricate crochet design gives it a trendy and unique look that is sure to turn heads. Embrace the warmth and charm of the Crochet Balloon Sleeve Cardigan and elevate your style effortlessly!
Materials and Preparation
To make this gorgeous pink balloon sleeve cardigan, you will need the following materials:
Materials
- Yarn: 700g (7 balls) of chunky acrylic yarn (Stylecraft Special for Babies Chunky in Baby Pink, or yarn of your choice).
- Crochet hooks: 5mm and 6mm.
- Tapestry needle (for sewing ends and attaching buttons).
- Scissors.
- Tape measure.
- Stitch markers.
- Buttons: 3 buttons of your choice for fastening the cardigan.
Yarn Weight Recommendations
While the tutorial uses chunky acrylic yarn, you can use other yarn types like cotton. Adjust the measurements based on your yarn weight and desired fit.
Abbreviations and Notes
Crochet Abbreviations:
- CH: Chain
- SC: Single Crochet
- HDC: Half Double Crochet
- BLO: Back Loop Only
- SL ST: Slip Stitch
Notes and Tips
- Ribbing: The ribbing is done using the BLO SC technique, which gives the cardigan its stretchy ridged look, so pay attention to this step.
- Consistency: Ensure your stitches are even to avoid waviness or uneven edges.
- Gauge Check: If using a different yarn, ensure the ribbing reaches the specified width and height for proper proportions—make a gauge swatch as needed!
Gauge, Approximate Size, and Pattern Notes
Gauge:
- For the ribbing: 11 CH = ~3 inches using chunky yarn and a 5mm hook.
- For the main panels: aim for 56 HDC stitches = ~21 inches.
Finished Size:
Measurements (approximately size M):
- Back panel width: 21 inches
- Full cardigan height: 16 inches (including 2 inches of ribbing).
- Sleeve dimensions: 20 inches wide and 19 inches tall (excluding 2 inches of ribbing).
If you need a different size, measure accordingly and scale the number of rows and stitches to fit your desired measurements.
Special Techniques
- BLO SC Ribbing Technique: Used for cuffs, edges, and middle panel details.
- Slip-Stitch Joining: Used to attach panels and seams.
- Buttonholes: Created during middle ribbing rows using CH spaces.
Step-by-Step Pattern
1. Ribbing Preparation
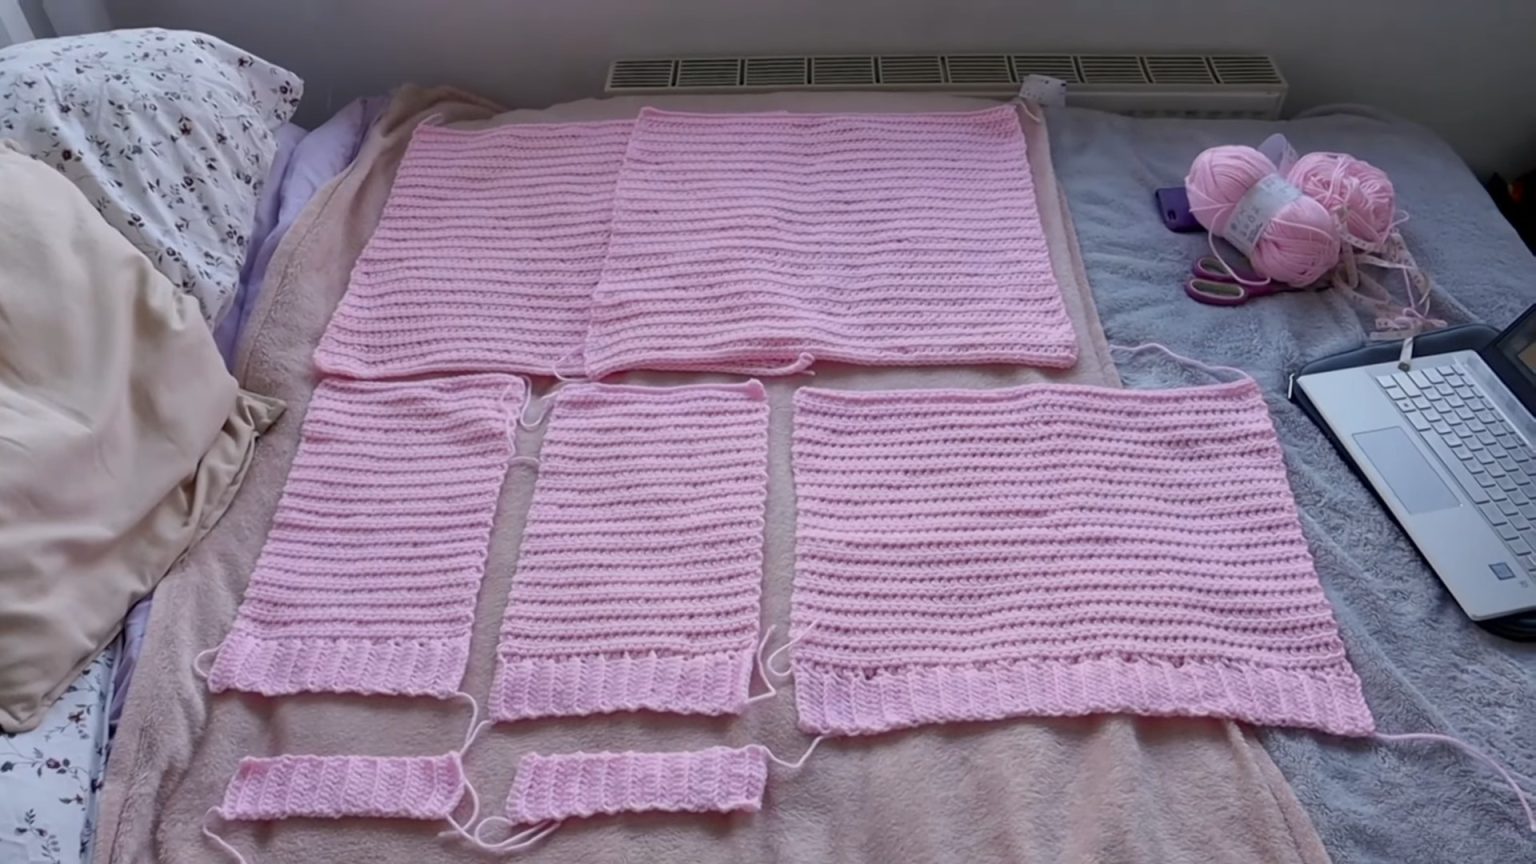
You’ll create five ribbing pieces:
- Back panel: 21 inches wide (approx. 56 rows).
- Front panels: Two ribbing pieces, 10 inches each.
- Sleeve cuffs: Two ribbing pieces, 8 inches each.
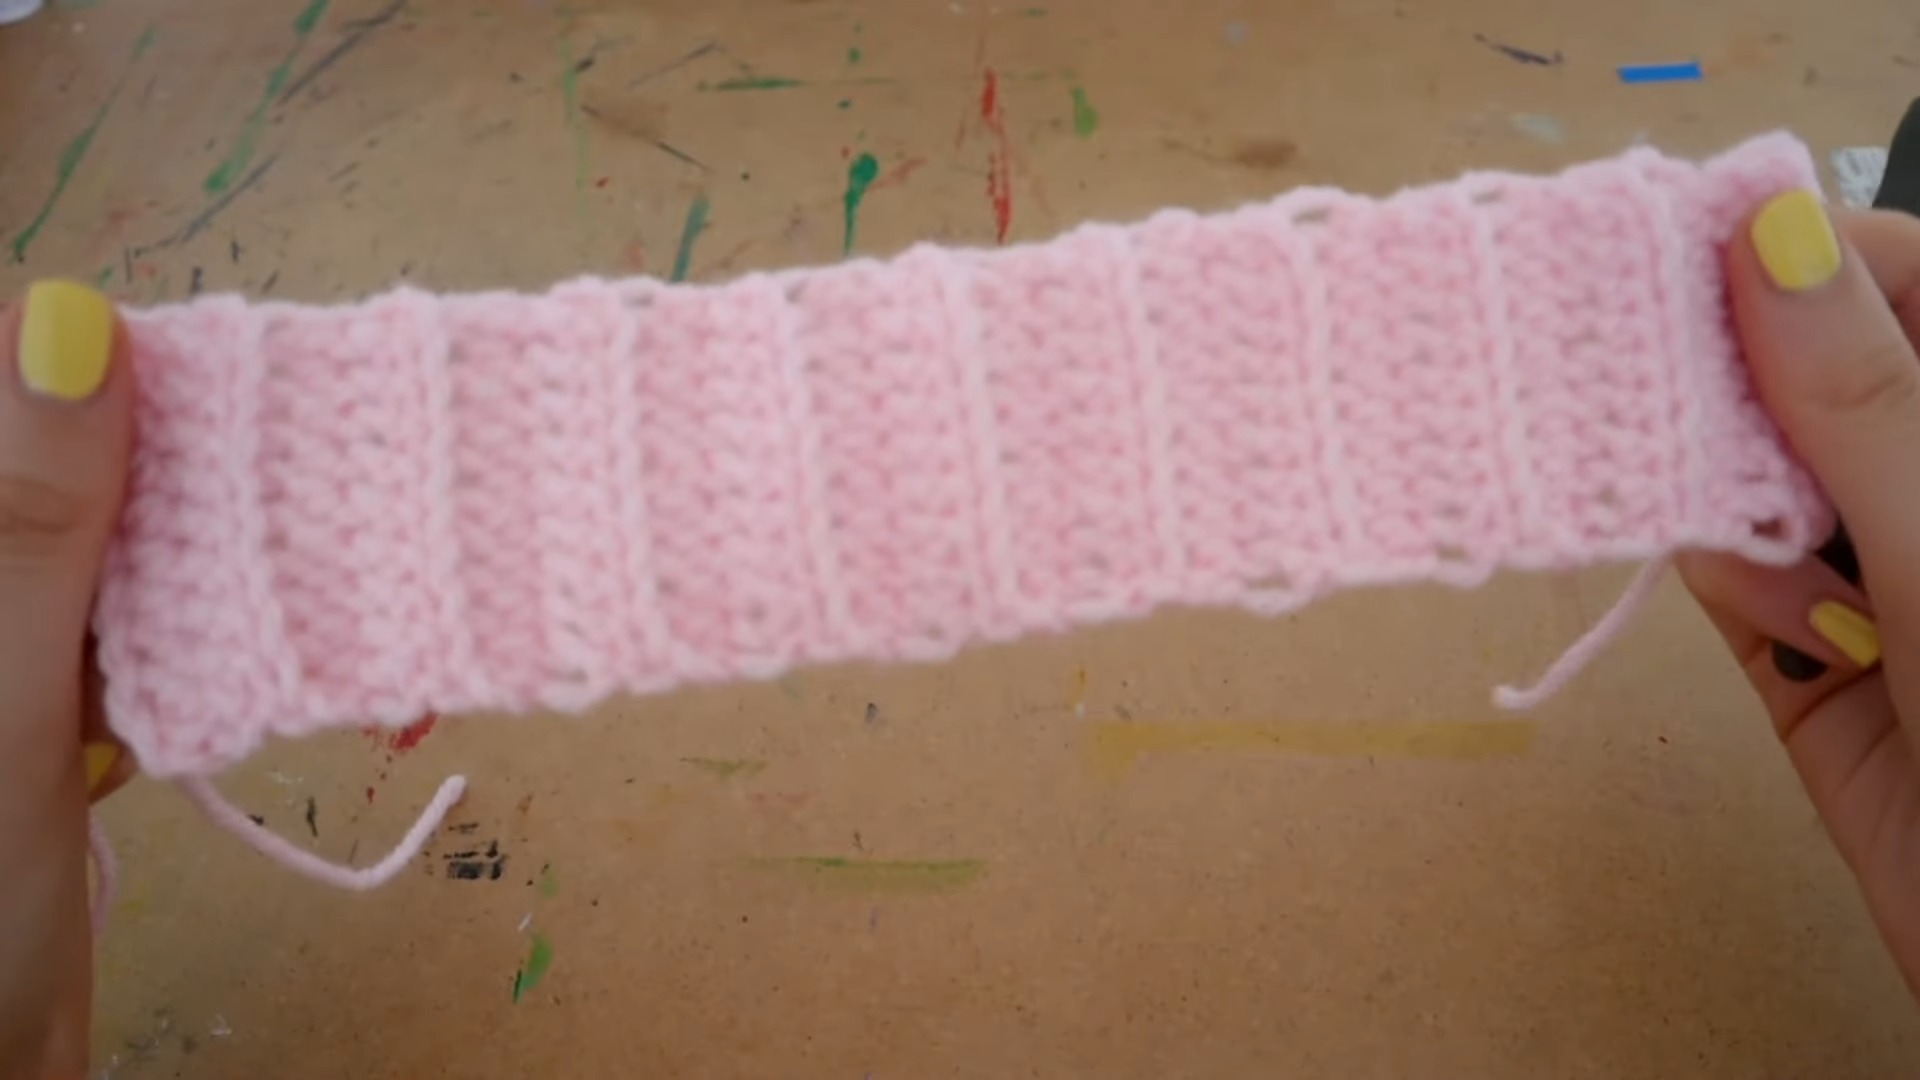
How to Crochet Ribbing (Basic Instructions):
- Start with a slip knot, then CH 11 (or as needed for ~3 inches).
- In the 2nd CH from the hook, work SC into each CH across (10 SC total).
- CH 1, turn, and work BLO SC across all stitches (10 BLO SC).
- Repeat until the ribbing reaches the desired width (e.g., 21 inches for the back panel). Tie off and set aside.
Back Panel
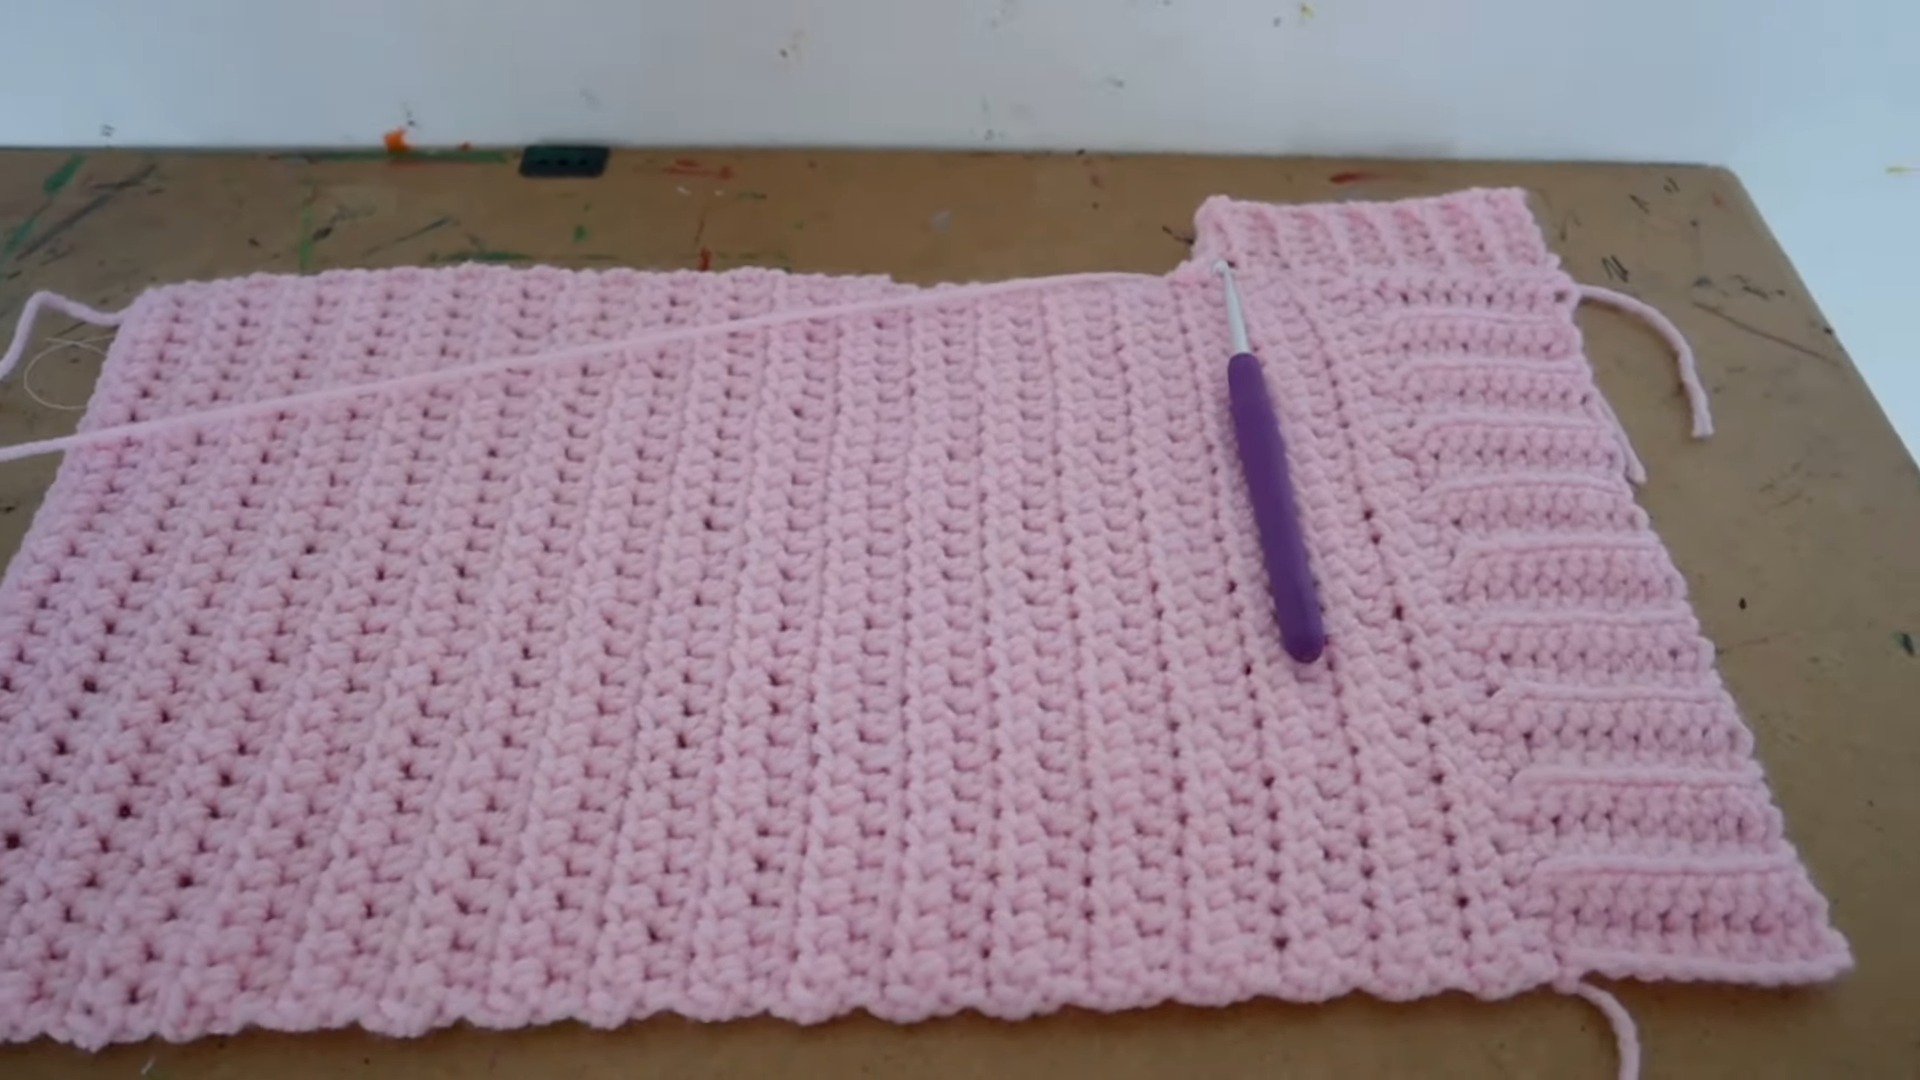
Front Panels (Left and Right)

Sleeves
Body Assembly
Attach Front Panels to Back Panel:
Attach Sleeves:
Side Seams
Middle Ribbing (Including Buttonholes)
Buttonholes
Finishing Touches
Collar Edge Single Crochet
Buttons
Final Step
- Funny Pictures
-
 Hilarious Memes for Those Bored to Tears
-
 Weekly Treat of Funniest Parenting Memes for Good Laugh out Loud Right Now
-
 Really Funny Pics to End These Weekend Perfectly
- Recipes
-
 Crispy Baked Avocado Fries
-
 Scrambled Chickpea and Spinach Pitas
-
 Cinnamon Pancakes
- Lifehacks
-
 Crochet Basics: Aligned Cobble Stitch
-
 Brick Stitch Crochet Tutorial
-
 Crochet Basics: Wattle Stitch
- Crochet Ideas
-
 Crochet Snorlax Plushie Doll
-
 Crochet Beautiful Penguin Toy
-
 Crochet Tiny Snowman
- DIY
-
 DIY Santa Craft For Kids
-
 Paper Plate Angel Craft
-
 Upcycled Mason Jar Chicken Vase
- Knitting Ideas
-
 Knitted Bridger Cowl
-
 Knitted Keepsake Bag
-
 Knitted Cutie Cupcake Dolls