Crochet Short Sleeve Cardigan

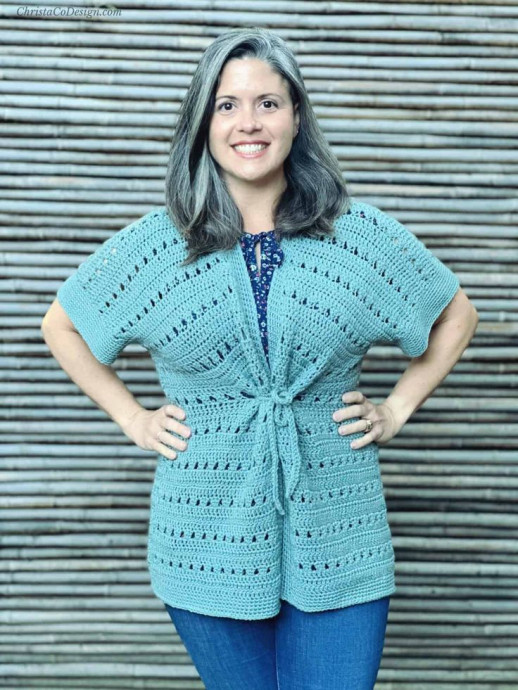
If you're looking for a versatile addition to your wardrobe, a Crochet Short Sleeve Cardigan is a perfect choice! This stylish and practical piece can effortlessly elevate any outfit while keeping you comfortable. With its charming crochet design and trendy short sleeves, it is a great option for both casual days and more dressed-up occasions. You can easily layer it over a tank top or a dress, creating a chic and cozy look. Whether you're out for a coffee date or relaxing at home, this cardigan is sure to be your go-to piece for any day of the week!
Materials
WeCrochet’s Brava Recycle a #3 DK weight yarn (100% recycled acrylic, 306 yd (280 m) per 100 g skein) in shade Lily Flower — 3 [3, 4, 4, 5, 6, 6, 7, 8] skeins.
Tools
5 mm (US Size H-8) crochet hook, or size needed to meet gauge.
- Yarn needle
- Measuring tape
- Scissors
- Stitch marker(s)
Instructions
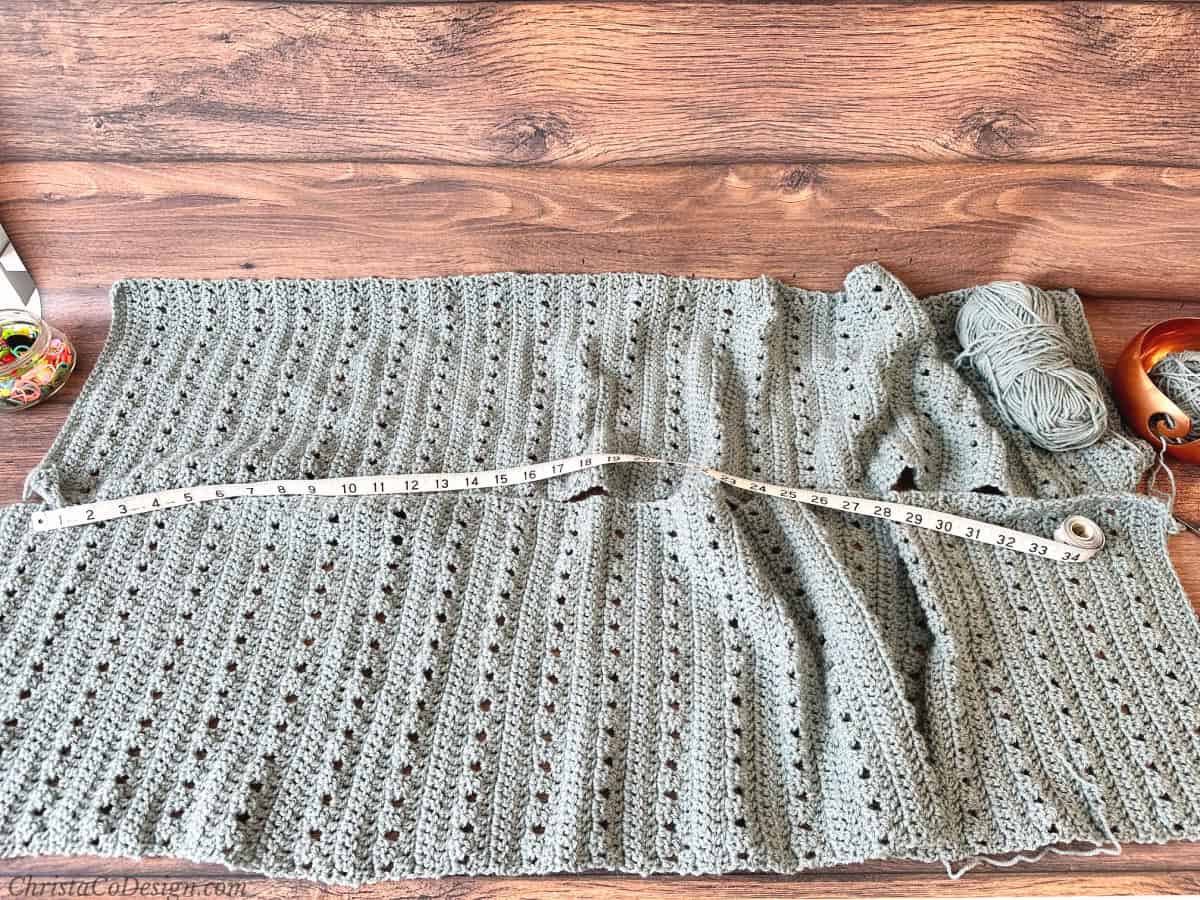
Panels
Make 2
Rep Rows 4 – 7: 21 [22, 23, 24, 25, 26, 27, 28, 29] more times or until panel length = 44 [46, 48, 50, 52, 54, 56, 58, 60]” long and 22 [23, 24, 25, 26, 27, 28, 29, 30]” folded.
Cut yarn and weave in ends.
Assembly
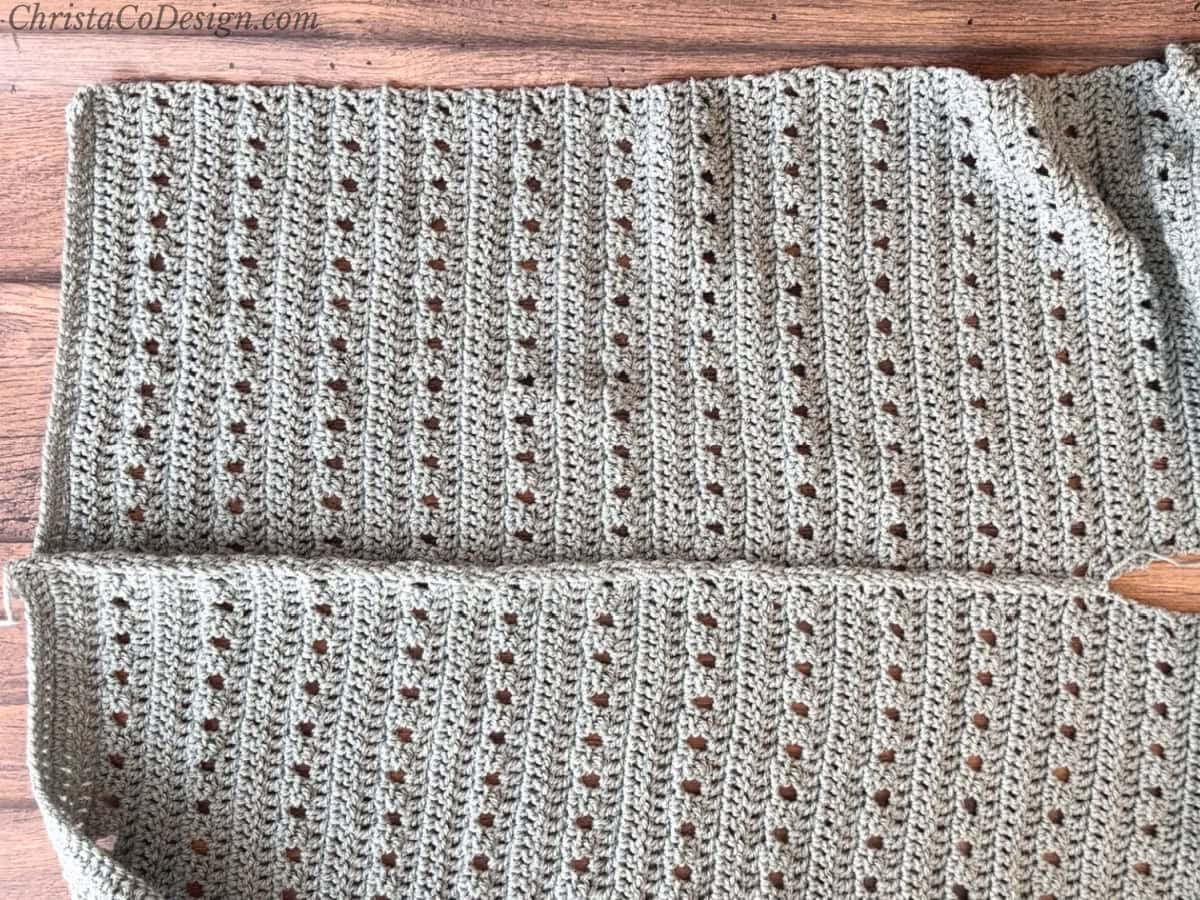
Seam the Back
Since the panels are seamed to form the back and then folded over the shoulder to form the front panels, this will result in one side (your front or back) being “upside down.” If you have a preference on which you see in the front then orient them that way. Just be sure both panels are facing the same way (i.e., both row 1 on the bottom) before seaming them together.
I chose a visible decorative seam for the back, so I worked on the rs. If you do not want your seam to stand out work on the ws when seaming.
Sew
Lay the two panels side by side, with the ws facing down.
Join yarn with a sl st to the bottom of row 1.
Sl st through both panel edges, matching row for row.
Seam up the back for 20 [21, 22, 23, 24, 25, 26, 27, 28]”. If you prefer an unseen, flat seam then sew on the ws using a mattress/whip stitch.
Seam the Sides
Fold over the front panels, line up the bottoms so they’re even-notice the back is not sewn all the way up to the top of the shoulder.
Sew front panel sides up until 6.5” (7, 7.5, 8, 8.5, 9, 9.5, 10, 10.5) inches are left to the fold of the shoulder.
Rep on the other side.
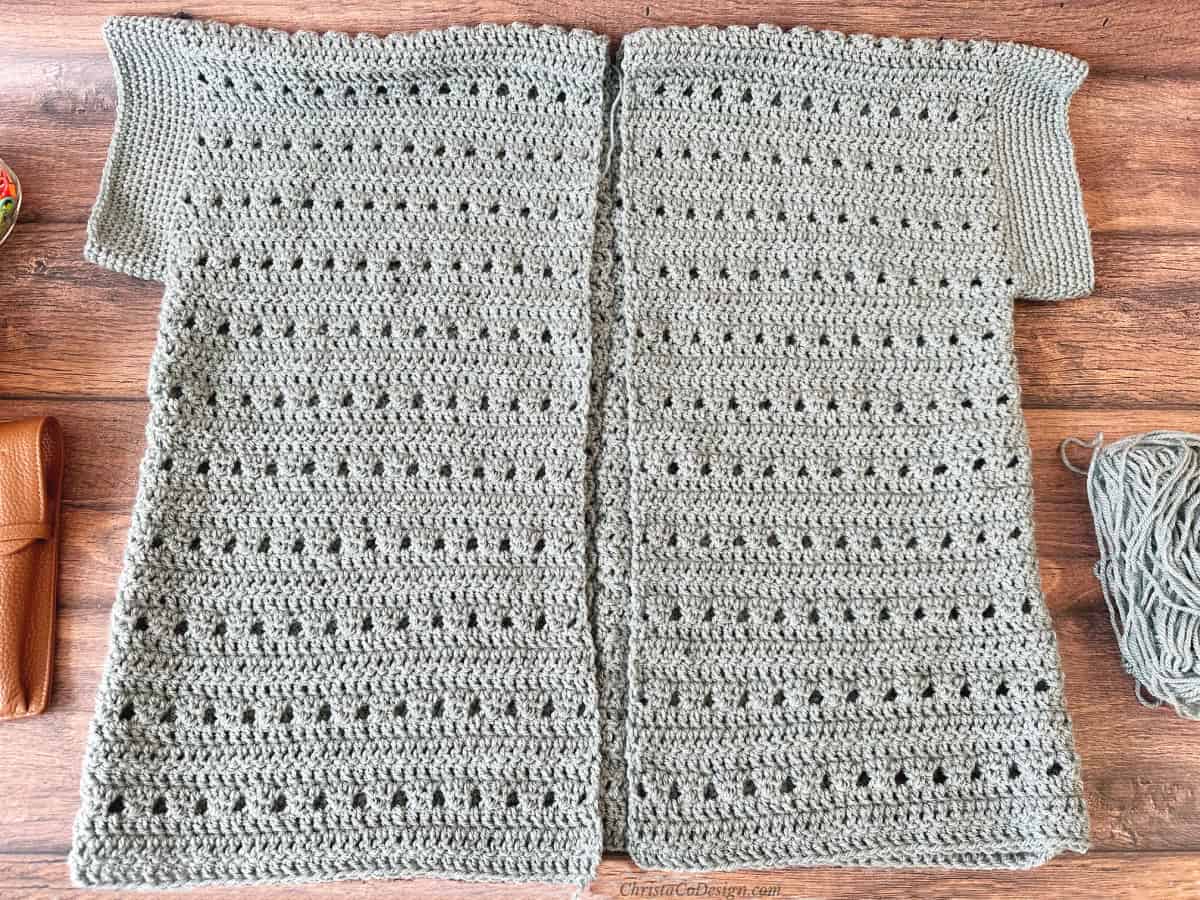
Sleeves
Join yarn with a sl st to the underside of the armhole.
Rep for the other sleeve.
Edging
The bottom hem and lapel are worked all together in rounds.
Position cardigan in front of you, upside down.
Join yarn with sl st to the bottom left panel from you.
You’ll work to the left, in the round around the bottom hem, then come up the right front panel, around the back of neck and down the left front panel, joining again at the bottom corner of the left front panel and continuing to repeat.
Belt (Optional)
Belt Pattern 1.5” wide
Row 1: Ch 7, sc in the 2nd chain from your hook and across, turn. (6 sts)
Row 2: Ch 1, sc in the same and in each sc across, turn. (6 sts)
Row 3: Rep Row 2 until the desired length is reached. Cut yarn and weave in ends.
Tie belt around or thread through spaces made with dc3tog which can double as a belt loop.
- Funny Pictures
-
 Hilarious Memes for Those Bored to Tears
-
 Weekly Treat of Funniest Parenting Memes for Good Laugh out Loud Right Now
-
 Really Funny Pics to End These Weekend Perfectly
- Recipes
-
 Crispy Baked Avocado Fries
-
 Baked Beans and Hot Dogs with Biscuit Topping
-
 Roasted Rosemary Lemon Chicken Breasts
- Lifehacks
-
 Crochet Basics: Twisted Fringe
-
 7 Crochet Tips And Tricks
-
 How To Work Crochet Into Denim
- Crochet Ideas
-
 Crochet Snorlax Plushie Doll
-
 Crochet Cat in 1 Row
-
 Crochet Beautiful Penguin Toy
- DIY
-
 Popsicle Stick and Jingle Bell Christmas Tree Ornament
-
 DIY Santa Craft For Kids
-
 Paper Plate Angel Craft
- Knitting Ideas
-
 Knitted Bridger Cowl
-
 Knitted Keepsake Bag
-
 Knitted Cutie Cupcake Dolls