Crochet Book Sleeve

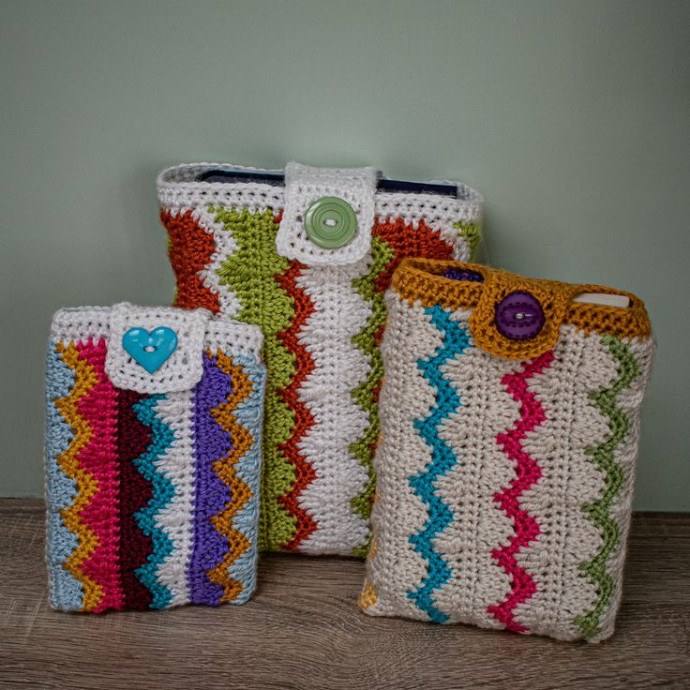
Introducing the marvelous Crochet Book Sleeve! This delightful creation not only protects your favorite books but also adds a charming touch to your reading experience. Handcrafted with love and care, each sleeve is a perfect companion for your literary adventures. Whether you're strolling through a park or cozying up on a rainy day, the Crochet Book Sleeve ensures your book stays safe and snug. It's a wonderful way to show off your style while keeping your book in pristine condition. Happy reading with your new Crochet Book Sleeve!
Materials
4 weight yarn of your choosing. I used Caron Simply Soft in the following approximate amounts:
- Large – 213 yards for the outer, 188 yards for the lining
- Medium – 138 yards for the outside, 105 yards for the lining
- Small – 96 yards for the outside, 88 yards for the lining
4mm hook
Stitch markers (optional)
Scissors
Tapestry needle
1.25” button
Gauge
Using the herringbone half double crochet stitch in the lining, the gauge is 8 sts and 6 rows in 2”. For the outside panel, my zigzag sections were 1.75” wide with 8 sc sts per inch.
Sizing
3 sizes – based on the outside measurements:
- Large is 8.5” wide by 11” tall (fits a tablet or standard hardback book)
- Medium is 7.5” wide by 9.5” tall (fits a standard book)
- Small is 6” wide by 8” tall (fits a Kindle)
Abbreviations Used
Ch(s) – chain(s)
St(s) – stitch(es)
FSC – foundation single crochet
YO – yarn over
Sc – single crochet
Hdc – half double crochet
Dc – double crochet
Tc – treble crochet
FO – fasten off
Sc2tog – single crochet 2 together
Sc3tog – single crochet 3 together
Tc2tog – treble crochet 2 together
Tc3tog – treble crochet 3 together
HHDC – herringbone half double crochet
Other Notes
Written in US terms.
Ch stitches at the beginning do not count as a st unless otherwise stated.
The pattern is written for #4 weight. Where the stitch counts or instructions vary, this is for the shorter length (longer length).
Where there are differences for size, the pattern/stitch/row counts will be written as small (med/large)
Before you start, decide how you would like your colors to flow. For my large and medium sleeves, I changed colors at the start of rows 3 and 5; for the small, I changed colors at the start of every other row.
You will make the outside first, and then if you would like, the lining that is made next. Note: the lining will reduce the inside space of the book sleeve by about ½-inch. This book sleeve is made from side to side and is sewn together for assembly. The top edging and button tab are completed last.
The Book Sleeve Crochet Pattern
For the Outside of Your Book Sleeve Crochet Pattern:
Row 1: FSC 31 (37/43) OR Ch 32 (38/44), sc in second ch from hook and each ch across. (31 (37/43))
Row 2: Turn, Ch1, sc in first st, *hdc in next st, dc in next st, 3 tc in next st, dc in next st, hdc in next st, sc in next st. Rep from * to end. (41 (49/57) sts)
Row 3: Turn, ch1, sc2tog over 1st and 2nd st of the row, sc in next 2 sts, *3 sc in next st, sc in next 2 sts, sc3tog over next 3 sts, sc in next 2 sts. Rep from * until you have 5 sts remaining. 3 sc in next st, sc in next 2 sts, sc2tog over last 2 sts. (41 (49/57) sts)
Row 4: Turn, repeat row 3.
Row 5: Turn, Ch4, sk the first st tc in the next st (counts as a tc2tog), *dc in next st, hdc in next st, sc in next st, hdc in next st, dc in next st, tc3tog over next 3 sts, rep from * across ending the last repeat at **. At this point, you will have 2 sts remaining. Tc2tog. (31 (37/43))
Row 6: Turn, ch1, sc in first and every st across (31 (37/43))
Row 7: Repeat row 6.
Rows 8–36 (42/54): Repeat rows 2-7. Note: you will end with row 6 for all sizes.
FO and weave in ends.
For the Lining Panel:
Row 1: FSC 29 (35/41) OR Ch 30 (36/42), sc in second ch from hook and each ch across. (29 (35/41))
Row 2: Turn, Ch1, HHDC in first st and each st across. (29 (35/41))
Rows 3 on: Repeat row 2 until your lining panel is half an inch shorter than your front panel.
Leave a long tail for sewing and FO.
Assembly
Step 1: Take your front panel and lay it flat right side facing you (the photos below show you the right and wrong sides)
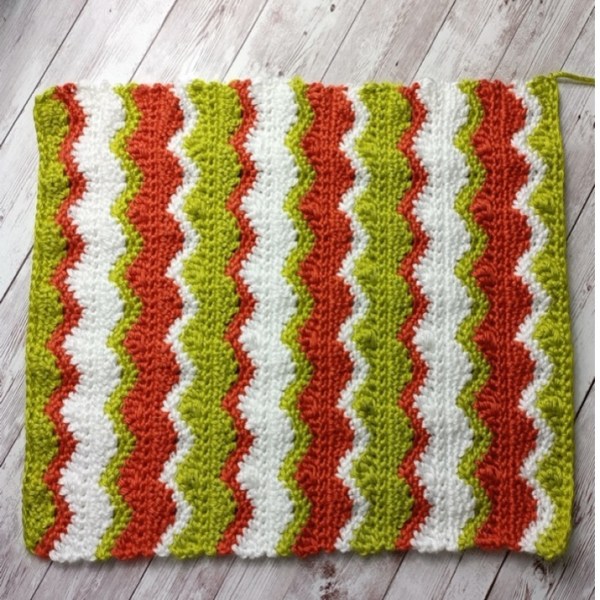
Front of your work
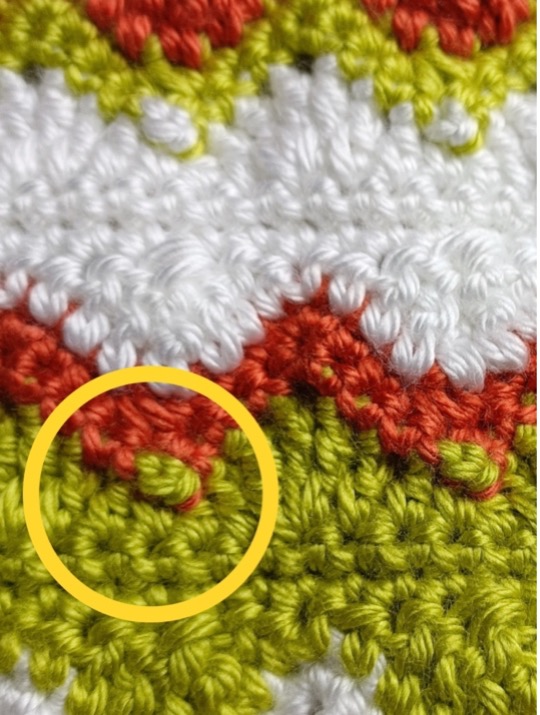
Back of your work
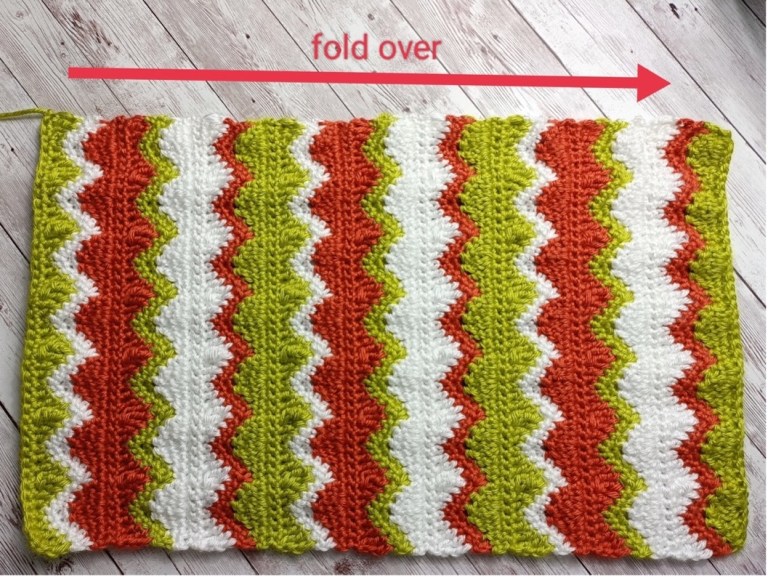
Step 2: Fold your panel in half.
Step 3: Sew or stitch the side and bottom of your panel together.
Step 4: Turn your panel so that the right sides are facing you. You may want to poke out the corners and edges a little so it lays nicely.
Step 5: Repeat steps 1-3 for the lining section. Do NOT turn your lining right side out.
Step 6: Insert your lining into the front panel, making sure that the open sides are both at the top and your seams are either together or at opposite sides.
Step 7: Attach your yarn on one of the sides. Ch1, and HDC evenly around the top of your sleeve, making sure to work into BOTH the front and back panels. Note: I worked 45 (52/68) hdc around my versions. If you work too few, it will reduce the size of the opening of your sleeve; too many, and it will flare a little.
SS to join.
Step 8: Ch1, HDC in each st around. SS to join and FO.
Step 9: Lay your book sleeve flat and work out where the center 8 sts are. Mark the first and last of these 8 sts with a stitch marker.
Making the Tabs
Row 1: Attach yarn in the stitch marked with the first stitch marker. Ch1, HDC in same.
Edging (Optional)
I finished off my book sleeves by working a sc into each st across the top of the tab, sc evenly down the sides of the tab, and then a sc in each st around the top of the book sleeve.
FO and weave in ends.
- Funny Pictures
-
 Hilarious Memes for Those Bored to Tears
-
 Weekly Treat of Funniest Parenting Memes for Good Laugh out Loud Right Now
-
 Really Funny Pics to End These Weekend Perfectly
- Recipes
-
 Crispy Baked Avocado Fries
-
 Scrambled Chickpea and Spinach Pitas
-
 Cinnamon Pancakes
- Lifehacks
-
 Crochet Basics: Aligned Cobble Stitch
-
 Brick Stitch Crochet Tutorial
-
 Crochet Basics: Wattle Stitch
- Crochet Ideas
-
 Crochet Snorlax Plushie Doll
-
 Crochet Beautiful Penguin Toy
-
 Crochet Tiny Snowman
- DIY
-
 DIY Santa Craft For Kids
-
 Paper Plate Angel Craft
-
 Upcycled Mason Jar Chicken Vase
- Knitting Ideas
-
 Knitted Bridger Cowl
-
 Knitted Keepsake Bag
-
 Knitted Cutie Cupcake Dolls