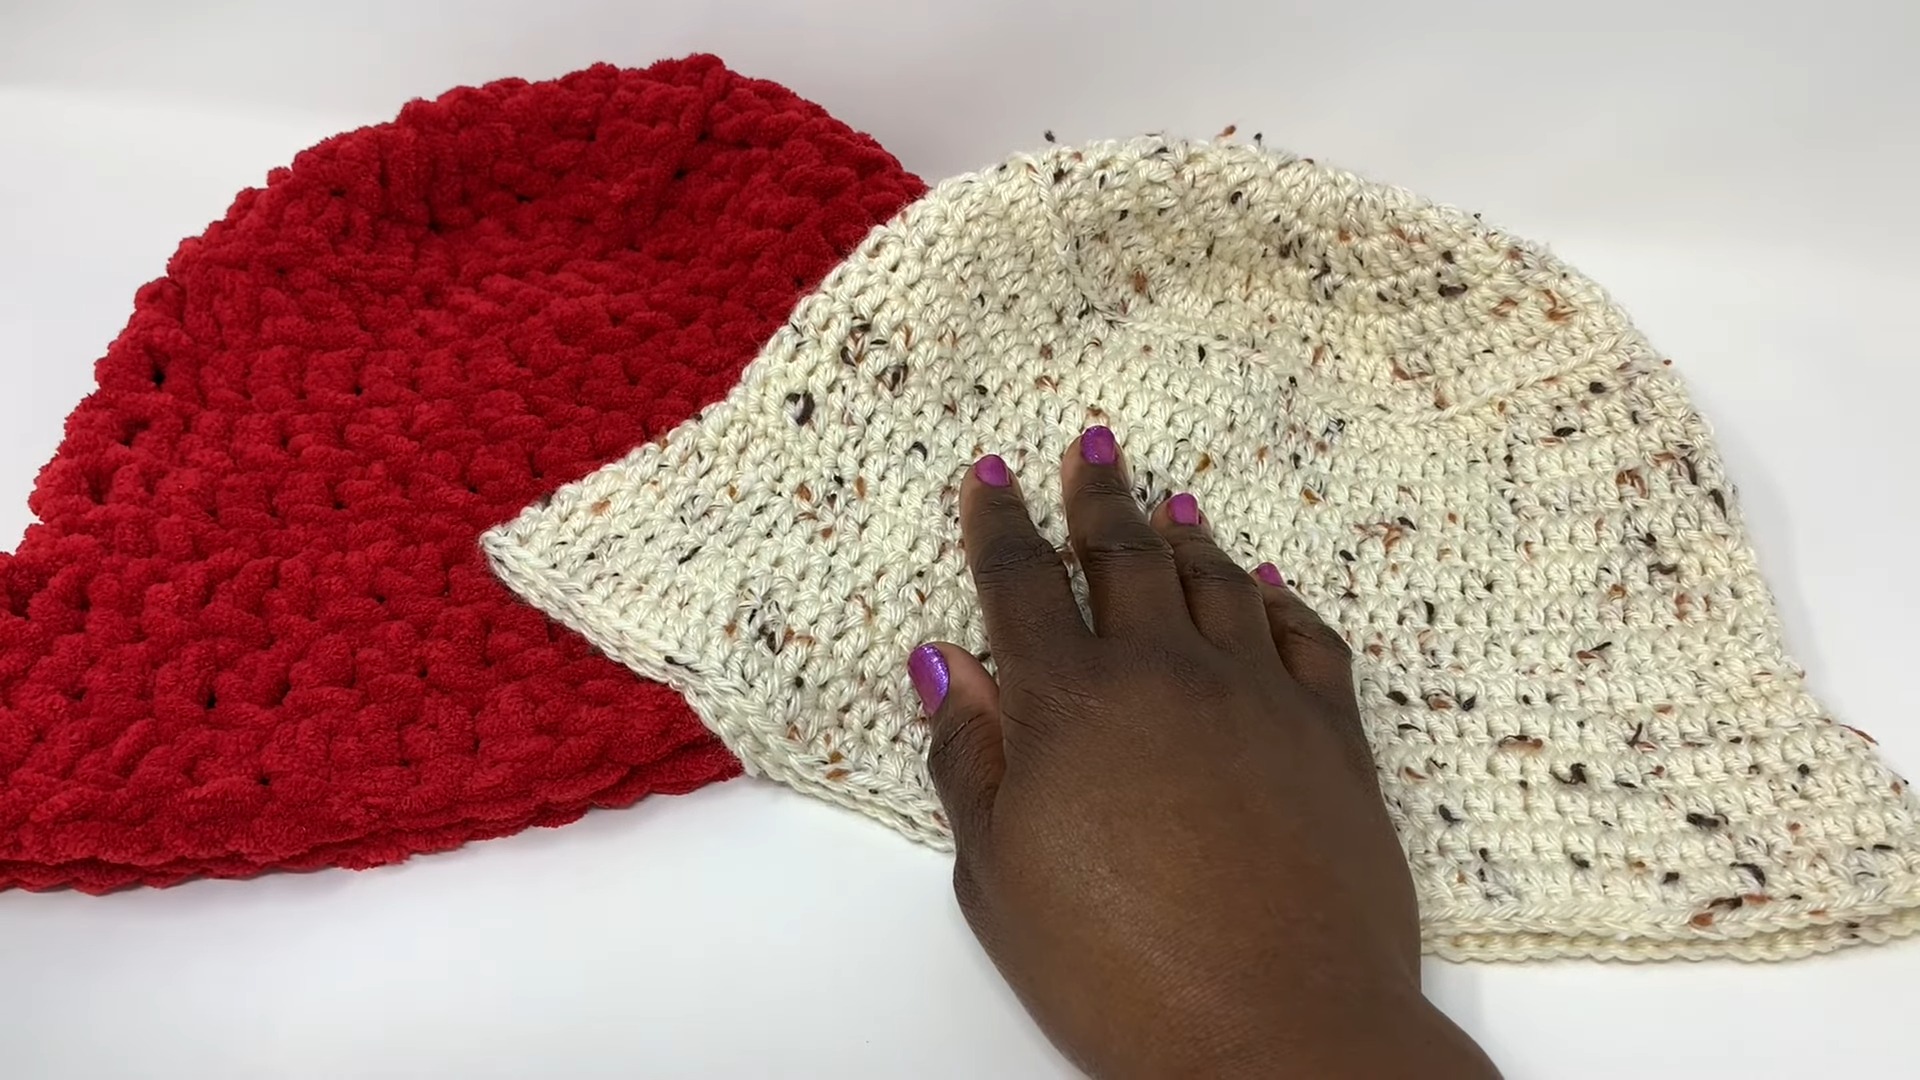
Crochet Bucket Hat Tutorial

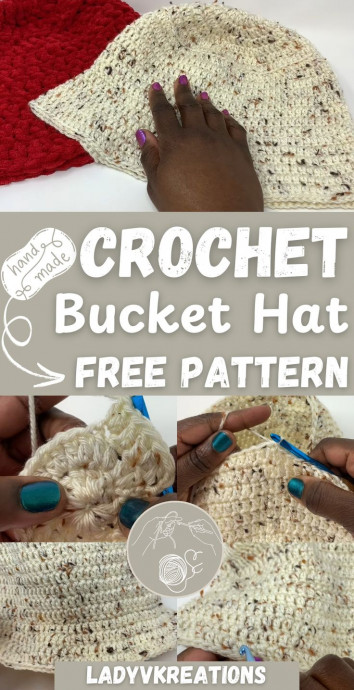
If you're looking for a fun and stylish accessory to add to your wardrobe, consider getting a Crochet Bucket Hat! These hats are not only trendy but also incredibly versatile. They provide excellent sun protection and can be a perfect finishing touch to any outfit. Whether you're heading to the beach, going for a casual stroll, or just wanting to add a touch of charm to your look, a Crochet Bucket Hat is a fantastic choice. Plus, they come in a variety of colors and designs, making it easy to find one that suits your personal style. So, why not add a Crochet Bucket Hat to your collection and elevate your fashion game with this cute and practical accessory?
Materials Needed
- Four medium weight yarn
- 5 mm H8 crochet hook
- Scissors
- Darning needle (for weaving in ends)
- Stitch marker and row counter (optional)
Top of the Hat
Round 1: Chain 4, slip stitch to form a ring, chain 2 (does not count as a stitch), and make 12 double crochet stitches into the ring. Slip stitch to join.
Round 2: Chain 2, place 2 double crochet stitches in the top of each double crochet stitch from the previous round (24 stitches total). Slip stitch to join.
Round 3: Chain 2, double crochet in the first stitch, then 2 double crochet stitches in the next stitch. Repeat this pattern (1 double crochet, then 2 double crochet) around (36 stitches total). Slip stitch to join.
Round 4: Chain 2, place 1 double crochet in the next two stitches, then 2 double crochet stitches in the third stitch. Repeat around (48 stitches total). Slip stitch to join.
Round 5: Chain 2, place 1 double crochet in the next three stitches, then 2 double crochet stitches in the fourth stitch. Repeat around (60 stitches total). Slip stitch to join.
Round 6: Chain 2, place 1 double crochet in the next four stitches, then 2 double crochet stitches in the fifth stitch. Repeat around (72 stitches total). Slip stitch to join.
Round 7: Chain 2, place 1 double crochet in the next five stitches, then 2 double crochet stitches in the sixth stitch. Repeat around (84 stitches total).
Body of the Hat
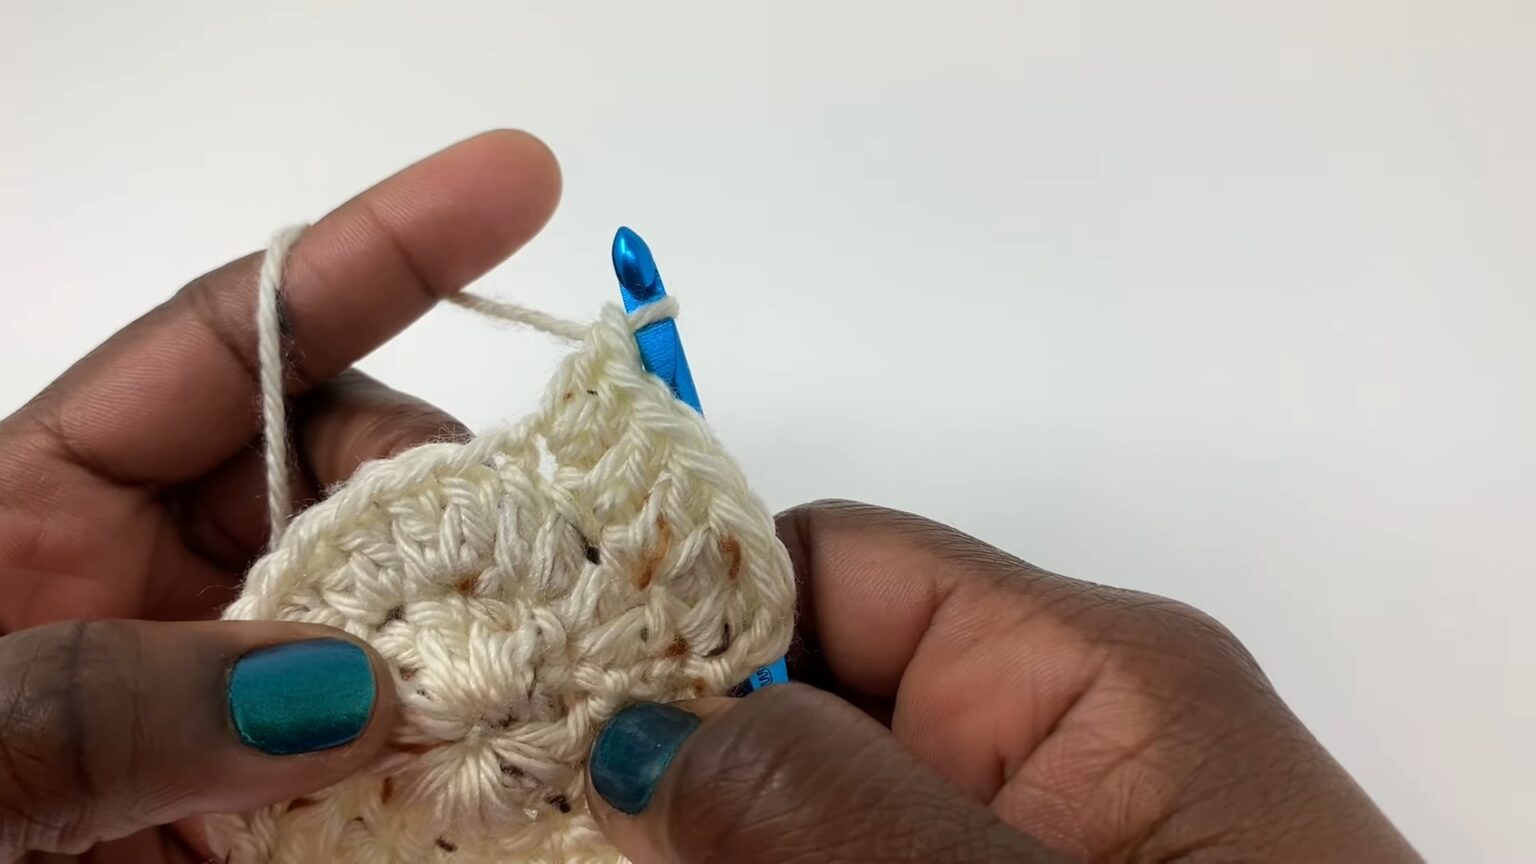
Round 8: Chain 2, work 1 double crochet in the back loop only of each stitch around (84 stitches). Slip stitch to join.
Rounds 9-15: Chain 2, work 1 double crochet in each stitch around (84 stitches). Slip stitch to join at the end of each round.
Round 16: Chain 1, work 1 single crochet in each stitch around (84 stitches). Slip stitch to join.
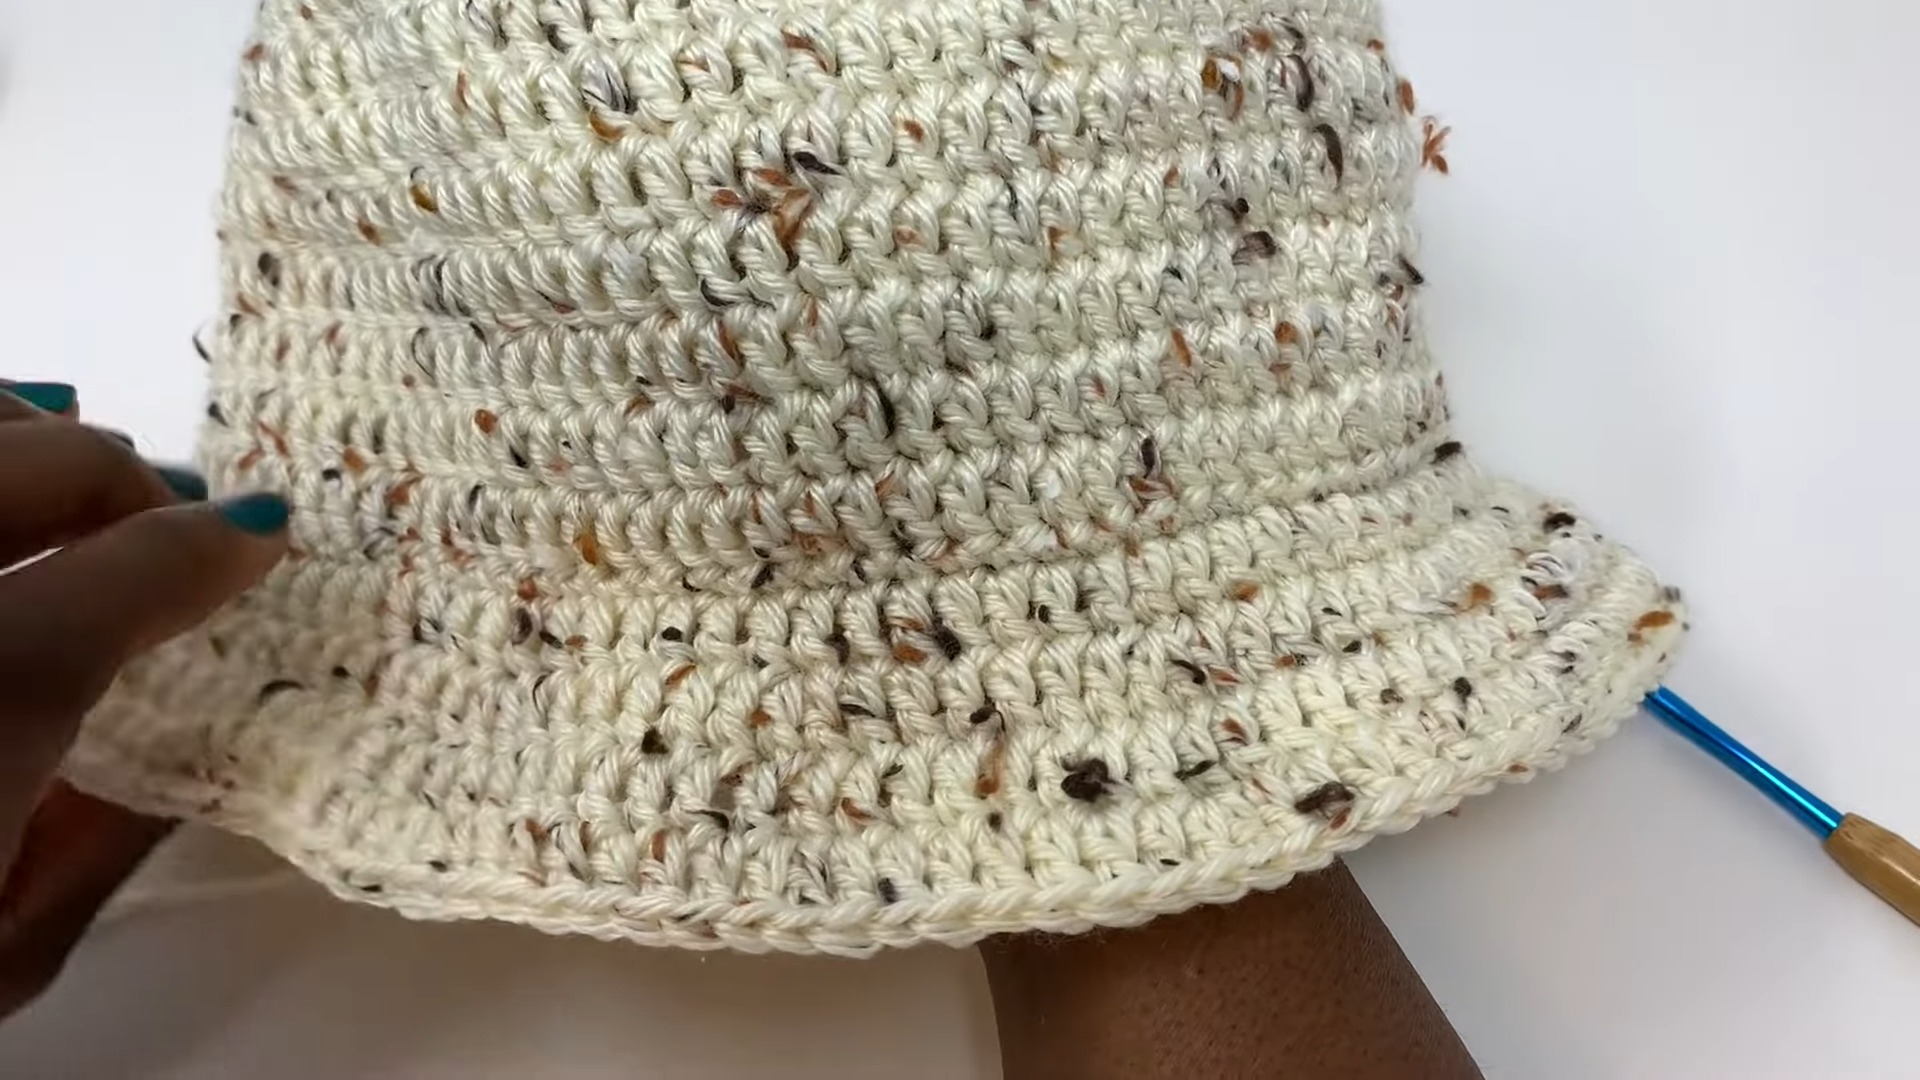
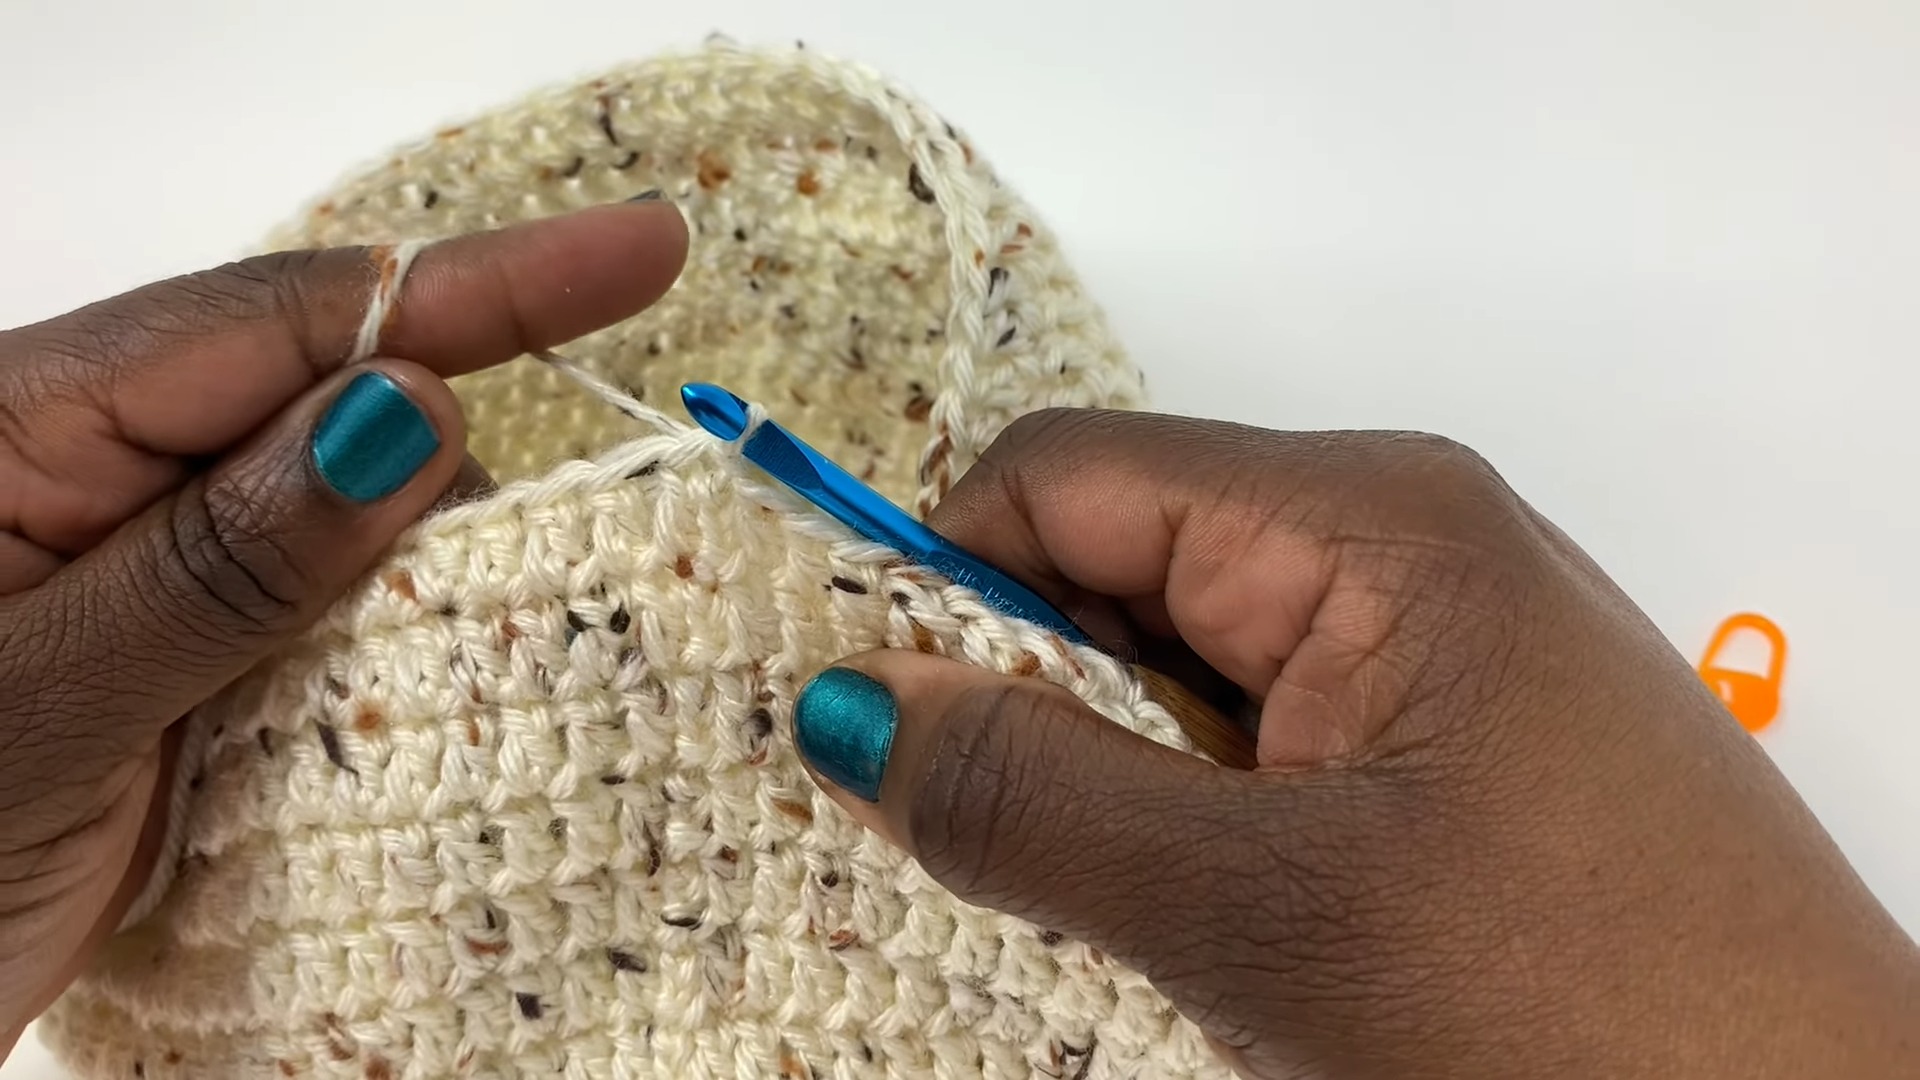
Brim of the Hat
Round 17: Chain 2, work 1 double crochet in the front loop only of each stitch around (84 stitches). Slip stitch to join.
Round 18: Chain 2, work 1 double crochet in the next six stitches, then 2 double crochet stitches in the seventh stitch. Repeat around (96 stitches total). Slip stitch to join.
Round 19: Chain 2, work 1 double crochet in each stitch around (96 stitches). Slip stitch to join.
Round 20: Chain 2, work 1 double crochet in the next seven stitches, then 2 double crochet stitches in the eighth stitch. Repeat around (108 stitches total). Slip stitch to join.
Round 21: Chain 2, work 1 double crochet in each stitch around (108 stitches). Slip stitch to join.
Round 22: Chain 2, work 1 double crochet in the next eight stitches, then 2 double crochet stitches in the ninth stitch. Repeat around (120 stitches total). Slip stitch to join, fasten off, and weave in ends.
Size Adjustments
For a medium-sized hat, stop increasing at round 5, which gives 60 stitches.
Always end on an increase row to prevent the brim from curling.
For the red bucket hat, make only three rows for the top and four rows of 36 stitches for the body.
For the red bucket hat, increase on every third stitch in the brim, with the last increase row giving 60 stitches.
The red bucket hat used a 9 mm crochet hook instead of the recommended 8 mm.
- Funny Pictures
-
 Hilarious Memes for Those Bored to Tears
-
 Weekly Treat of Funniest Parenting Memes for Good Laugh out Loud Right Now
-
 Really Funny Pics to End These Weekend Perfectly
- Recipes
-
 Crispy Baked Avocado Fries
-
 Scrambled Chickpea and Spinach Pitas
-
 Cinnamon Pancakes
- Lifehacks
-
 Crochet Basics: Aligned Cobble Stitch
-
 Brick Stitch Crochet Tutorial
-
 Crochet Basics: Wattle Stitch
- Crochet Ideas
-
 Crochet Snorlax Plushie Doll
-
 Crochet Beautiful Penguin Toy
-
 Crochet Tiny Snowman
- DIY
-
 DIY Santa Craft For Kids
-
 Paper Plate Angel Craft
-
 Upcycled Mason Jar Chicken Vase
- Knitting Ideas
-
 Knitted Bridger Cowl
-
 Knitted Keepsake Bag
-
 Knitted Cutie Cupcake Dolls