How to Create Crochet Orca Whale Amigurumi

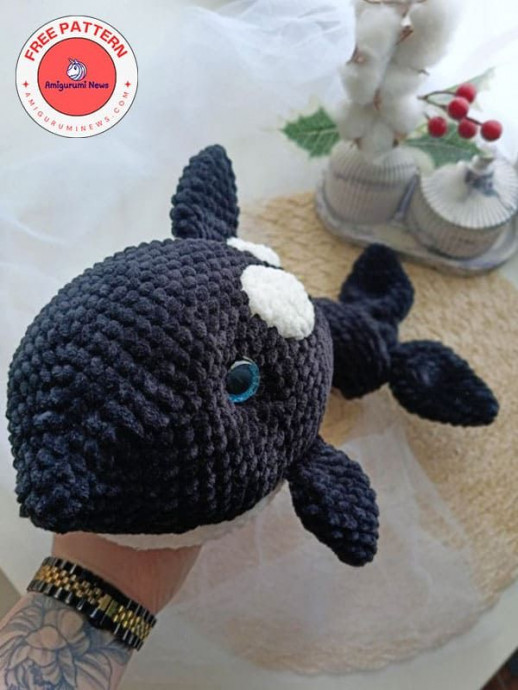
Creating a crochet Orca Whale Amigurumi is a delightful crafting project that brings a touch of ocean magic right into your hands! These charming creatures are perfect for brightening up any space with their whimsical charm and adorable design. With their distinctive black and white patterns, they make for a fun and unique addition to any crochet collection. Whether you're a seasoned crocheter or just starting out, crafting your very own Orca Whale Amigurumi is a rewarding and enjoyable experience that is sure to bring a smile to your face! Dive into the world of crochet and unleash your creativity with this lovable sea-inspired project.
Materials Needed
1. Wolans Bunny Baby 100-10 (black) skein, Wolans Bunny Baby 100-02 (milky) less than half a skein;
2. Eyes 18 mm;
3. YarnArt Jeans yarn for decoration;
4. Filler, scissors, needle;
5. Hook 3.5;
6. Lighter for securing the legs of the fittings;
7. Markers or contrasting thread for tracking the beginning of the row;
Abbreviations
sc - single crochet
dc - double crochet
inc - increase
dec - decrease
ch - chain
slst - slip stitch
MR - magic ring
Body Instructions
1. 6 sc in MR (6)
2. 6 inc (12)
3. 12 sc (12)
4. (1 sc, inc) *6 (18)
5. (2 sc, inc) *6 (24)
6. (3 sc, inc) *6 (30)
7. (4 sc, inc) *6 (36)
8. (5 sc, inc) *6 (42)
9. (6 sc, inc) *6 (48)
10. (7 sc, inc) *6 (54)
11. (8 sc, inc) *6 (60)
12-23. 12 rows of 60 sc
Mark the location of the eyes with two threads between rows 16 and 17, leaving about 22 loops between the edges of the eyes.
22. 16 sc, 2 dec, 8 sc, 2 dec, 8 sc, 2 dec, 16 sc (54)
23-24. 2 rows of 54 sc (54)
25. 14 sc, 2 dec, 2 sc, 1 dec, 3 sc, 2 dec, 3 sc, 1 dec, 2 sc, 2 dec, 14 sc (46)
26-27. 2 rows of 46 sc
28. 14 sc, 1 dec, 1 sc, 1 dec, 1 sc, 3 dec, 1 sc, 1 dec, 1 sc, 1 dec, 14 sc (39)
29. (11 sc, dec) *3 (36)
30-31. 2 rows of 36
32. 12 sc, 6 dec, 12 sc (30)
33. 30 sc
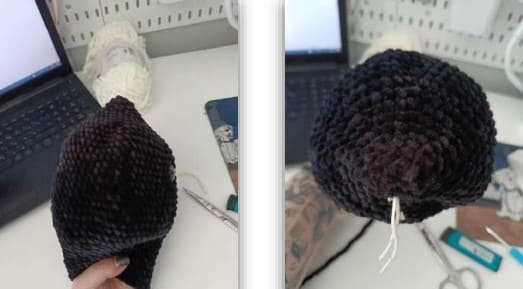
We start stuffing the toy. We stuff it tightly, and closer to the tail we stuff it loosely.
34. (3 sc, dec) *6 (24)
35. 24 sc
36. (2 sc, dec) *6 (18)
37. 18 sc
38. (1 sc, dec) *6 (12)
Now we begin to crochet the place where the knot will be. We crochet dc.
39-60. 20 rows of 12 dc.
61-63. 3 rows of 12 sc. Leave a long thread and cut off.
We tie a knot. And add a little stuffing to the tail. Tighten the hole.
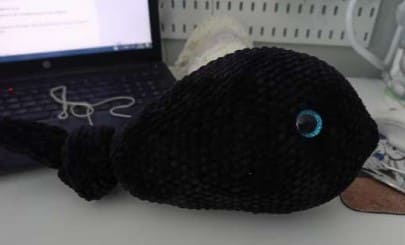
Eye tightening. We tighten the eyes as in the picture. And we shape the whites of the eyes.
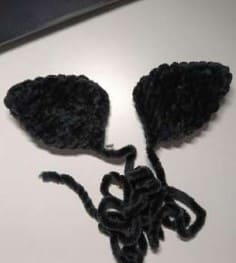
Tail Instructions
2 identical parts.
1. 6 sc in MR (6)
2. (1 sc, inc) *3 (9)
3. (2 sc, inc) *3 (12)
4. 12 sc
5. (3 sc, inc) *3 (15)
6. (4 sc, inc) *3 (18)
7. 18 sc
8. (5 sc, inc) *3 (21)
9. 21 sc
10. (5 sc, dec) *3 (18)
11. (4 sc, dec) *3 (15)
12. (3 sc, dec) *3 (12)
13. (2 sc, dec) *3 (9)
Crochet 4 sc for both walls. Fasten and leave a long thread for sewing.
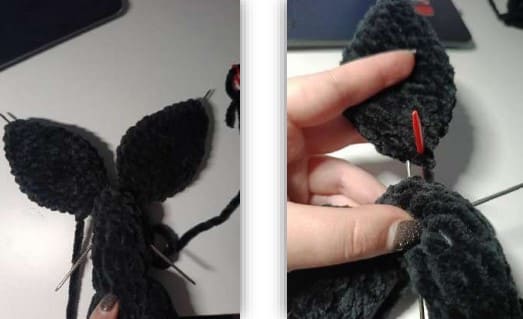
We do not stuff the tail. Using knitting needles, we attach it to the fin where the sc is and sew it on.
In order to prevent the fins from falling over, you can additionally (optionally) sew them to the tail.
Upper Fin Instructions
1. 6 sc in MR (6)
2. (1 sc, inc) *3 (9)
3. (2 sc, inc) *3 (12)
4. 12 sc
5. (3 sc, inc) *3 (15)
6. 15 sc
7. (4 sc, inc) *3 (18)
8. 18 sc
9. (1 sc, dec) *6 (12)
Crochet 6 sc for both walls. Fasten and leave a thread for sewing.
We do not stuff the fin. We sew the dorsal fin to the upper part of the body in the center between rows 25-30. As in the photo below.
Side Fins Instructions
1. 6 sc in MR (6)
2. (1 sc, inc) *3 (9)
3. (2 sc, inc) *3 (12)
4. (3 sc, inc) *3 (15)
5. 15 sc
6. (4 sc, inc) *3 (18)
7. 18 sc (18)
8. (4 sc, dec) *3 (15)
8. (3 sc, dec) *3 (12)
Crochet 6 sc for both walls. Fasten and leave a thread for sewing.
We do not stuff the fins. We sew them on after we sew on the “belly”.
Belly Instructions
1. Make on 10 ch, from the 2nd loop: 9 sc (9)
2. inc, 7 sc, inc (11)
3. 11 sc (11)
4. inc, 9 sc, inc (13)
5-14. 10 rows of 13 sc
15. dec, 9 sc, dec (11)
16-20. 5 rows of 11 sc
21. dec, 7 sc, dec (9)
22-24. 3 rows of 9 sc
25. dec, 5 sc, dec (7)
26-28. 3 rows of 7 (7)
29. dec, 3 sc, dec (5)
Now make a SC around the piece.
6 sc, hdc, dc, dc, dc, hdc, 17 sc, in corner inc, 2 sc, hdc, dc, hdc, 2 sc, in corner inc, 17 sc, hdc, dc, dc, dc, hdc, 6 sc, in corner inc, 2 sc, hdc, 2 sc, in corner inc.
2nd row of binding:
6 slst behind the back half loop, hdc, 3 dc, hdc, 18 slst behind the back half loop, ch, 9 slst behind the back half loop, ch, 18 slst behind the back half loop, hdc, 3 dc, hdc, 6 slst behind the back half loop, ch, 7 slst 6 slst behind the back half loop. Fasten off the thread and cut off.
I sew the detail with YarnArt Jeans thread in milky color. Sew starting from the 8th row and up to the knot.
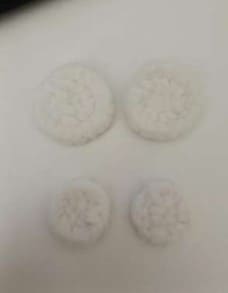
Spots on the Head
2 pieces of each size.
Small. Crochet in white.
1. 6 sc in MR
2. 6 inc (12). Fasten the thread and cut.
I sew the detail with milky YarnArt Jeans thread.
Big Spot:
1. 6 in MR.
2. 6 inc (12)
3. (1 sc, inc) *6 (18), Fasten the thread and cut it off.
I sew the detail with milky YarnArt Jeans thread.
Sew the spots above the eyes in the position you want.
- Funny Pictures
-
 Cute Cat Memes That Will Make Your Day Brighter
-
 Spot-on and Funny Memes About Introverts Struggles
-
 Top Wonderful Cat Memes on Their Way to Better Your Day
- Recipes
-
 Creamy Old Fashioned Rice Pudding
-
 Russian Tea Cakes (Snowball Cookies)
-
 Rigatoni with Sausage, Tomatoes, and Zucchini
- Lifehacks
-
 How to Crochet a Harlequin Stitch
-
 Removing The Toughest Stains
-
 Crochet Basics: Crumpled Griddle Stitch
- Crochet Ideas
-
 Crochet Christmas Tree
-
 Crochet Goblet of Fire
-
 Crochet Adorable Ammonite
- DIY
-
 DIY Snowman Wreath
-
 Mini Santa Sleigh Ornament
-
 Crochet Gingerbread House Blanket
- Knitting Ideas
-
 Knitted Easter Bunny
-
 Knitted Mobile Phone/Glasses Case
-
 Knitted Cabled Wallet