Crochet Cactus Curtain Insertion/Coaster

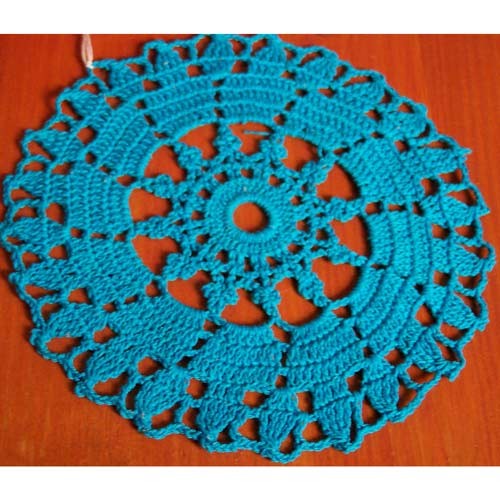
Looking to add a touch of charm to your space? Look no further than the Crochet Cactus Curtain Insertion/Coaster! This delightful creation is not only practical but adds a whimsical and cozy vibe to any room. Whether you're using it as a curtain insertion to let in a subtle hint of sunlight or as a charming coaster to protect your surfaces, this crochet cactus design is sure to bring a smile to your face. Handcrafted with care and attention to detail, each piece adds a unique and personal touch to your home decor. Why settle for ordinary when you can have something as adorable as this Crochet Cactus Curtain Insertion/Coaster?
Size
Size: 18 cm (7 inches)
Material
Material: Pearl cotton #5, hook 1.9 mm (Boye steel#5), light blue; you can substitute with Cebelia #5 or equivalent cordonnet thread (but the gauge can slightly vary).
Stitches
Stitches: ch, sl st, sc, dc, 4tcl = 4-tr cluster = tr not closed in first st, tr not closed in 2nd st, tr not closed in 3rd st, tr not closed in 4th st, close all tr together, 3pc = 3-points picot = 3 ch, sl st in last st made, 3 ch, sl st in same st, 3 ch, sl st in same stitch, picot = 3 ch, sl st in first ch.
Difficulty
Difficulty: Medium
Directions
Wrap thread on forefinger 4-5 times, insert hook in this loop and work:
Step 1
1. 36 dc in the loop; join with sl st to first st.
Step 2
2. *(dc on next dc) twice, 3 ch, sk a dc*; Repeat * to * 12 times, join with sl st to first st.
Step 3
3. *dc in space between the 2 dc, 3pc on dc just made, 3 ch, sc in 3-ch lp, 3 ch*; Repeat * to * 12 times, join with sl st to first st. Cut thread.
Step 4
4. Join in the tip of 3pc (i.e., in the second leaf/picot), *sc in tip of next picot, 8 ch*; Repeat * to * 12 times, join with sl st to first st.
Step 5
5. *8 dc in next sp, 1 ch*; Repeat * to * 12 times, join with sl st to first st.
Step 6
6. *2 dc in first dc of next 8-dc grp, (dc in next dc) 6 times, 2 dc in last dc of same grp, 2 ch*; Repeat * to * 12 times, join with sl st to first st.
Step 7
7. *(dc in next dc) 10 times, 2 ch*; Repeat * to * 12 times, join with sl st to first st.
Step 8
8. sl st in 4th dc of first grp, *(dc in next dc) 4 times, sk 3 dc, 2 ch, 4 dc in next sp, 2 ch, sk 3 dc*; Repeat * to * 12 times, join with sl st to first st.
Step 9
9. *4tcl on next 4 dcs, picot on cluster, 3 ch, tr in next sp, 3 ch*; Repeat * to * 12 times, join with sl st to first st. Cut thread, weave in ends.
Notes
- Substitute any of the following for the first stitch in a row as follows:
- first sc with 1 ch, sc;
- first hdc with 2 ch;
- first dc with 3 ch;
- first tr with 4 ch and so on;
- When you read "sl st to <location>", where the location is not immediately contiguous to last st, this means an appropriate number of sl sts for reaching <location>.
- If I do not specify it, if you last worked the previous row on a stitch (say st1), while you must start the next row in another stitch (say st2), make an appropriate number of sl sts to reach st2.
- Funny Pictures
-
 Hilarious Memes for Those Bored to Tears
-
 Weekly Treat of Funniest Parenting Memes for Good Laugh out Loud Right Now
-
 Really Funny Pics to End These Weekend Perfectly
- Recipes
-
 Crispy Baked Avocado Fries
-
 Scrambled Chickpea and Spinach Pitas
-
 Cinnamon Pancakes
- Lifehacks
-
 Crochet Basics: Aligned Cobble Stitch
-
 Brick Stitch Crochet Tutorial
-
 Crochet Basics: Wattle Stitch
- Crochet Ideas
-
 Crochet Snorlax Plushie Doll
-
 Crochet Beautiful Penguin Toy
-
 Crochet Tiny Snowman
- DIY
-
 DIY Santa Craft For Kids
-
 Paper Plate Angel Craft
-
 Upcycled Mason Jar Chicken Vase
- Knitting Ideas
-
 Knitted Bridger Cowl
-
 Knitted Keepsake Bag
-
 Knitted Cutie Cupcake Dolls