Crochet June The Lady Bug Amigurumi Pattern Guide

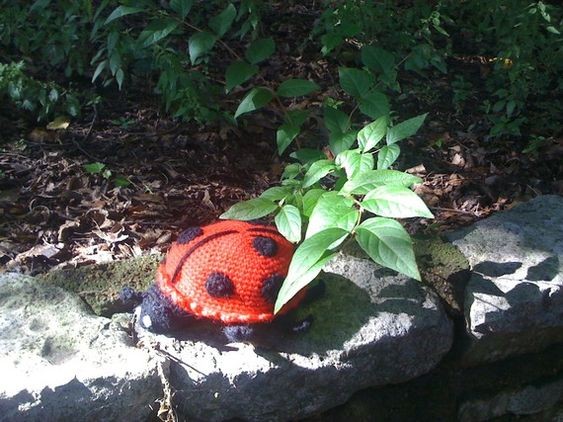
Crochet June The Lady Bug is a delightful amigurumi project that brings a touch of whimsy to any crocheter's collection. This adorable ladybug pattern is perfect for both beginners and seasoned crocheters alike, with its clear instructions and charming design. The vibrant colors and cute details make June The Lady Bug a joy to create, and once finished, she makes a wonderful gift or a cute addition to your décor. Crocheting this lovable bug is not only relaxing and rewarding but also a fun way to showcase your crafting skills. So grab your crochet hook and some colorful yarn, and let June The Lady Bug bring a smile to your face with her endearing charm!
Materials
- Worsted Weight Yarn
- I Love This Yarn – Firered
- I Love This Yarn – Black
- Scraps of White
- Size E crochet hook
- Polyfiberfill
- Large Eye Needle
Abbreviations
- SC – Single Crochet
- DC – Double Crochet
- CH – Chain
- FO – Fasten Off
- SL ST – Slip Stitch
- INC – Make two Single Crochet in Same Stitch
- DEC – Single Crochet two stitches together
- Puff Stitch – (Insert the hook in the stitch, yarn over, draw the yarn through the stitch) repeat 2 more times. You should have loops on your hook. Yarn over and draw through all 6 loops on the hook. Push the stitch out.
- BLO – Back Loops Only
- FLO – Front Loops Only
- HDC – Half Double Crochet
Note: The entire project is worked in the round. Use a stitch marker or a scrap piece of yarn to mark the beginning of each row. Then you don’t have to count every row. Do not join unless instructed to.
Parentheses indicate a repeat. Repeat the stitches in the parentheses for the number of times indicated.
The bracketed number [] is the number of stitches at the end of each row.
I spread my increases out so there isn’t a seam on the finished piece. If you do not like this method, you can do regular increases.
Head (Black or Contrast Color)
Ch 2
Round 1: 4 SC in 2nd CH from hook [4].
Round 2: INC in each stitch around [8].
Round 3: (SC, INC) 4 times [12].
Round 4: (SC, INC, SC) 4 times [16].
Round 5: (3 SC, INC) 4 times [20].
Round 6: (2 SC, INC, 2 SC) 4 times [24].
Rounds 7-11: 5 rows SC [24 stitches per row].
Join with a slip stitch and fasten off.
Second Head (Black or Contrast Color)
Ch 2
Round 1: 6 SC in 2nd CH from hook [6].
Round 2: INC in each stitch [12].
Round 3: (SC, INC) 6 times [18].
Round 4: (SC, INC, SC) 6 times [24].
Round 5: (3 SC, INC) 6 times [30].
Round 6: (2 SC, INC, 2 SC) 6 times [36].
*5 SC, INC* 6 times [42]
*6 SC, INC* 6 times [48]
*7 SC, INC* 6 times [54]
*8 SC, INC* 6 times [60]
*9 SC, INC* 6 times [66]
*10 SC, INC* 6 times [72],
Join with a slip stitch and fasten off.
Top (Red or Main Color)
- 6 SC in magic adjustable ring
- 2 SC in each stitch (12 SC)
- *1 SC, INC (2 SC in stitch)* 6 times (18 SC)
- *2 SC, INC* 6 times (24 SC)
- *3 SC, INC* 6 times (30 SC)
- *4 SC, INC* 6 times (36)
- *5 SC, INC* 6 times (42)
- *6 SC, INC* 6 times (48)
- *7 SC, INC* 6 times (54)
- *8 SC, INC* 6 times (60)
- *9 SC, INC* 6 times (66)
- *10 SC, INC* 6 times (72)
- 13-20: 8 rows SC
Single crochet top to bottom stuffing as you go. Leave 12 stitches remaining to single crochet top to head (do not fasten off continue to edging after the head is sewn on) stuff head and sew bottom of head to bottom of ladybug.
Edging
Continue working around in main color as follows: (SC, Chain 2, 2HDC in same stitch) skip 2 stitches repeat around.
Antennae (Black or Contrast) Make 2
- Ch 7,
- SC in 2nd chain from hook, SC each remaining stitch. Sew to top of head sticking upright.
Legs (Black or Contrast) Make 6 (Optional)
6 stitch I cord for 10 rows and bind off. Sew to bottom under edging.
Finishing Touches
Embroider two white dots on the head to act as eyes.
Embroider a center line across the top in the contrast color. I used long straight stitches from the center to each edge.
This is a fun project to change up your colors. You can also use size 14mm safety eyes.
Light Pink and Chocolate Brown adds a fun color combination.
Bright Pink with a light blue and the 14 mm eyes.
- Funny Pictures
-
 Hilarious Memes for Those Bored to Tears
-
 Weekly Treat of Funniest Parenting Memes for Good Laugh out Loud Right Now
-
 Really Funny Pics to End These Weekend Perfectly
- Recipes
-
 Crispy Baked Avocado Fries
-
 Scrambled Chickpea and Spinach Pitas
-
 Cinnamon Pancakes
- Lifehacks
-
 Crochet Basics: Aligned Cobble Stitch
-
 Brick Stitch Crochet Tutorial
-
 Crochet Basics: Wattle Stitch
- Crochet Ideas
-
 Crochet Snorlax Plushie Doll
-
 Crochet Beautiful Penguin Toy
-
 Crochet Tiny Snowman
- DIY
-
 DIY Santa Craft For Kids
-
 Paper Plate Angel Craft
-
 Upcycled Mason Jar Chicken Vase
- Knitting Ideas
-
 Knitted Bridger Cowl
-
 Knitted Keepsake Bag
-
 Knitted Cutie Cupcake Dolls