How to Crochet an Itsy Bitsy Spider: A Step-by-Step Guide

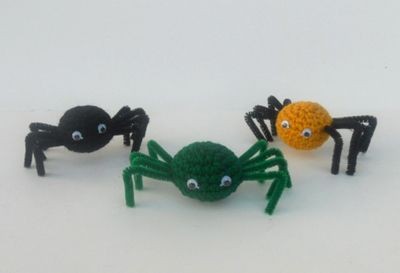
Crocheting a little itsy bitsy spider can be a fun and charming project to work on. Imagine creating each delicate leg and intricate web with just a hook and some yarn. The process of carefully crafting each stitch to bring this adorable creature to life is not only satisfying but also a great way to showcase your creativity. With the right colors and attention to detail, your crochet spider can become a delightful decoration or a playful toy. So gather your materials, follow a pattern or get creative on your own, and crochet your way to spinning a web of cuteness with your very own itsy bitsy spider. Enjoy the journey of bringing something small and sweet into the world through the art of crochet!
Materials Needed
What you will need:
- 4 medium worsted yarn (color of your choice)
- 2.75mm crochet hook
- Goggly eyes
- Chenille stems
- Fiberfill for stuffing
- Yarn needle
- Safety pin to mark the end of each row
- Glue
Abbreviations
abbreviations:
- Rnd = round
- sc = single crochet
- inc = increase
- dec = decrease
Crocheting Instructions
With yarn of your choice, make a chain of 2.
RND 1: 6 sc in the second stitch from the hook (6)
RND 2: 2 sc in each stitch around (12)
RND 3: [1 sc, inc] 6 times (18)
RND 4: [2 sc, inc] 6 times (24)
RND 5 to 7: sc in each stitch around (24)
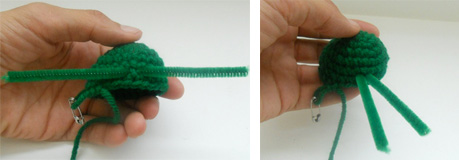
Cut 4 pieces of chenille stem, about 5 inches long. Insert them in the stitches of the last row on each side, then fold them in two.
Resume with your rounds
RND 8: [2 sc, dec] 6 times (18)
RND 9: [1 sc, dec] 6 times (12)
Start stuffing
RND 10: dec 6 times (6)
Fasten off and weave the rest of the thread into the remaining stitches to close the hole.
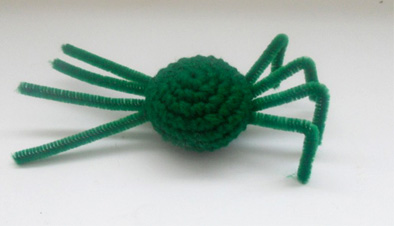
Glue the goggly eyes on the face. Bend the legs to form the shape of the legs.
Your spider is done! You can have a lot of fun with this: play with different colors, add eyebrows, or a mouth. You can also insert a piece of embroidery thread on top to hang your spiders.
- Funny Pictures
-
 Relatable and Funny Memes to Distract You From the Routine
-
 Hilarious Cat Snapchats That Will Leave You With the Biggest Smile
-
 Today’s Top Funny Tweets to Scroll Before Bed
- Recipes
-
 Cappuccino Brownies
-
 Chicken Mushroom Tortellini Bake
-
 Spinach Pie
- Lifehacks
-
 8 Necessary Tips for Baking Bread
-
 Tips & Hacks for Clean Carpets
-
 10 Uses For Old TV Armoires
- Crochet Ideas
-
 Crochet Watermelon Amigurumi
-
 Crochet Flower Hat for your Pet
-
 Crochet Sophia and Bennet Love Birds
- DIY
-
 DIY Beaded Christmas Tree
-
 Crochet Titus the Barn Owl
-
 DIY Washer Ornaments
- Knitting Ideas
-
 Knitted Star Square Dishcloth
-
 Knitted Free 2025 Year Dishcloth
-
 Knitted Ribbed Adult Hat